
Samsung NP-N102S-B05PH Display Replacement

What you need

  1. Samsung NP-N102S-B05PH Display Replacement, Display: step 1, image 1 of 3 Samsung NP-N102S-B05PH Display Replacement, Display: step 1, image 2 of 3 Samsung NP-N102S-B05PH Display Replacement, Display: step 1, image 3 of 3
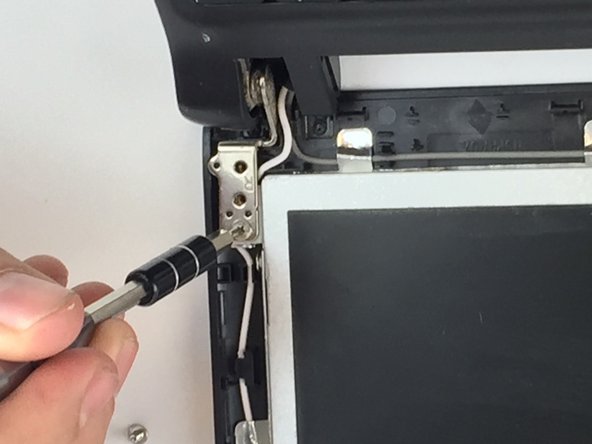
    • Take out the four 4.5mm Phillips #0 screws located at the corners of the screen.

  2. Samsung NP-N102S-B05PH Display Replacement: step 2, image 1 of 2 Samsung NP-N102S-B05PH Display Replacement: step 2, image 2 of 2
    • Now, use the blue opening tool to gently pry the front bezel off.

  3. Samsung NP-N102S-B05PH Display Replacement: step 3, image 1 of 3 Samsung NP-N102S-B05PH Display Replacement: step 3, image 2 of 3 Samsung NP-N102S-B05PH Display Replacement: step 3, image 3 of 3
    • Unscrew each of the four 6.5mm Phillips #0 screws securing the screen to the case.

  4. Samsung NP-N102S-B05PH Display Replacement: step 4, image 1 of 3 Samsung NP-N102S-B05PH Display Replacement: step 4, image 2 of 3 Samsung NP-N102S-B05PH Display Replacement: step 4, image 3 of 3
    • Using the black spudger tool and your fingertip, gently push on the ends of the ribbon cable to pop it out of the socket.

  5. Samsung NP-N102S-B05PH Display Replacement: step 5, image 1 of 1
    • The screen is can now be lifted away from the laptop.

Conclusion

To reassemble your device, follow these instructions in reverse order.

One other person completed this guide.

Daniel Rudzik

Member since: 10/04/16

349 Reputation

3 Guides authored

Team

USF Tampa, Team 2-4, Nance Fall 2016 Member of USF Tampa, Team 2-4, Nance Fall 2016

USFT-NANCE-F16S2G4

4 Members

5 Guides authored

0 Comments

Add Comment

View Statistics:

Past 24 Hours: 0

Past 7 Days: 8

Past 30 Days: 28

All Time: 767