Free Shipping on Domestic Orders $75+

Samsung L100 Setting Knob Spring

What you need

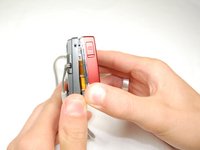
    1. Samsung L100 Setting Knob Spring, Removing Back Cover: step 1, image 1 of 3 Samsung L100 Setting Knob Spring, Removing Back Cover: step 1, image 2 of 3 Samsung L100 Setting Knob Spring, Removing Back Cover: step 1, image 3 of 3
      • Remove the six external screws from the camera using a Phillips #0 screwdriver.

      • After the screws has been removed, the bottom of the back half of the external case should be loosened from the camera.

      • Be careful, make sure you don't lose the screws.

      Ask FixBot

      Add Comment

    2. Samsung L100 Setting Knob Spring: step 2, image 1 of 2 Samsung L100 Setting Knob Spring: step 2, image 2 of 2
      • Open the battery cover that's located on the bottom right side of the camera and carefully remove the battery.

      Ask FixBot

      Add Comment

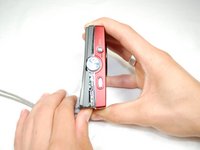
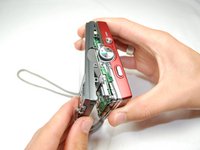
    3. Samsung L100 Setting Knob Spring: step 3, image 1 of 3 Samsung L100 Setting Knob Spring: step 3, image 2 of 3 Samsung L100 Setting Knob Spring: step 3, image 3 of 3
      • Slide your fingernail or a plastic spudger in the groove from the bottom to the top right side of the camera.

      Ask FixBot

      Add Comment

    4. Samsung L100 Setting Knob Spring: step 4, image 1 of 1
      • Carefully squeeze the top right corner of the camera and pry off the external cover.

      • If you hear a "cracking" sound. This is normal.

      • Continue to pull the external cover and it will come off cleanly.

      • Be cautious of the flash capacitor. It carries an electrical charge, that may give you an unpleasant shock.

      Ask FixBot

      Add Comment

    5. Samsung L100 Setting Knob Spring: step 5, image 1 of 1
      • Carefully pull off the back cover, parts behind the back of the case might fall out.

      Ask FixBot

      Add Comment

    1. Samsung L100 Setting Knob Spring, Flash Circuit Board: step 6, image 1 of 1
      • Remove the screws holding the circuit board.

      • After you remove the screws, carefully remove the circuit board.

      Ask FixBot

      Add Comment

    2. Samsung L100 Setting Knob Spring: step 7, image 1 of 2 Samsung L100 Setting Knob Spring: step 7, image 2 of 2
      • Remove the front cover, it comes off easily.

      • Buttons might fall out when you remove the front cover.

      Ask FixBot

      Add Comment

    3. Samsung L100 Setting Knob Spring: step 8, image 1 of 1
      • Face camera towards you.

      • Remove the two screws from circuit board on the left side of the lens.

      Ask FixBot

      Add Comment

    4. Samsung L100 Setting Knob Spring: step 9, image 1 of 1
      • Carefully hold up the circuit board, while it's still connected to the camera.

      • Remove all five screws that's on top of the camera.

      Ask FixBot

      Add Comment

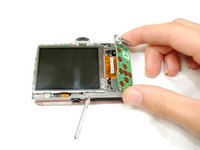
    5. Samsung L100 Setting Knob Spring: step 10, image 1 of 3 Samsung L100 Setting Knob Spring: step 10, image 2 of 3 Samsung L100 Setting Knob Spring: step 10, image 3 of 3
      • Carefully push up the top of the circuit board.

      • Pull up flash circuit board from top of camera.

      Ask FixBot

      Add Comment

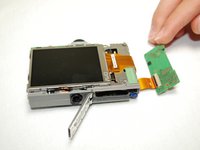
    1. Samsung L100 Setting Knob Spring, Setting Knob Spring: step 11, image 1 of 1
      • Face the bottom of the Flash Circuit board towards you.

      • Remove the one screw that's located on the left side of the lens.

      Ask FixBot

      Add Comment

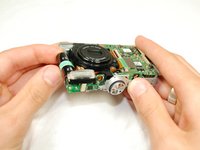
    2. Samsung L100 Setting Knob Spring: step 12, image 1 of 1
      • Take the flash circuit board and turn it over.

      • Remove the plastic setting knob.

      • Make sure to keep copper spring inside of the slot.

      Ask FixBot

      Add Comment

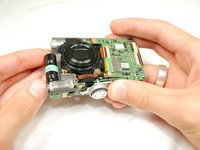
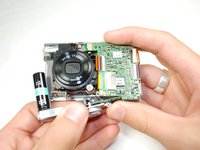
    3. Samsung L100 Setting Knob Spring: step 13, image 1 of 3 Samsung L100 Setting Knob Spring: step 13, image 2 of 3 Samsung L100 Setting Knob Spring: step 13, image 3 of 3
      Tool used on this step:
      Tweezers
      $4.99
      Buy
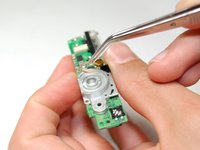
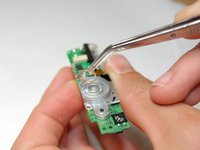
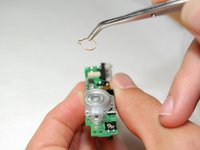
      • Take out and replace the Setting Knob Spring with tweezers.

      Ask FixBot

      Add Comment

Conclusion

To reassemble your device, follow these instructions in reverse order.

Cancel: I did not complete this guide.

andyhe

Member since: 04/15/10

81 Reputation

1 Guide authored

Team

Cal Poly, Team 6-17, Maness Spring 2010 Member of Cal Poly, Team 6-17, Maness Spring 2010

CPSU-MANESS-S10S6G17

4 Members

10 Guides authored

0 Guide Comments

Add Comment

View Statistics:

Past 24 Hours: 1

Past 7 Days: 5

Past 30 Days: 32

All Time: 3,561