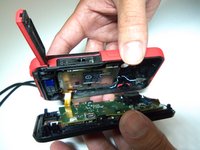
Samsung HMX-W300 Front Case Replacement

What you need

  1. Samsung HMX-W300 Front Case Replacement, Disassembling Samsung HMX-W300: step 1, image 1 of 3 Samsung HMX-W300 Front Case Replacement, Disassembling Samsung HMX-W300: step 1, image 2 of 3 Samsung HMX-W300 Front Case Replacement, Disassembling Samsung HMX-W300: step 1, image 3 of 3
    • To remove the wristband of the device, grab the middle loop and pull the band through.

  2. Samsung HMX-W300 Front Case Replacement: step 2, image 1 of 2 Samsung HMX-W300 Front Case Replacement: step 2, image 2 of 2
    • Remove four screws with a Hex 1.5 mm screwdriver.

  3. Samsung HMX-W300 Front Case Replacement: step 3, image 1 of 3 Samsung HMX-W300 Front Case Replacement: step 3, image 2 of 3 Samsung HMX-W300 Front Case Replacement: step 3, image 3 of 3
    • Open the HDMI door on the side of the camera.

    • Remove the single screw using a Phillips #00 screwdriver.

  4. Samsung HMX-W300 Front Case Replacement: step 4, image 1 of 3 Samsung HMX-W300 Front Case Replacement: step 4, image 2 of 3 Samsung HMX-W300 Front Case Replacement: step 4, image 3 of 3
    • Use the iFixit opening tool on both sides on the device. Pry apart both sections with light force.

    • Do not apply too much force. There is a wire that attaches the front case with the rear case that can be damaged.

  5. Samsung HMX-W300 Front Case Replacement: step 5, image 1 of 3 Samsung HMX-W300 Front Case Replacement: step 5, image 2 of 3 Samsung HMX-W300 Front Case Replacement: step 5, image 3 of 3
    • Pull the wire ribbon out with a pair of tweezers.

  6. Samsung HMX-W300 Front Case Replacement, Battery: step 6, image 1 of 2 Samsung HMX-W300 Front Case Replacement, Battery: step 6, image 2 of 2
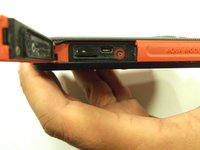
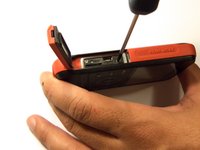
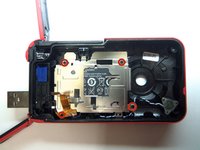
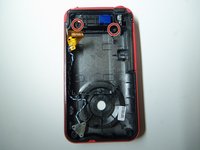
    • Remove the four screws from the battery housing using a Phillips #00 screwdriver.

  7. Samsung HMX-W300 Front Case Replacement: step 7, image 1 of 1
    • Use the iFixit opening tool to pry the battery housing open.

  8. Samsung HMX-W300 Front Case Replacement: step 8, image 1 of 3 Samsung HMX-W300 Front Case Replacement: step 8, image 2 of 3 Samsung HMX-W300 Front Case Replacement: step 8, image 3 of 3
    • After removing the battery housing, take the battery out.

  9. Samsung HMX-W300 Front Case Replacement, USB Port: step 9, image 1 of 3 Samsung HMX-W300 Front Case Replacement, USB Port: step 9, image 2 of 3 Samsung HMX-W300 Front Case Replacement, USB Port: step 9, image 3 of 3
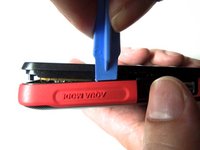
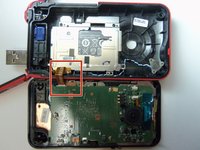
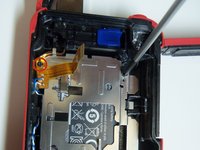
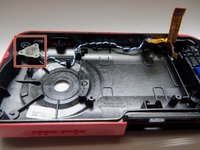
    • Use an iFixit opening tool to pry up the plastic cover.

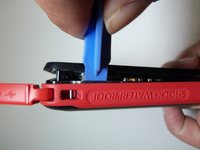
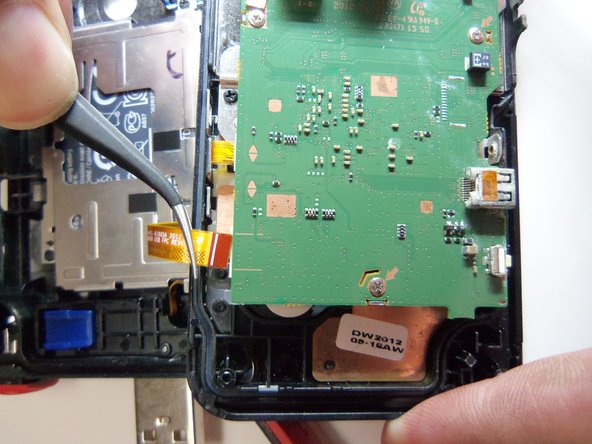
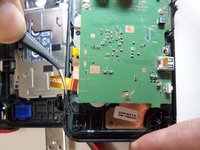
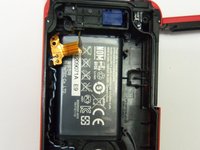
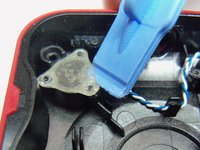
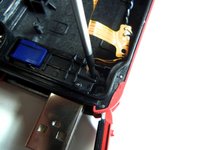
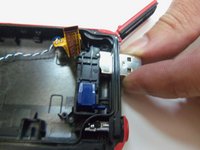
    • Use tweezers to remove the wire from the slots.

  10. Samsung HMX-W300 Front Case Replacement: step 10, image 1 of 2 Samsung HMX-W300 Front Case Replacement: step 10, image 2 of 2
    • Remove both screws from the USB port using a Phillips #00 screwdriver.

  11. Samsung HMX-W300 Front Case Replacement: step 11, image 1 of 2 Samsung HMX-W300 Front Case Replacement: step 11, image 2 of 2
    • Push the USB port inside the case to remove it from the device.

  12. Samsung HMX-W300 Front Case Replacement, Front Case: step 12, image 1 of 1
    • The front case is separated from the rest of the device.

Conclusion

To reassemble your device, follow these instructions in reverse order.

Robert

Member since: 01/21/15

966 Reputation

8 Guides authored

Team

USF Tampa, Team 9-2, Blackwell Winter 2015 Member of USF Tampa, Team 9-2, Blackwell Winter 2015

USFT-BLACKWELL-W15S9G2

4 Members

16 Guides authored

0 Comments

Add Comment

View Statistics:

Past 24 Hours: 0

Past 7 Days: 0

Past 30 Days: 0

All Time: 308