
The Samsung Galaxy Tab E Lite 7 Kids Motherboard Replacement

What you need

  1. The Samsung Galaxy Tab E Lite 7 Kids Motherboard Replacement, Rear Case: step 1, image 1 of 3 The Samsung Galaxy Tab E Lite 7 Kids Motherboard Replacement, Rear Case: step 1, image 2 of 3 The Samsung Galaxy Tab E Lite 7 Kids Motherboard Replacement, Rear Case: step 1, image 3 of 3
    • Make sure the device is turned off before attempting to disassemble it.

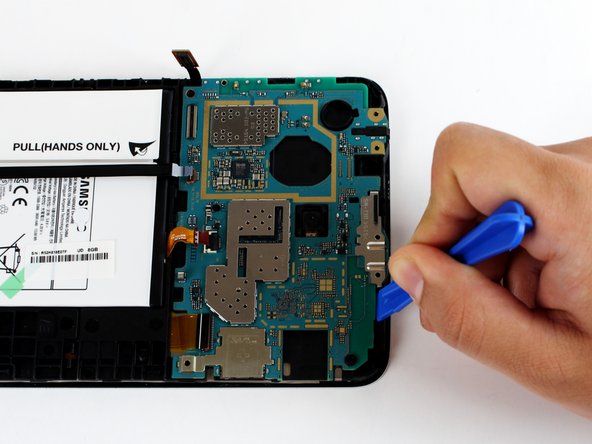
    • Using a plastic opening tool, wedge in the seam between the screen and the case.

    • Rock the tool by moving it towards and away from the middle of the screen, trying to separate the tape holding the screen and case together.

  2. The Samsung Galaxy Tab E Lite 7 Kids Motherboard Replacement: step 2, image 1 of 2 The Samsung Galaxy Tab E Lite 7 Kids Motherboard Replacement: step 2, image 2 of 2
    • After separating the latches holding the screen and case together, slowly take the screen off the case.

  3. The Samsung Galaxy Tab E Lite 7 Kids Motherboard Replacement, Motherboard: step 3, image 1 of 3 The Samsung Galaxy Tab E Lite 7 Kids Motherboard Replacement, Motherboard: step 3, image 2 of 3 The Samsung Galaxy Tab E Lite 7 Kids Motherboard Replacement, Motherboard: step 3, image 3 of 3
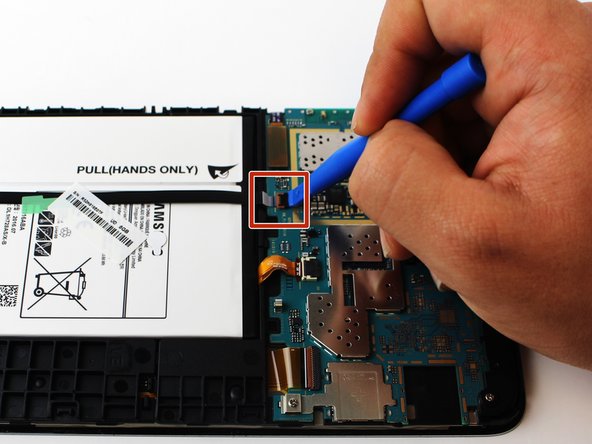
    • Use the plastic opening tool to lift up the black ZIF (zero insertion force) connector.

    • Use your hands to pull the black cable out of its slot.

  4. The Samsung Galaxy Tab E Lite 7 Kids Motherboard Replacement: step 4, image 1 of 2 The Samsung Galaxy Tab E Lite 7 Kids Motherboard Replacement: step 4, image 2 of 2
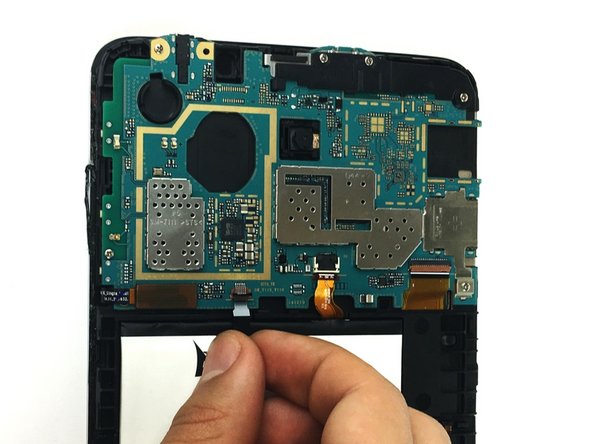
    • Use the plastic opening tool to lift the ZIF (zero insertion force) connector holding the ribbon cable.

    • Pull out the battery's ribbon cable.

  5. The Samsung Galaxy Tab E Lite 7 Kids Motherboard Replacement: step 5, image 1 of 2 The Samsung Galaxy Tab E Lite 7 Kids Motherboard Replacement: step 5, image 2 of 2
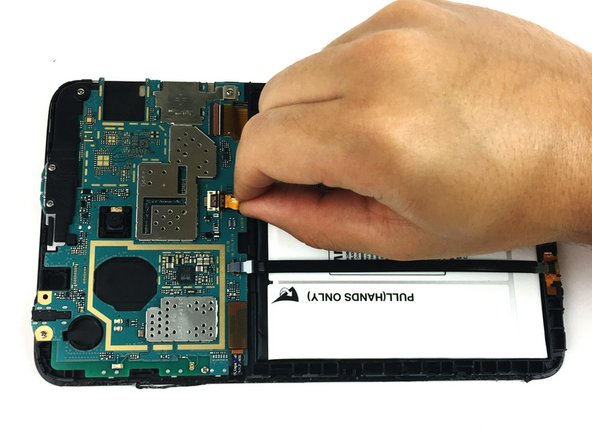
    • Use the plastic opening tool to lift up the latch to the ribbon cable.

    • Remove the ribbon cable from the connector.

  6. The Samsung Galaxy Tab E Lite 7 Kids Motherboard Replacement: step 6, image 1 of 1
    • Remove the seven 4mm PH000 screws holding the motherboard in place.

  7. The Samsung Galaxy Tab E Lite 7 Kids Motherboard Replacement: step 7, image 1 of 1
    • Use the plastic opening tool to pry up the tab holding the motherboard in place.

  8. The Samsung Galaxy Tab E Lite 7 Kids Motherboard Replacement: step 8, image 1 of 3 The Samsung Galaxy Tab E Lite 7 Kids Motherboard Replacement: step 8, image 2 of 3 The Samsung Galaxy Tab E Lite 7 Kids Motherboard Replacement: step 8, image 3 of 3
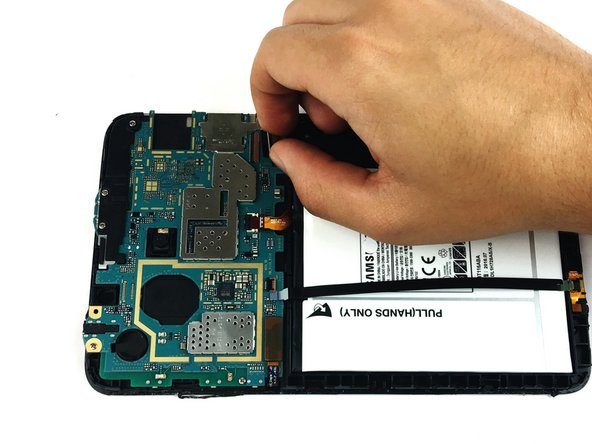
    • Use the precision tweezers to remove the black plastic corner on top of the motherboard.

    • Use the plastic opening tool to pull the motherboard out of the case.

Nicholas Nolan

Member since: 02/17/17

805 Reputation

5 Guides authored

Team

USF Tampa, Team S19-G2, Hoffman Spring 2017 Member of USF Tampa, Team S19-G2, Hoffman Spring 2017

USFT-HOFFMAN-S17S19G2

4 Members

7 Guides authored

View Statistics:

Past 24 Hours: 0

Past 7 Days: 5

Past 30 Days: 12

All Time: 1,025