Introduction
If you are having issues with keeping a charge or your battery is dead, use this guide to properly replace the battery in your Samsung Galaxy Tab A 10.1.
What you need
Video Overview
-
-
Have the front of the device facing you.
-
Begin near one of the curved edges of the device (see photo two for visual example).
-
Place a plastic opening tool between the front and back panels.
-
-
-
-
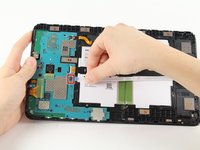
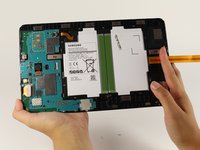
Remove the adhesive film and flip up the retaining flap on the ZIF battery connector.
-
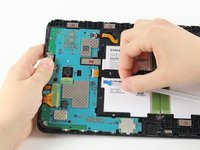
Slide the orange battery ribbon cable out of the ZIF connector.
-
-
-
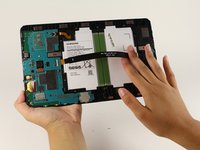
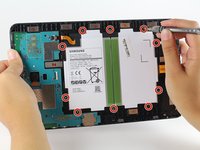
Using a Phillips #000 screwdriver, remove the ten 4 mm screws around the battery.
-
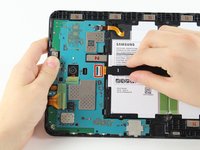
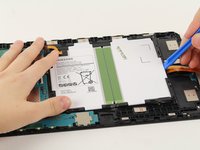
Slide a plastic opening tool under the bottom of the battery close to the speakers and lift up.
-


To reassemble your device, follow these instructions in reverse order.
Cancel: I did not complete this guide.
46 other people completed this guide.
Team

Cal Poly, Team S15-G6, Livingston Fall 2017 Member of Cal Poly, Team S15-G6, Livingston Fall 2017
CPSU-LIVINGSTON-F17S15G6
4 Members
31 Guides authored
10 Guide Comments
Used this guide up until the disconnecting of the battery in order to fix the black screen of death. Very very helpful. Thank you.
If you have my kind of bad luck — where the latch for the battery flex cable connector sticks to the tape when you remove the tape, and then it will not snap back into place — don’t worry about it too much, because the connector tension will hold the flex cable in place. Just put the tape back over the top as directed.
Why does it say you need a heat gun?
To loosen the adhesive. A hair dryer works well too
how to calibrate the new battery?
when device switched off due to 0% of battery - there is impossible to boot it even with charging. there is required to open a tablet and charge the battery from another source.