
Samsung Galaxy S III i8190 mini Display + Touch Screen Replacement

What you need

  1. Samsung Galaxy S III i8190 mini Display + Touch Screen Replacement, Display + Touch Screen: step 1, image 1 of 3 Samsung Galaxy S III i8190 mini Display + Touch Screen Replacement, Display + Touch Screen: step 1, image 2 of 3 Samsung Galaxy S III i8190 mini Display + Touch Screen Replacement, Display + Touch Screen: step 1, image 3 of 3
    • Here we have the Samsung Galaxy S3 mini with the LCD broken. The touch works fine, but its easier to replace the entire assy.

    • First of all, remove the battery door, then the battery....

    • Then, unscrew all the screw from the bottom side. NOTE:All the screws has the same lenght

  2. Samsung Galaxy S III i8190 mini Display + Touch Screen Replacement: step 2, image 1 of 3 Samsung Galaxy S III i8190 mini Display + Touch Screen Replacement: step 2, image 2 of 3 Samsung Galaxy S III i8190 mini Display + Touch Screen Replacement: step 2, image 3 of 3
    • Now, with a flat screwdriver or the plastic triangle, separate the rear case from the front case.

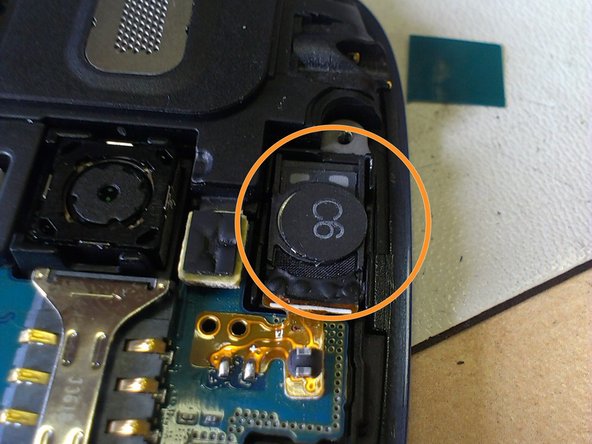
    • Here we have the call speaker. Its glued to the front, so we have to release it or desolder the 2 knobs on the flex cable.

  3. Samsung Galaxy S III i8190 mini Display + Touch Screen Replacement: step 3, image 1 of 3 Samsung Galaxy S III i8190 mini Display + Touch Screen Replacement: step 3, image 2 of 3 Samsung Galaxy S III i8190 mini Display + Touch Screen Replacement: step 3, image 3 of 3
    • Remove the volume and power buttons.

    • Release the lower buttons and MicroSD connectors.

  4. Samsung Galaxy S III i8190 mini Display + Touch Screen Replacement: step 4, image 1 of 2 Samsung Galaxy S III i8190 mini Display + Touch Screen Replacement: step 4, image 2 of 2
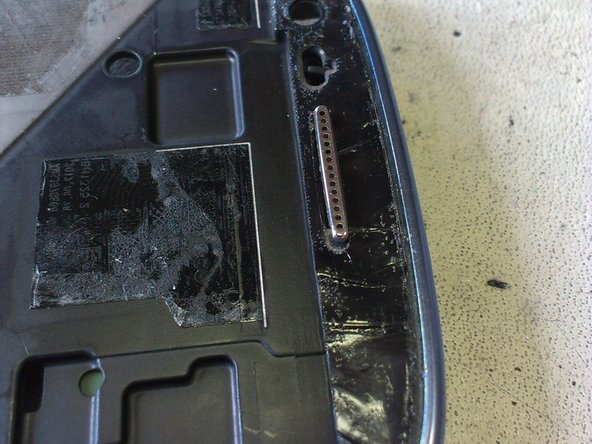
    • Now, lift from the right side the board, and be careful, below is the LCD connector.

    • It´s turn to the HOT STATION. If you don´t have one of this, you can do it with a Hairdryer or a Heat gun

    • I don´t have any photo of the proccess, so I´m sorry for that. You must heat all the LCD area, and with special attention on the top and bottom areas.

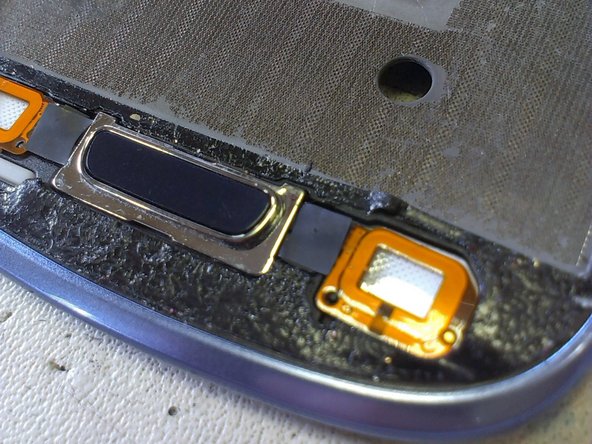
    • Please be careful with the 2 lower buttons, they have this orange flat cable!!

    • As you can see, the LCD is totally destroyed, but it was broken before, so...

  5. Samsung Galaxy S III i8190 mini Display + Touch Screen Replacement: step 5, image 1 of 3 Samsung Galaxy S III i8190 mini Display + Touch Screen Replacement: step 5, image 2 of 3 Samsung Galaxy S III i8190 mini Display + Touch Screen Replacement: step 5, image 3 of 3
    • Now, you can see that the touch screen were damaged too, so this is why I have purchased the whole unit assy.

    • PLEASE!! DON´T remove these adhesive tapes! They are neccessary for the new module (that doen´t have double sided tape )

  6. Samsung Galaxy S III i8190 mini Display + Touch Screen Replacement: step 6, image 1 of 3 Samsung Galaxy S III i8190 mini Display + Touch Screen Replacement: step 6, image 2 of 3 Samsung Galaxy S III i8190 mini Display + Touch Screen Replacement: step 6, image 3 of 3
    • Now, place the new module on the chassis, and be careful with the flex cables.

    • To assembly all togheter, do the steps backwards, and don´t forget to place the volume and power up buttons!

    • Remember to put back the speaker

  7. Samsung Galaxy S III i8190 mini Display + Touch Screen Replacement: step 7, image 1 of 2 Samsung Galaxy S III i8190 mini Display + Touch Screen Replacement: step 7, image 2 of 2
    • Reconnect all the connectors to the main board, place the rear case, and tight all the screws!

    • YOU DID IT!!

Jaime

Member since: 11/05/13

3,333 Reputation

4 Guides authored

View Statistics:

Past 24 Hours: 3

Past 7 Days: 11

Past 30 Days: 33

All Time: 67,935