
Samsung Galaxy Note Pro 12.2 Microphone Replacement

La'Taja Long and
Last updated on May 16, 2024
Views: 831
View statistics:
- Past 24 Hours:
- 4
- Past 7 Days:
- 22
- Past 30 Days:
- 65
- All Time:
- 831
Comments: 0
No one has left comments on this guide. Will you be first?
Go to guide commentsCompleted: 0 1
No one has marked this guide "completed." Will you be the first?
1 person has marked this guide "completed." It's you — great job!
Favorites: 0 1
No one has favorited (and subscribed to) this guide. Will you be the first?
1 person has favorited (and subscribed to) this guide — and that's you!
Introduction
Go to step 1 ↓Replacing the microphone of your Samsung Galaxy Note Pro 12.2 (Galaxy SM-P900) is a great idea for refurbishing this device.
Location and removal of this component within the tablet device is not easily done. Steps 1-3 will walk you through the removal of those components.
Lastly, be sure that your device is powered off before beginning the disassembly process.
What you need
Tools


-
-
-
Remove the black back cover with a blue iFixit opening tools by working it around the perimeter of the case.
 Ask FixBot
-
-
-
Tool used on this step:Tweezers$3.99
-
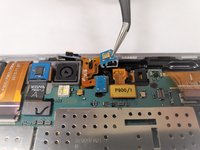
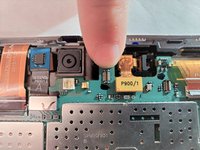
Remove the microphone by using the angled tweezers tool, starting at the base of the component to free it from the motherboard.
-
-


To reassemble your device, follow these instructions in reverse order.

Team

IUPUI, Team S1-G3, Henning Fall 2019 Member of IUPUI, Team S1-G3, Henning Fall 2019
IUPUI-HENNING-F19S1G3
3 Members
36 Guides authored
