
Samsung Galaxy Note 3 Power button + Vibration motor Replacement

  1. Samsung Galaxy Note 3 Power button + Vibration motor Replacement, Remove your back cover: step 1, image 1 of 3 Samsung Galaxy Note 3 Power button + Vibration motor Replacement, Remove your back cover: step 1, image 2 of 3 Samsung Galaxy Note 3 Power button + Vibration motor Replacement, Remove your back cover: step 1, image 3 of 3
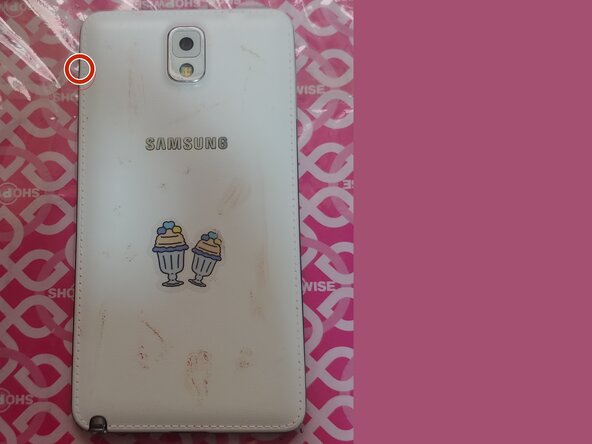
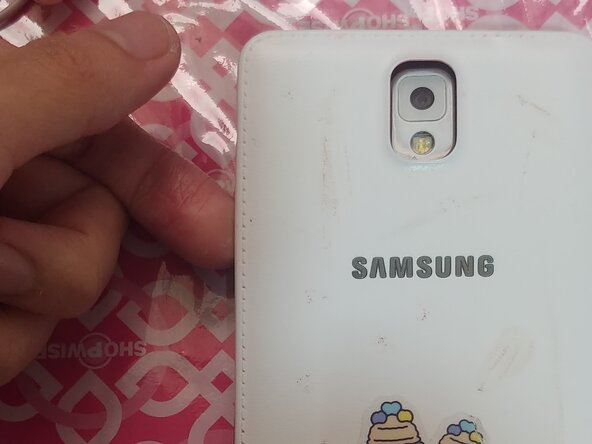
    • This is the notch of your rear cover, this is where you start. Just slide your finger and the back cover comes of very easily

  2. Samsung Galaxy Note 3 Power button + Vibration motor Replacement, Remove your battery and S-Pen: step 2, image 1 of 3 Samsung Galaxy Note 3 Power button + Vibration motor Replacement, Remove your battery and S-Pen: step 2, image 2 of 3 Samsung Galaxy Note 3 Power button + Vibration motor Replacement, Remove your battery and S-Pen: step 2, image 3 of 3
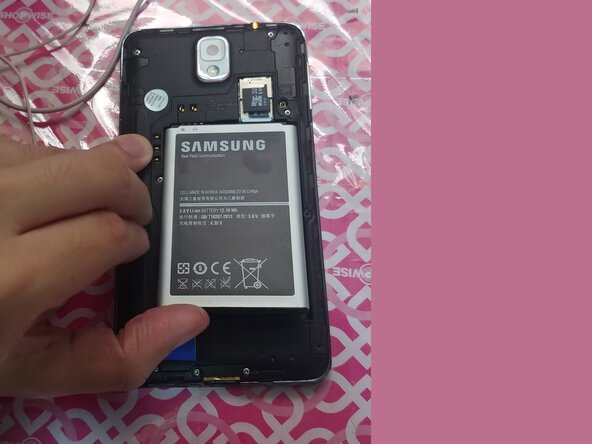
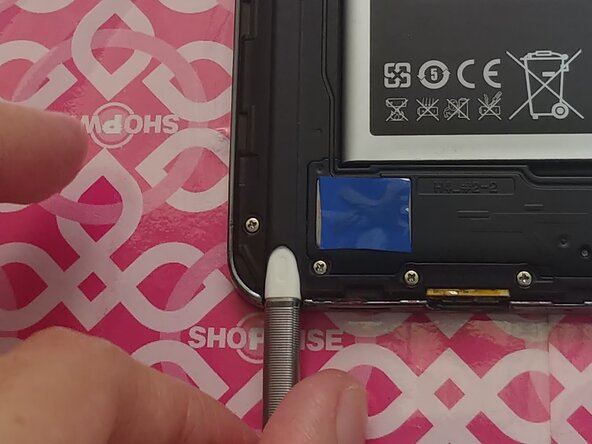
    • You can either insert your fingernail or simply insert a plastic spudger in the battery's notch

    • If you removed your stylus before removing the back cover then you can skip the stylus step. It can be either of them.

  3. Samsung Galaxy Note 3 Power button + Vibration motor Replacement, Removing the mid-frame: step 3, image 1 of 3 Samsung Galaxy Note 3 Power button + Vibration motor Replacement, Removing the mid-frame: step 3, image 2 of 3 Samsung Galaxy Note 3 Power button + Vibration motor Replacement, Removing the mid-frame: step 3, image 3 of 3
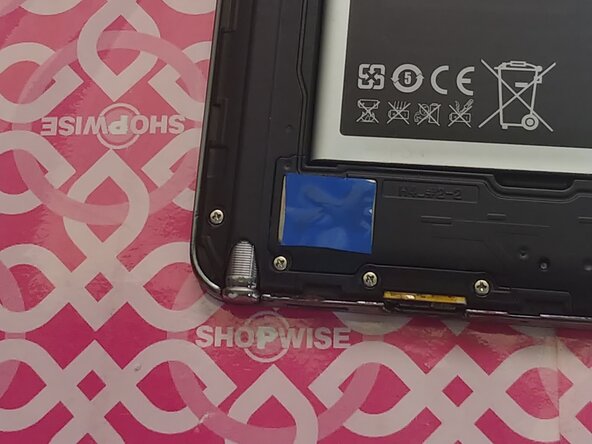
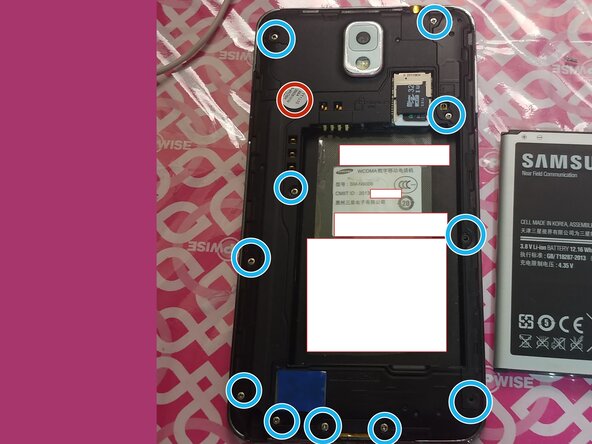
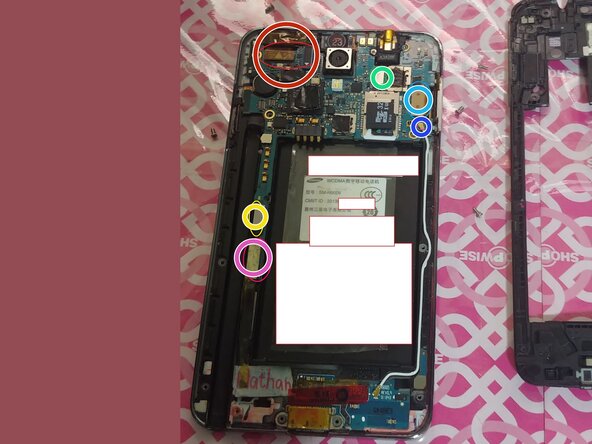
    • The mid-frame is held by 12 Philips head screws and 1 screw is hidden by a sticker

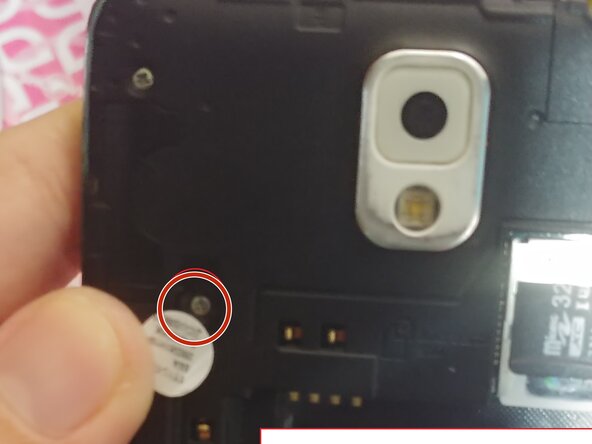
    • Be sure you remove the sticker so you can remove the hidden screw that's hidden by a sticker.

  4. Samsung Galaxy Note 3 Power button + Vibration motor Replacement, Disconnecting the flex cables: step 4, image 1 of 2 Samsung Galaxy Note 3 Power button + Vibration motor Replacement, Disconnecting the flex cables: step 4, image 2 of 2
    • You can disconnect these flex cables, however be careful when you lift up the board as some flex cables can get caught. I highlighted the following connections.

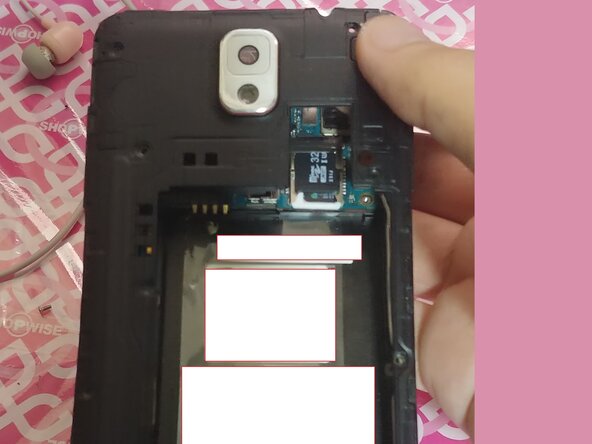
    • Camera and various sensors flex cable

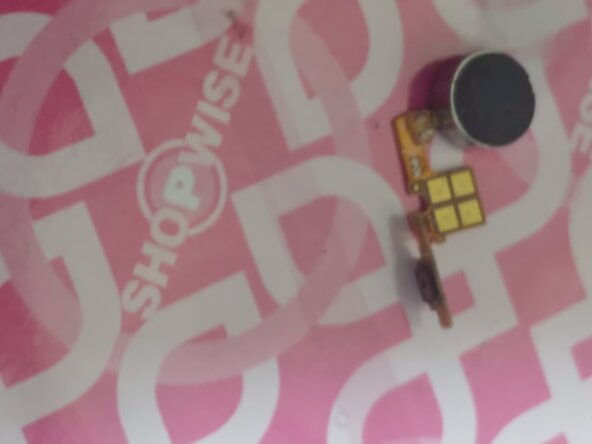
    • Navigation button flex

    • Charging port flex

    • Screen flex

    • Headphone jack flex

    • Coaxial antenna (Optional but highly recommended to remove this)

  5. Samsung Galaxy Note 3 Power button + Vibration motor Replacement, Removing the motherboard from the assembly: step 5, image 1 of 2 Samsung Galaxy Note 3 Power button + Vibration motor Replacement, Removing the motherboard from the assembly: step 5, image 2 of 2
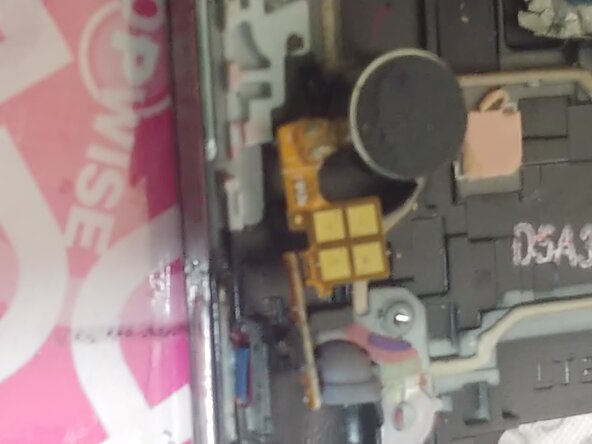
    • Gently grab the board out, you can also use tweezers to realign the flex cables that getting caught so they won't be causing problems.

    • You might also want to pull a little in the rear camera because it's a little bit stubborn but be careful because if you pull it too far you might rip the flex connection for the rear camera.

    • Be careful on the headphone jack flex cable and as well the button flex and charging flex as it might tear if you aren't careful.

  6. Samsung Galaxy Note 3 Power button + Vibration motor Replacement, Removing the vibrator motor + Power button assembly: step 6, image 1 of 3 Samsung Galaxy Note 3 Power button + Vibration motor Replacement, Removing the vibrator motor + Power button assembly: step 6, image 2 of 3 Samsung Galaxy Note 3 Power button + Vibration motor Replacement, Removing the vibrator motor + Power button assembly: step 6, image 3 of 3
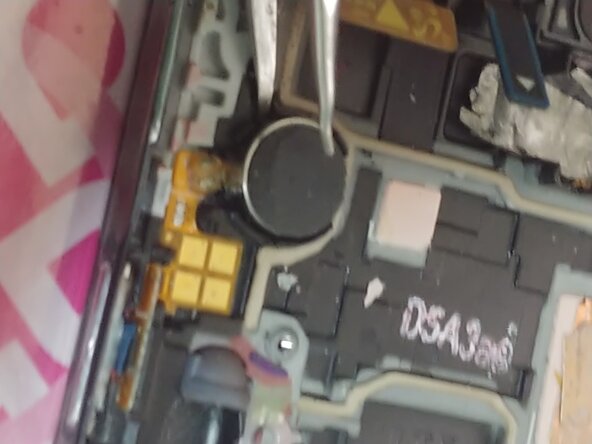
    • You can insert a little bit using your tweezers in the part of the vibration motor. This allows you to create a gap

    • Do this slowly as if you go too far you might break the contact pads. If it's stubborn you can use a little bit of heat, for me it pops quite easily.

    • This procedure is also required if you want to replace the power button casing itself (Which has the rubber part) as the rubber degrades over time which results to the power button being harder to press.

Conclusion

To reassemble your device, follow these instructions in reverse order. This works on every Note 3s

One other person completed this guide.

Nathan David Yellow Guy

Member since: 05/20/25

121 Reputation

2 Guides authored

0 Guide Comments

Add Comment

View Statistics:

Past 24 Hours: 1

Past 7 Days: 1

Past 30 Days: 32

All Time: 32