Introduction
This guide will show you how to open up the device to remove and replace the disc tray.
What you need
-
-
Remove the two 10mm screws with a Phillips #1 screwdriver.
-
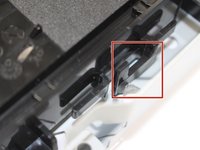
Use the plastic prying tool to separate the top plastic casing from the bottom metal casing.
 Ask FixBot
-
-
-
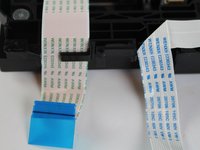
Grip the blue tab and pull upwards to remove the ribbon cable from the motherboard.
-
-
-
-
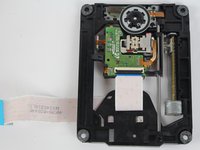
Pinch both tabs on the side of the disc tray, push towards the front, and lift the disc tray out to remove.
-


To reassemble your device, follow these instructions in reverse order.
Cancel: I did not complete this guide.
One other person completed this guide.
Team

USF Tampa, Team S16-G4, Boczar Spring 2018 Member of USF Tampa, Team S16-G4, Boczar Spring 2018
USFT-BOCZAR-S18S16G4
4 Members
4 Guides authored