Free Shipping on Domestic Orders $75+

Salter Brecknell Model 311 Disassembly

What you need

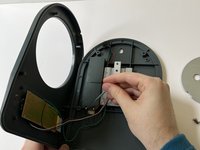
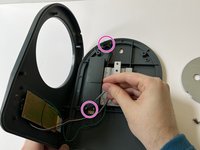
    1. Salter Brecknell Model 311 Disassembly, Prepare to disassemble: step 1, image 1 of 2 Salter Brecknell Model 311 Disassembly, Prepare to disassemble: step 1, image 2 of 2
      • Flip the scale over, remove batteries.

      • It requires 4 AA batteries and has two plastic clips to hold the upper batteries.

      • Be careful not to break the plastic clips.

      Ask FixBot

      Add Comment

    2. Salter Brecknell Model 311 Disassembly, Remove primary set of screws: step 2, image 1 of 1
      • Remove screws at 1 o'clock and 7 o'clock positions, using the mini screwdriver.

      • Be careful with the mini screwdriver to refrain from stripping the head of the screw.

      Ask FixBot

      Add Comment

    3. Salter Brecknell Model 311 Disassembly, Remove secondary set of screws: step 3, image 1 of 1
      • Remove screws at 5 o'clock and 11 o'clock positions, using the mini screwdriver.

      • Unscrew them slowly, keeping the tool directly perpendicular to the surface to avoid damage, as they are self-tapping.

      Ask FixBot

      Add Comment

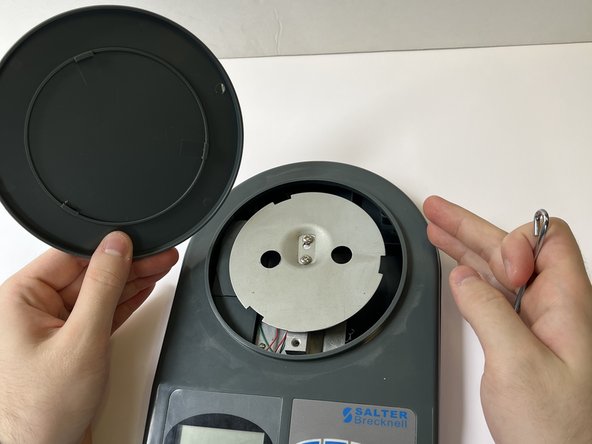
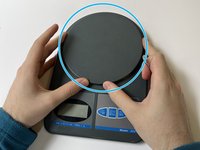
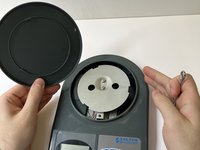
    4. Salter Brecknell Model 311 Disassembly, Remove aesthetic top cover: step 4, image 1 of 2 Salter Brecknell Model 311 Disassembly, Remove aesthetic top cover: step 4, image 2 of 2
      • Remove the weighing platform by unscrewing carefully.

      • Rotate it about 60 degrees so that it can be lifted vertically.

      Ask FixBot

      Add Comment

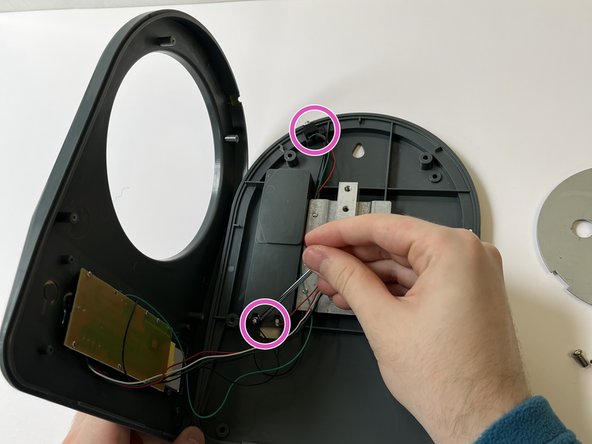
    5. Salter Brecknell Model 311 Disassembly, Split Open Plastic Shell: step 5, image 1 of 1
      • Gently tap the side of the upper plastic half, be careful as it can be snapped easily.

      • There are two clips that attach the upper half to the bottom half.

      • Be careful to avoid breaking the clips off.

      Ask FixBot

      Add Comment

    6. Salter Brecknell Model 311 Disassembly, Remove Central Screws: step 6, image 1 of 1
      • Remove the two central screws, connecting the scale weight.

      • The tightness of the screws can affect the scale's accuracy, so it is important to take note of this.

      Ask FixBot

      Add Comment

    7. Salter Brecknell Model 311 Disassembly, Separate the Plastic Shell: step 7, image 1 of 1
      • Lift the top half of the plastic shell to the side. Be careful, as the electrical circuit board will connect both parts.

      • The wires are exceptionally thin, be careful to not rip them.

      Ask FixBot

      Add Comment

    8. Salter Brecknell Model 311 Disassembly, Inspect the wiring: step 8, image 1 of 2 Salter Brecknell Model 311 Disassembly, Inspect the wiring: step 8, image 2 of 2
      • Check for wiring issues connecting to components; look for torn cables.

      • Look for loose wires or connections. Every single wire should be fully attached at both ends.

      Ask FixBot

      Add Comment

    9. Salter Brecknell Model 311 Disassembly, Inspect the circuit board: step 9, image 1 of 1
      • Check back and front of circuit board for liquid damage.

      • Sometimes you can see damage from the back, but if you inspect the front side, it should be very obvious.

      • If brown stains are visible on the board, there is likely liquid damage on the board.

      • If you find liquid damage, unscrew the mini screws, and replace the board.

      • You will need to re-solder the electrical cables if you replace the board.

      Ask FixBot

      Add Comment

    10. Salter Brecknell Model 311 Disassembly, Important Reassembly Actions: step 10, image 1 of 1
      • Reassemble by inverting steps 1 - 7.

      • Remember to only torque the central screws till they will not back out, not more.

      Ask FixBot

      Add Comment

Conclusion

To reassemble your device, follow these instructions in reverse order.

Cancel: I did not complete this guide.

Steven

Member since: 06/22/23

191 Reputation

1 Guide authored

0 Guide Comments

Add Comment

View Statistics:

Past 24 Hours: 1

Past 7 Days: 11

Past 30 Days: 39

All Time: 469