
SVP 5800 Front Casing Replacement

Cheyenne Heinen and
Last updated on Mar 19, 2018
Views: 1K
View statistics:
- Past 24 Hours:
- 3
- Past 7 Days:
- 22
- Past 30 Days:
- 77
- All Time:
- 1,048
Comments: 0
No one has left comments on this guide. Will you be first?
Go to guide commentsCompleted: 1 2
1 person has marked this guide "completed." Will you be next?
2 people have marked this guide "completed." Including you — great job!
Favorites: 0 1
No one has favorited (and subscribed to) this guide. Will you be the first?
1 person has favorited (and subscribed to) this guide — and that's you!
Introduction
Go to step 1 ↓This guides enumerates the steps of removing and replacing the front casing of the SPV Aqua 5800 Camera in order to protect the mechanisms within.
What you need
Tools


-
-
-
Locate the two 3.5 mm screws on the side of the device.
-
Apply pressure to the PH J000 philips head screwdriver and turn in a counter clockwise motion until the screw becomes loose enough to pull out.
 Ask FixBot
-
-
-
-
-
Once you have properly removed the strap hook, locate the two 3 mm screws located on the opposite side of the strap hook.
-
Place the PH J000 phillips head screwdriver on the head of screw; apply pressure and turn in a counter clockwise motion until screws come loose.
-
-
-
-
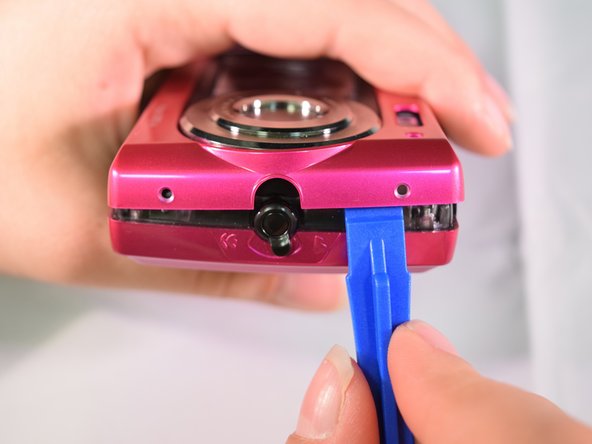
Place the plastic opening tool on the crack between the front and back casings.
-
Apply pressure by pulling down on the plastic opening tool to pry the case apart.
-
-
-
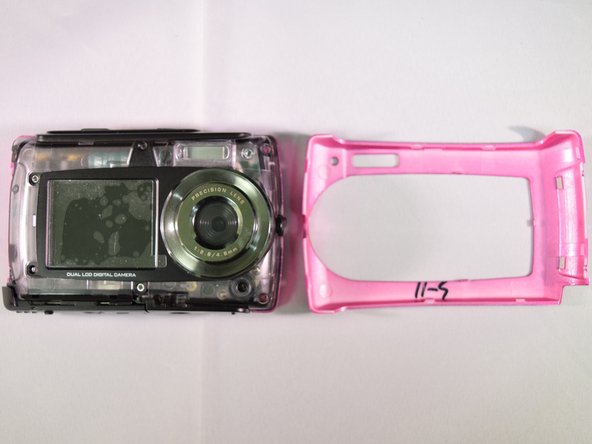
Wedge your fingers in the opening and slowly pull the front casing away from the bottom casing until it complete separates from the device.
-
-



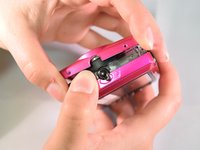
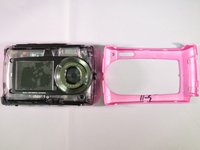
To reassemble your device, follow these instructions in reverse order.
Cancel: I did not complete this guide.
One other person completed this guide.

Team

Marist, Team 1-3, Laflen Spring 2016 Member of Marist, Team 1-3, Laflen Spring 2016
MARS-LAFLEN-S16S1G3
2 Members
60 Guides authored
