
Ryobi RS290G Brush Assembly Replacement

What you need

  1. Ryobi RS290G Brush Assembly Replacement, Top Cap: step 1, image 1 of 1
    • Remove two 20mm and one 16mm Phillips #2 screws from the housing assembly and exhaust port.

  2. Ryobi RS290G Brush Assembly Replacement: step 2, image 1 of 1
    • Remove the three 16mm Phillips #2 screws from the top cap/upper grip.

  3. Ryobi RS290G Brush Assembly Replacement: step 3, image 1 of 1
    • Remove the top cap.

  4. Ryobi RS290G Brush Assembly Replacement, Switch Trigger: step 4, image 1 of 1
    • Remove the switch trigger.

  5. Ryobi RS290G Brush Assembly Replacement, Brush Assembly: step 5, image 1 of 2 Ryobi RS290G Brush Assembly Replacement, Brush Assembly: step 5, image 2 of 2
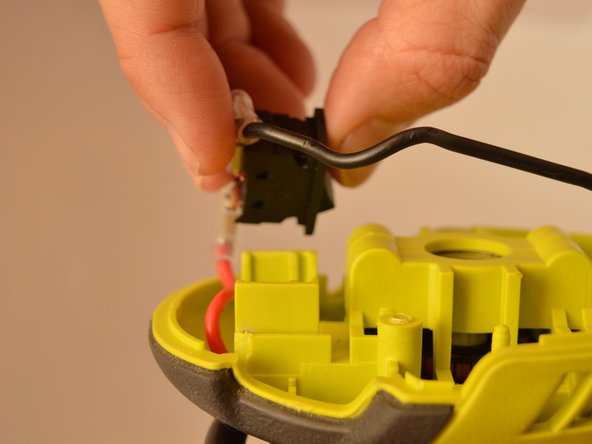
    • Slide the power switch out of the housing assembly by carefully gripping the power switch and slide upward from the base.

  6. Ryobi RS290G Brush Assembly Replacement: step 6, image 1 of 1
    • Remove the two 16mm Phillips #2 screws from the inner housing assembly.

  7. Ryobi RS290G Brush Assembly Replacement: step 7, image 1 of 1
    • Remove the two 14mm Phillips #2 screws from the cord clamp.

  8. Ryobi RS290G Brush Assembly Replacement: step 8, image 1 of 1
    • Carefully slide the housing assembly apart, avoiding damage or pulling on wires.

  9. Ryobi RS290G Brush Assembly Replacement: step 9, image 1 of 2 Ryobi RS290G Brush Assembly Replacement: step 9, image 2 of 2
    • Slide out both brush assemblies from the inner housing assembly.

  10. Ryobi RS290G Brush Assembly Replacement: step 10, image 1 of 1
    • Slide off the disconnect terminal for the brush assembly (white lead).

  11. Ryobi RS290G Brush Assembly Replacement: step 11, image 1 of 1
    • Slide off the disconnect terminal for the brush assembly (black lead).

Conclusion

To reassemble your device, follow these instructions in reverse order.

0 Comments

Add Comment

View Statistics:

Past 24 Hours: 0

Past 7 Days: 5

Past 30 Days: 9

All Time: 733