Introduction
This is a guide to replace the pressurestat on a Rocket Appartamento espresso machine. The specific model number for this machine varies by color.
The pressurestat is a part that will wear out with normal usage and can be fixed easily. If the pressure regulator fails, there is a possibility of the machine overheating and malfunctioning. When the machine starts to fail, users may notice:
- The pressure gauge indicating over 1.5 bars of pressure, which puts the gauge indicator into the red zone.
- The machine may start making a squealing sound as the machine tries to vent the steam internally.
- The boiler may shut off while the machine remains switched on due to the internal breaker switch engaging.
When replacing the pressurestat, be sure the machine is unplugged and cool to the touch. Trying to make the repairs while the machine is still hot may cause burns. Be sure to test the part as directed in Step Seven to ensure it works correctly before putting the machine back together.
What you need
-
-
-
Remove the drip tray and the water reservoir so you can access the main area of the machine.
 Ask FixBot
-
-
-
Remove the four M3.5 × 6 mm screws from the water reservoir using a #2 Phillips head screwdriver.
-
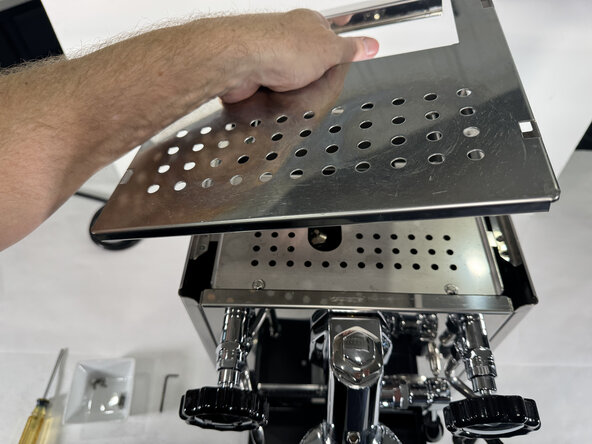
Use the 2.5 mm Allen key wrench to remove the two M3 × 10 mm screws from the top panel.
-
Lift off the top panel.
-
-
-
Remove the heat panel by using the 7mm socket wrench to loosen (but do not remove) the two socket cap screws.
-
When the screws are loosened, the slide the panel back from the screws and remove.
-
-
-
-
Gently place the machine on its side. Using the 7mm socket wrench, remove the M4 x 10mm socket cap screws on the bottom of the machine.
-
Set the machine back upright. Grab both sides of the panels and gently lift them off the groves to remove.
-
-
-
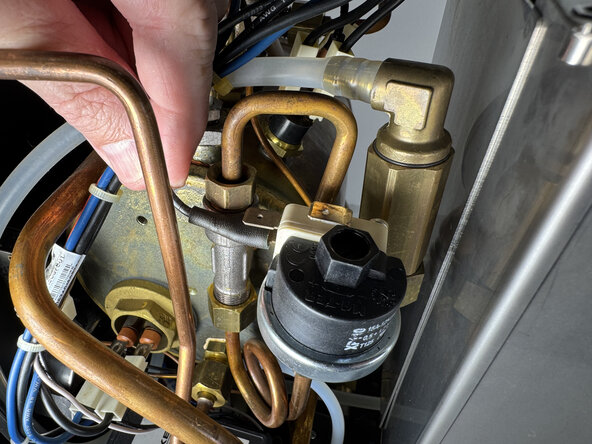
Remove the pressurestat: disconnect the blue wire by sliding it off of the top tab.
-
Disconnect the black wire by sliding it off the bottom tab.
-
Using the 17mm wrench to hold the pressurestat in place, use an adjustable wrench to loosen the nut underneath to unscrew completely (Lefty Loosey!). Lift the pressurestat off.
-
-
-
Attach the new pressurestat and reconnect it to the nut (Righty-Tighty!). Hand tighten the nut, and then use the adjustable wrench to fully tighten.
-
Reconnect the black wire by sliding it onto the bottom tab on the pressurestat.
-
Reconnect the blue wire by sliding it onto the top tab on the pressurestat.
-
Slide the side panels back into place and replace the screws on the bottom of the machine.
-
-
-
Turn the machine on and allow the machine to heat up. The pressurestat part is working correctly when the machine pressure gauge registers between 1 - 1.5 bars of pressure.
-
Slide the heat shield from Step 3 back into place and tighten the two screws holding it in place.
-
Replace the top panel from Step 2 and screw in the two screws holding it in place with the Allen key wrench.
-
Replace the four screws around the water reservoir from Step 2 using the #2 Phillips screwdriver.
-
Add back the water reservoir and the drip tray.
-
Plug the machine in. It is ready for use.
-
-






To reassemble your device, follow these instructions in reverse order.
Cancel: I did not complete this guide.
2 other people completed this guide.

Team

Austin Community College, Team 57-13, Kapoor Summer 2026 Member of Austin Community College, Team 57-13, Kapoor Summer 2026
AUSTINCC-KAPOOR-SU26S57G13
1 Member
12 Guides authored
