This translation was generated by a machine and has not been reviewed by a person yet. Speak this language? Review it.
Introduction
The Roccat Leadr wireless gaming mouse can be fully opened with a little patience and the right tools to service the battery, switch or button mechanism.
What you need
-
-
-
The Leadr has four large PTFE sliders, under which all the case screws are concealed. Briefly heat each slider, carefully lift it with the spudger and stick it onto foil for reuse.
-
Ignore the small sticker in the middle. This is the warranty seal, but strangely enough there is no screw underneath.
-
Also remove the white sticker with the barcode and serial number.
 Ask FixBot
-
-
-
Loosen the four screws that hold the two halves of the housing together.
-
-
-
Hold the mouse sideways and separate the upper and lower shells along the seam with light pressure from the spudger. Lift the top only a few centimeters - it is connected to the motherboard via JST cable
-
Pull the JST connectors vertically upwards to remove the top completely. Of the connectors in the second picture, you only need to remove the one on the right, as the one on the right belongs to the battery and is easier to remove once the top has been removed.
-
-
-
-
Pull the two-pin JST connector of the 1 000 mAh Li-Ion battery vertically upwards.
-
If you want to change the battery, it is a lithium polymer battery in 803040 form factor with a JST PH2.0 connector and 3.7 volts.
-
-
-
Six more screws secure the motherboard module: 5 large ones and one small one at the mouse wheel. Remove those.
-
-
-
First remove the screws (3 large, 2 small under the mouse wheel)
-
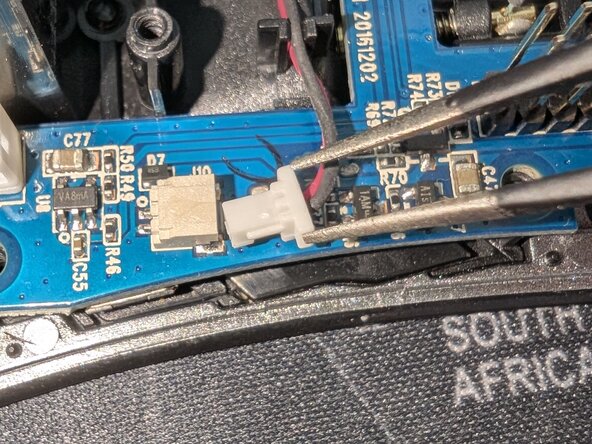
Now remove the plug for the charging pins (Fig. 2)
-
Now you can carefully lift and remove the board
-
-
-
First remove the four screws.
-
You can then remove the fin, but be careful not to lose the spring, as it sits loosely on a small pin underneath the fin.
-
Then you can remove the side module with a little careful wiggling.
-
-




Work through the steps in reverse order to reassemble your device.
Cancel: I did not complete this guide.
2 other people completed this guide.
Special thanks to these translators:
100%


These translators are helping us fix the world! Want to contribute?
Start translating ›

