Free Shipping on Domestic Orders $75+

Right Hinge Installation

Prerequisite Only
This is a prerequisite-only guide! This guide is part of another procedure and isn’t meant to be used alone.

What you need

    1. Right Hinge Installation, Hinge cable information: step 1, image 1 of 3 Right Hinge Installation, Hinge cable information: step 1, image 2 of 3 Right Hinge Installation, Hinge cable information: step 1, image 3 of 3
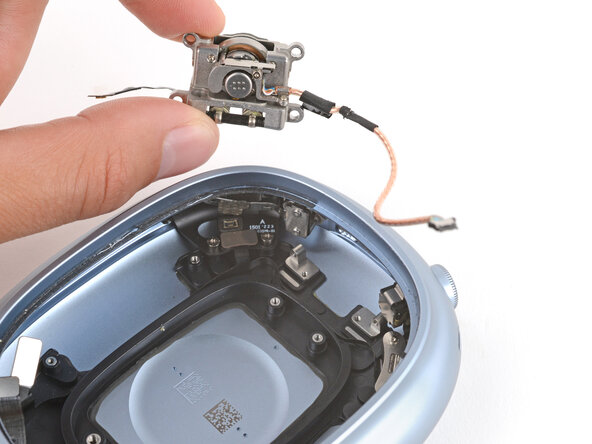
      • Before putting the hinge back into place, note the following:

      • The black ribbon cable coming out of the left side of the hinge needs to be routed behind the lower screw post. Otherwise, it will likely tear. You may need to use tweezers to do this while you put the hinge in place.

      • There's a long ribbon cable that needs to run in front of the hinge. Make sure it doesn't get stuck under the hinge, or it may get damaged.

      Ask FixBot

      Add Comment

    2. Right Hinge Installation, Put the hinge into place: step 2, image 1 of 3 Right Hinge Installation, Put the hinge into place: step 2, image 2 of 3 Right Hinge Installation, Put the hinge into place: step 2, image 3 of 3
      • The hinge needs to be placed so the copper cable goes near the Digital Crown and the black ribbon cable goes towards the noise control button.

      • Insert the hinge into its recess at a slight downward angle and then rotate it into place, making sure all four screw holes line up.

      • Before moving on, go back to the previous step and make sure the cable are in the proper locations.

      Ask FixBot

      Add Comment

    3. Right Hinge Installation, Install the hinge screws: step 3, image 1 of 2 Right Hinge Installation, Install the hinge screws: step 3, image 2 of 2
      • Use a Torx Plus 5IP screwdriver to install the four 5.3 mm‑long screws securing the hinge.

      Ask FixBot

      Add Comment

    4. Right Hinge Installation, Clip the hinge wire: step 4, image 1 of 2 Right Hinge Installation, Clip the hinge wire: step 4, image 2 of 2
      • Use a spudger to gently push the copper hinge cable into its clip.

      • If you're having trouble, don't force the cable into the clip. Reposition it slightly and try again.

      Ask FixBot

      Add Comment

    5. Right Hinge Installation, Reconnect the hinge: step 5, image 1 of 1
      • While holding the hinge's ribbon cable in place with tweezers, use a spudger to reconnect the press connector.

      Ask FixBot

      Add Comment

    6. Right Hinge Installation: step 6, image 1 of 1
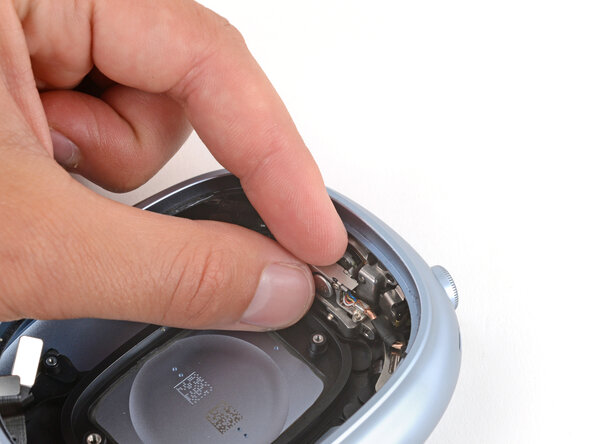
      • Use your finger to bend the connector cover back into place.

      Ask FixBot

      Add Comment

    7. Right Hinge Installation: step 7, image 1 of 2 Right Hinge Installation: step 7, image 2 of 2
      • Use a Torx Plus 1IP screwdriver to remove the two 1.7 mm‑long screws securing the connector cover.

      • You may need to hold the cover down while installing the screws.

      Ask FixBot

      Add Comment

Finish Line

Cancel: I did not complete this guide.

Spencer Day

Member since: 09/14/22

205,788 Reputation

1,267 Guides authored

0 Guide Comments

Add Comment

View Statistics:

Past 24 Hours: 0

Past 7 Days: 1

Past 30 Days: 12

All Time: 72