Ridgid R860054 Disassembly

What you need

  1. Ridgid R860054 Disassembly, Ridgid R860054 Disassembly: step 1, image 1 of 2 Ridgid R860054 Disassembly, Ridgid R860054 Disassembly: step 1, image 2 of 2
    • Using a T10 Torx security bit, remove the ten screws from the housing assembly.

    • All of the casing screws are the same length and require the same bit.

  2. Ridgid R860054 Disassembly: step 2, image 1 of 2 Ridgid R860054 Disassembly: step 2, image 2 of 2
    • Separate one half of the drill casing from the other by gently pulling both halves apart.

    • Once one half of the casing is removed, be careful! If the components are directed towards the ground, they could fall out.

  3. Ridgid R860054 Disassembly: step 3, image 1 of 3 Ridgid R860054 Disassembly: step 3, image 2 of 3 Ridgid R860054 Disassembly: step 3, image 3 of 3
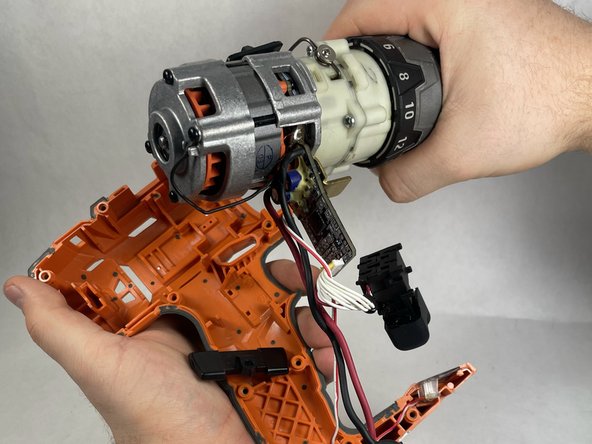
    • Remove the plastic speed switch and forward/reverse switch by softly lifting them from the casing.

    • Remove the internal components of the drill by lightly pulling on the drill chuck.

    • All of the other electronic components are attached to the chuck, and will come out with it.

  4. Ridgid R860054 Disassembly: step 4, image 1 of 1
    • The main section of the drill should have the trigger, light indicator, and battery prongs all connected via wire. There should be two plastic switches separated from the rest of the body.

Conclusion

To reassemble your device, follow these instructions in reverse order.

gage.anastasio

Member since: 03/15/23

339 Reputation

3 Guides authored

Team

0 Comments

Add Comment

View Statistics:

Past 24 Hours: 0

Past 7 Days: 1

Past 30 Days: 10

All Time: 200