Introduction
If the device is not turning on at all and is not responding, follow this guide to do a mainboard replacement (PCB) of your Retroid Pocket 3 device. This process will take approximately 20-25 minutes, and the tools needed for the project are listed in the guide.
What you need
-
-
-
Unplug any cables connected to the Retroid Pocket 3+.
-
Ensure your device has a charge of 5% or less as a charged battery can be dangerous if punctured.
 Ask FixBot
-
-
-
Remove the four 6 mm screws from the backplate of the device with a T5 Torx screwdriver.
-
Use a plastic opening tool or spudger to gently pry apart the backplate from the device.
-
-
-
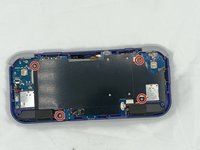
Remove the four 4.5 mm screws with a Phillips #00 screwdriver.
-
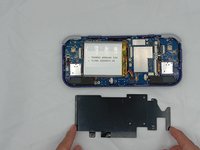
Lift off the metal plate.
-
-
-
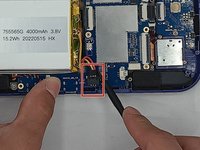
Use a plastic opening tool or spudger to unclip the battery connector.
-
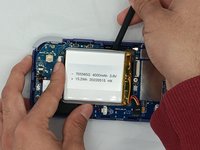
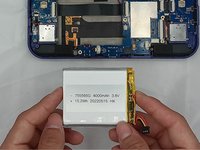
Carefully lift the battery from the case.
-
Lift and remove the battery.
-
-
-
-
-
-
Remove the three 4.5 mm screws with a Phillips #00 screwdriver on the main board.
-
-
-
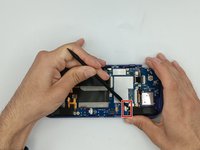
Using a spudger, put the tip under the aerial connecter and rotate upwards to unclip the plug.
-
-
-
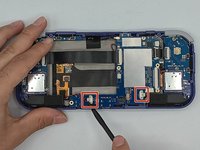
Use a spudger to disconnect the two speaker cables on the bottom of the board.
-
-
-
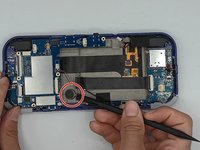
Start lifting the board to give you access to the vibration motor on the metal case.
-
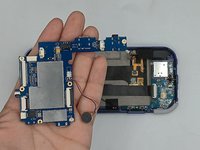
Use a spudger to carefully pry the motor free; it is bound with double-sided tape.
-
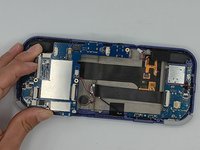
Carefully lift the board out of the device.
-
-








To reassemble your device, follow these instructions in reverse order.
Cancel: I did not complete this guide.
One other person completed this guide.

Team

University of North Texas, Team 4-7, Harold Spring 2024 Member of University of North Texas, Team 4-7, Harold Spring 2024
UNT-HAROLD-S24S4G7
4 Members
60 Guides authored
