Free Shipping on Domestic Orders $75+

This translation was generated by a machine and has not been reviewed by a person yet. Speak this language? Review it.

Restart housing installation

Prerequisite Only
This is a prerequisite-only guide! This guide is part of another procedure and isn’t meant to be used alone.
    1. Restart housing installation, Cleaning parts: step 1, image 1 of 3 Restart housing installation, Cleaning parts: step 1, image 2 of 3 Restart housing installation, Cleaning parts: step 1, image 3 of 3
      • Remove the angel hair by hand.

      • Remove the blobs using a utility knife.

      • Be careful not to cut yourself.

      • Deburr the bottom of the parts if necessary.

      Ask FixBot

      Add Comment

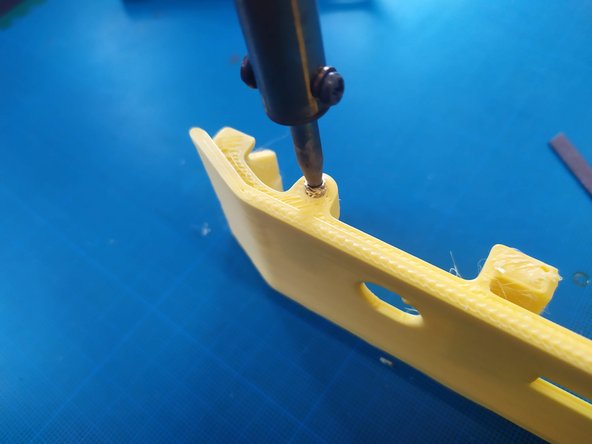
    2. Restart housing installation, Installing the inserts: step 2, image 1 of 3 Restart housing installation, Installing the inserts: step 2, image 2 of 3 Restart housing installation, Installing the inserts: step 2, image 3 of 3
      • Install the threaded inserts (see following steps for sizes).

      • Use a small flat file or any other flat tool to finish pressing the inserts in.

      • If there is plastic on the iron, please clean it with the sponge.

      Ask FixBot

      Add Comment

    3. Restart housing installation, Guide d'insertion: step 3, image 1 of 3 Restart housing installation, Guide d'insertion: step 3, image 2 of 3 Restart housing installation, Guide d'insertion: step 3, image 3 of 3
      • insérer M2

      • insérer M3S

      Ask FixBot

      Add Comment

    4. Restart housing installation, Installing parts on the lower metal plate: step 4, image 1 of 3 Restart housing installation, Installing parts on the lower metal plate: step 4, image 2 of 3 Restart housing installation, Installing parts on the lower metal plate: step 4, image 3 of 3
      • Clip the rear blocks in place.

      • Add a drop of threadlocker.

      • Drive a short M3 Torx screw.

      • Repeat the green points for the front frame.

      Ask FixBot

      Add Comment

    5. Restart housing installation, Installing parts on the lower metal plate (continued): step 5, image 1 of 2 Restart housing installation, Installing parts on the lower metal plate (continued): step 5, image 2 of 2
      • Repeat the previous step for the inner screws.

      • The inner screws are long M3 Torx screws.

      Ask FixBot

      Add Comment

    6. Restart housing installation, Adding the button: step 6, image 1 of 2 Restart housing installation, Adding the button: step 6, image 2 of 2
      • Aim for the button.

      • The seal must be inside the case; this acts like a locking nut.

      Ask FixBot

      Add Comment

Finish Line

Cancel: I did not complete this guide.

Modixia

Member since: 07/01/24

1,954 Reputation

9 Guides authored

0 Guide Comments

Add Comment

View Statistics:

Past 24 Hours: 0

Past 7 Days: 1

Past 30 Days: 8

All Time: 94