This translation was generated by a machine and has not been reviewed by a person yet. Speak this language? Review it.
Introduction
In this guide, you will learn how to easily replace a defective display panel.
Especially after a severe drop, the display can be damaged even if it appears to be intact.
You should first use an external monitor to check if the laptop is functioning and rule out other sources of error before you start repairing the panel.
What you need
-
-
-
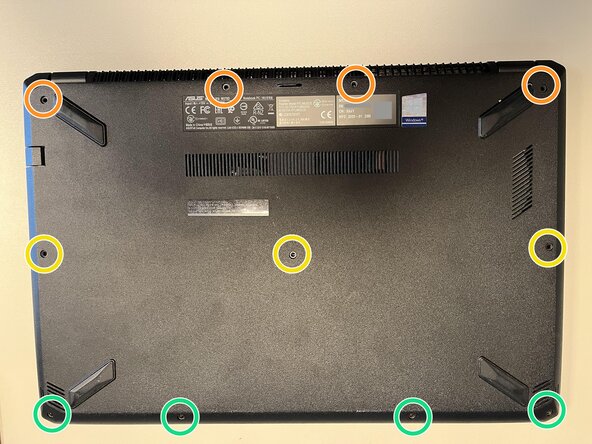
Close the laptop, place it on its lid, and align it as shown in the image
-
There are three different screw lengths:
-
4 x PH1 12 mm (orange)
-
3 x PH1 10 mm (yellow)
-
4 x PH1 7 mm (green)
-
The screws must be reinstalled in the correct position later, otherwise something can be damaged.
-
Take out the screws and sort them by length.
 Ask FixBot
-
-
-
Turn the device over and open it.
-
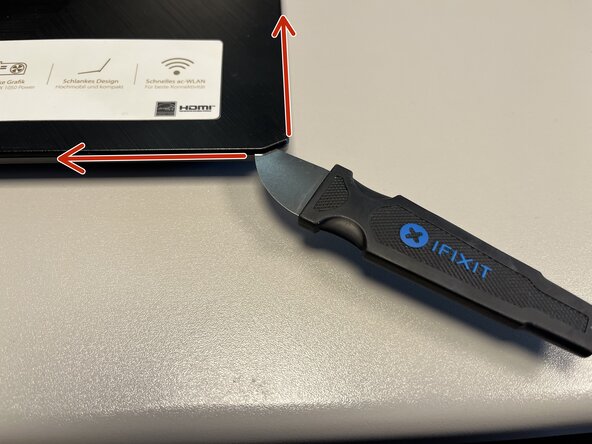
Carefully insert the Jimmy into the gap between the case and the keyboard at the lower right corner of the keyboard.
-
From this position, work your way forward by levering alternately to the left and up until the keyboard is loose on the case.
-
-
-
There are 4 cables that must be removed!
-
Carefully open the keyboard under the touchpad, move it in the direction of the screen.
-
Use the spudger to lift the black lock on the ribbon cable and carefully pull out the cable. Repeat this for each one of the four ribbon cables.
-
-
-
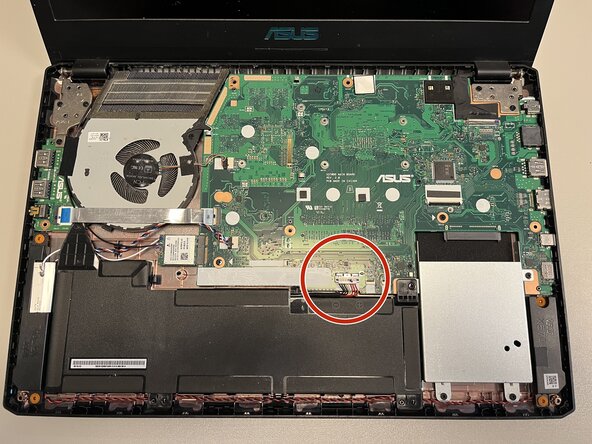
Locate the battery connector.
-
Carefully slide the metal clip (marked blue in the picture) upwards to unlock the connector.
-
Use the spudger to lift the white connector upwards.
-
-
-
-
-
-
Carefully remove the covers using tweezers.
-
Remove the two screws. PH1 - 4 mm.
-
-
-
Place the device opened on its lid!
-
Use the Jimmy to carefully insert it into the gap in the right corner and pry open the bezel in a counter-clockwise direction.
-
-
-
The bezel is still held to the hinges by its curved shape.
-
Carefully move it and lift it upwards to remove it.
-
-
-
Use the tweezers to carefully pull the adhesive strips off the panel's mounting clips.
-
-
-
Use tweezers to release the adhesive label.
-
Pull the connector upward to disconnect it.
-
-
-
Connect the panel.
-
Secure it with the 4 screws.
-
Plug in the keyboard and boot the system to check if the panel is properly connected.
-
If it is not working, check the connector.
-
If it is working, remove the protective film.
-
The display cable must be correctly positioned in its guide, otherwise the bezel will not sit flush.
-
-




Follow the steps in reverse order to reassemble your device.
Cancel: I did not complete this guide.
One other person completed this guide.

