
Replacing Sega Dreamcast Power Block (Power Supply)

What you need

  1. Replacing Sega Dreamcast Power Block (Power Supply), Expansion Bay: step 1, image 1 of 2 Replacing Sega Dreamcast Power Block (Power Supply), Expansion Bay: step 1, image 2 of 2
    • Verify that the console is disconnected from the AC outlet before you begin.

    • Flip the console over on its back.

    • Take note of your model number, in case replacement parts are needed.

  2. Replacing Sega Dreamcast Power Block (Power Supply): step 2, image 1 of 3 Replacing Sega Dreamcast Power Block (Power Supply): step 2, image 2 of 3 Replacing Sega Dreamcast Power Block (Power Supply): step 2, image 3 of 3
    • Remove the expansion bay by applying pressure to the small clip on the expansion bay while prying it away from the console.

  3. Replacing Sega Dreamcast Power Block (Power Supply), Top Cover: step 3, image 1 of 1
    • Locate and remove all four black 12mm Phillips #02 screws from the underside of the console.

    • Note: Remove the expansion bay to locate the fourth screw

  4. Replacing Sega Dreamcast Power Block (Power Supply): step 4, image 1 of 1
    • Internal components can be loose. Be careful that they do not fall out when removing the cover.

    • Turn the console right side up.

    • Remove the top cover by gently lifting the upper portion of the console.

  5. Replacing Sega Dreamcast Power Block (Power Supply), Power Block (Power Supply): step 5, image 1 of 2 Replacing Sega Dreamcast Power Block (Power Supply), Power Block (Power Supply): step 5, image 2 of 2
    • Verify that the console is disconnected from the AC outlet before you begin. If you have just powered off the system, give the capacitors a few minutes to discharge before you begin working.

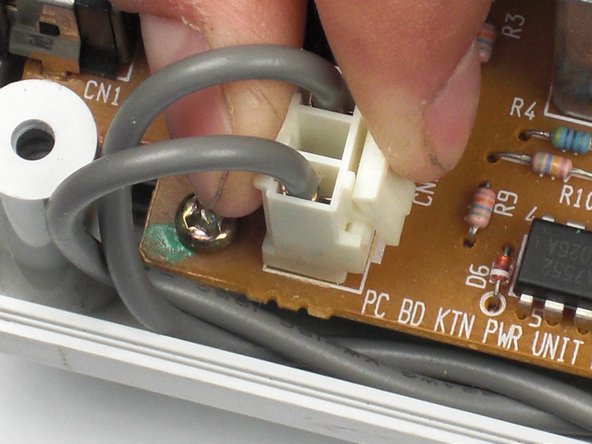
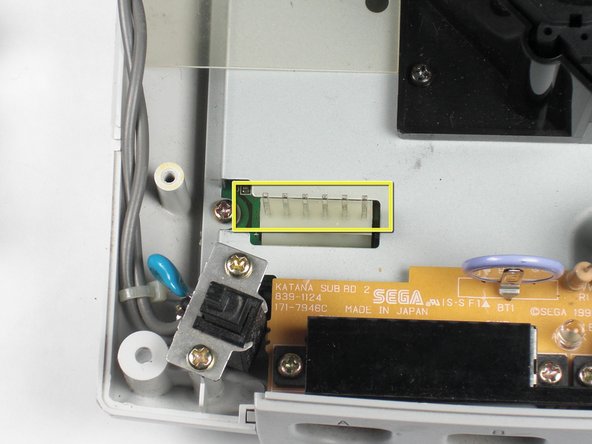
    • Remove the white female pin header by clamping the clip and pulling it up gently from the power board.

  6. Replacing Sega Dreamcast Power Block (Power Supply): step 6, image 1 of 1
    • Remove the two 10mm Philips #02 screws that are fastened to the power block.

  7. Replacing Sega Dreamcast Power Block (Power Supply): step 7, image 1 of 2 Replacing Sega Dreamcast Power Block (Power Supply): step 7, image 2 of 2
    • Do not bend the male pin header between the mounted head when you remove the power supply from the chassis.

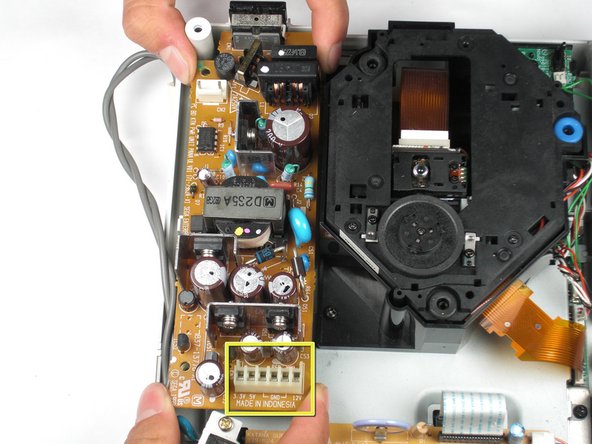
    • Remove the power board by using both hands to gently lift the power board away from the console.

  8. Replacing Sega Dreamcast Power Block (Power Supply): step 8, image 1 of 1
    • Remove the clear plastic film that is tucked between the power supply and the chassis.

wkwong

Member since: 11/14/09

529 Reputation

5 Guides authored

Team

Cal Poly, Team 5-1, Regan Fall 2009 Member of Cal Poly, Team 5-1, Regan Fall 2009

CPSU-REGAN-F09S5G1

5 Members

21 Guides authored

View Statistics:

Past 24 Hours: 1

Past 7 Days: 30

Past 30 Days: 88

All Time: 16,275