
Replacement of Panasonic Toughbook CF-19 Hard Disk / SSD

    • Hard disk or Solid-State Drive (SSD) would be installed depending on the CF-19 model.

    • Ensure the electrical power is totally off prior to perform the replacement procedure.

    • If you proceed without turning off the electrical power for the laptop, you may lose unsaved information/data.

  1. Replacement of Panasonic Toughbook CF-19 Hard Disk / SSD, Opening Hard Disk/SSD comartment: step 2, image 1 of 3 Replacement of Panasonic Toughbook CF-19 Hard Disk / SSD, Opening Hard Disk/SSD comartment: step 2, image 2 of 3 Replacement of Panasonic Toughbook CF-19 Hard Disk / SSD, Opening Hard Disk/SSD comartment: step 2, image 3 of 3
    • Locate Hard Disk/SSD compartment door and locking latch.

    • Slide the locking latch to the right side.

    • With the locking latch is fully slid to the right side, slide it downward to unlock.

    • Pull the compartment door and it will be opened.

    • Opened laptop screen would make opening compartment door more easier.

  2. Replacement of Panasonic Toughbook CF-19 Hard Disk / SSD, Removal of the Hard Disk Caddy: step 3, image 1 of 1
    • Hard Disk/SSD for CF-19 is installed inside of the 'caddy', a housing for a disk. This procedure removes caddy assembly from the laptop.

    • With the compartment door fully opened, check the inside of the compartment.

    • Locate the caddy and small plastic handle on it.

    • Hold the small plastic handle and pull it out to remove the caddy assembly from the laptop. Applying small amount force would be required.

  3. Replacement of Panasonic Toughbook CF-19 Hard Disk / SSD, Disassembly of the caddy 1): step 4, image 1 of 3 Replacement of Panasonic Toughbook CF-19 Hard Disk / SSD, Disassembly of the caddy 1): step 4, image 2 of 3 Replacement of Panasonic Toughbook CF-19 Hard Disk / SSD, Disassembly of the caddy 1): step 4, image 3 of 3
    • Visually check the exterior condition of the caddy.

    • The caddy is consist of metal and plastic material. Electrical connector is located backside of the caddy, lower side.

    • Locate the locking latch on the right and left side of the caddy compartment. Two (2) latches are on each side, totally four (4) latches are on the caddy.

    • Unlock the latches by smoothly push the plastic part of the caddy.

    • There is a small sticker near the small handle. This sticker holds separated two parts of the caddy to prevent they are fully separated. It is recommended you to provide care to this sticker, although the damage would not affect the functionality of the caddy.

    • Flip the caddy once you unlocked the all four (4) latches.

    • Pull the metal cover of the caddy upwards to open it.

  4. Replacement of Panasonic Toughbook CF-19 Hard Disk / SSD, Disassembly of the caddy 2): step 5, image 1 of 2 Replacement of Panasonic Toughbook CF-19 Hard Disk / SSD, Disassembly of the caddy 2): step 5, image 2 of 2
    • There are soft cushions to absorb physical impact, and heater mat (printed circuit) to maintain hard disk/SSDs' operating temperature. Use caution when perform the task. Failure to comply may result in damage to cushion/circuit and this will lead to degrade/lost of cold and impact resistance.

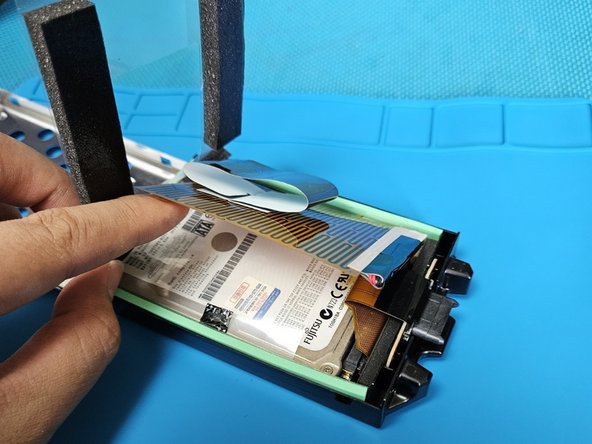
    • Move the transparent plastic film at the top layer.

    • Move the Flat Printed Circuit (FPC) upwards. You may see the hard disk/SSD under the transparent film.

    • Use caution when you move the FPC upwards. Failure to comply may result in damage to the red/black wires connected to the FPC.

    • Raise the last layer of the transparent film to the hard disk is totally exposed.

  5. Replacement of Panasonic Toughbook CF-19 Hard Disk / SSD, Disassembly of the caddy 3): step 6, image 1 of 2 Replacement of Panasonic Toughbook CF-19 Hard Disk / SSD, Disassembly of the caddy 3): step 6, image 2 of 2
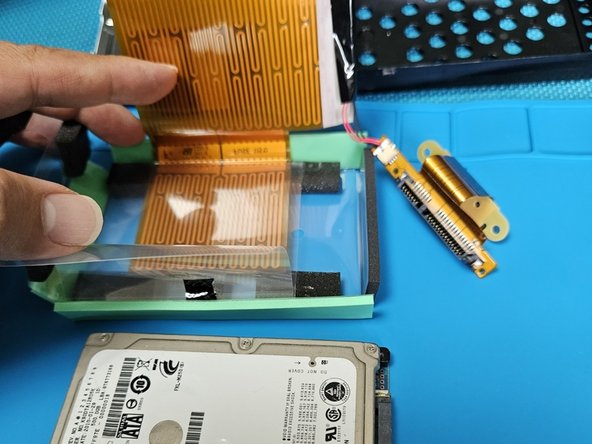
    • Pull out the SATA connector routed to the hard disk/SSD. Pulling out the connector upwards to remove it.

    • Pull out the transparent film at the top layer upwards. Put singers into the small gap between caddy and cushon/films.

    • Ensure the SATA connector moves freely. Failure to comply may result in damage to the connector.

    • Disconnect the connector from the hard disk/SSD.

  6. Replacement of Panasonic Toughbook CF-19 Hard Disk / SSD, Prepare the replacement HDD/SSD.: step 7, image 1 of 1
    • Get the replacement HDD/SDD ready. Ensure there is no foreign objects on the electrical connectors.

    • CF-19 supports HDD/SSD with 2.5" dimension, SATA interface.

  7. Replacement of Panasonic Toughbook CF-19 Hard Disk / SSD, Installation of the replacement HDD/SSD: step 8, image 1 of 3 Replacement of Panasonic Toughbook CF-19 Hard Disk / SSD, Installation of the replacement HDD/SSD: step 8, image 2 of 3 Replacement of Panasonic Toughbook CF-19 Hard Disk / SSD, Installation of the replacement HDD/SSD: step 8, image 3 of 3
    • Put the replacement HDD/SSD into the caddy components.

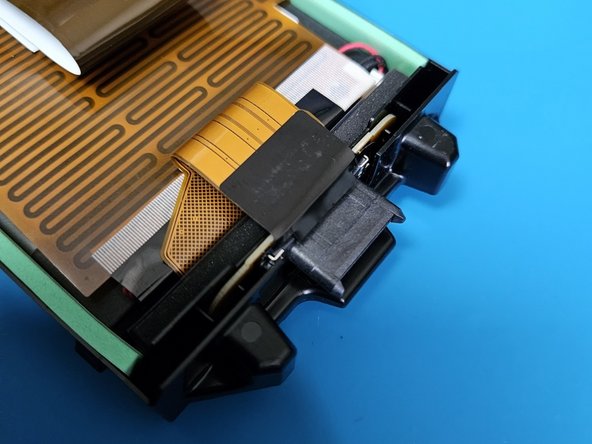
    • Connect the SATA connector. Connector shall be located inside of the black sponge cushion.

    • Restore the layers of the protective film and heater mat. Transparent film - Heater Mat - Transparent film.

  8. Replacement of Panasonic Toughbook CF-19 Hard Disk / SSD, Reassembly of the Caddy: step 9, image 1 of 3 Replacement of Panasonic Toughbook CF-19 Hard Disk / SSD, Reassembly of the Caddy: step 9, image 2 of 3 Replacement of Panasonic Toughbook CF-19 Hard Disk / SSD, Reassembly of the Caddy: step 9, image 3 of 3
    • Put the caddy components with the HDD/SSD into the caddy.

    • Once the components are sit into the caddy, install the connector. There is a guide structure for connector, inside of the caddy rim.

    • Close the metal cover for the caddy.

    • Reinstall the completed caddy onto the CF-19 laptop.

Conclusion

To reassemble the device, follow the instructions in reverse order.

Special thanks to these translators:

ko en

100%

김또임 is helping us fix the world! Want to contribute?
Start translating ›

김또임

Member since: 07/05/23

1,175 Reputation

3 Guides authored

0 Comments

Add Comment

View Statistics:

Past 24 Hours: 4

Past 7 Days: 21

Past 30 Days: 56

All Time: 459