Introduction
When the master vacuum switch on your door lock system begins to leak it can prevent the lock side, the unlock side, or even both sides from properly functioning. You can replace it with a new part but it is fairly expensive for such a simple device.
To that end, this guide will help you to attempt a repair before springing for the replacement part.
Guide credit goes to Nick K., a helpful member over on the BenzWorld forums. He graciously agreed to provide the content for this guide.
What you need
-
-
To begin you will need to remove your door panel. For help with this process see the door panel removal guide.
-
Then you will need to remove the master door lock switch from the car. After following the steps in the vacuum door lock system diagnosis technique guide to unbolt the switch from the door and disconnect it from the lock mechanism simply pull the three vacuum lines, making note of where the red, green, and solid yellow lines attach.
-
-
-
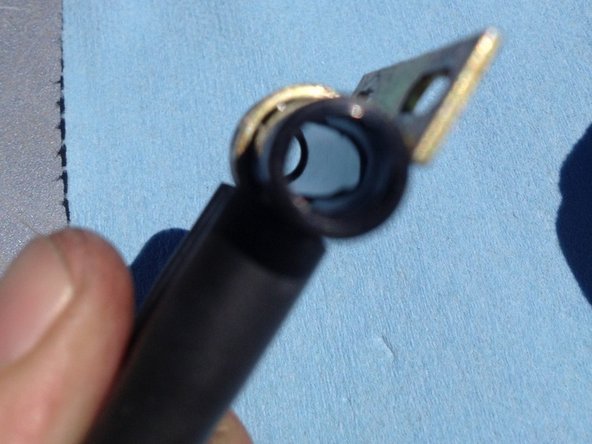
Shown is the vacuum switch removed from the door, with the flexible rubber vacuum connectors still attached. The rubber vacuum connectors may also be left on the plastic hard lines in the door, its your choice.
-
-
-
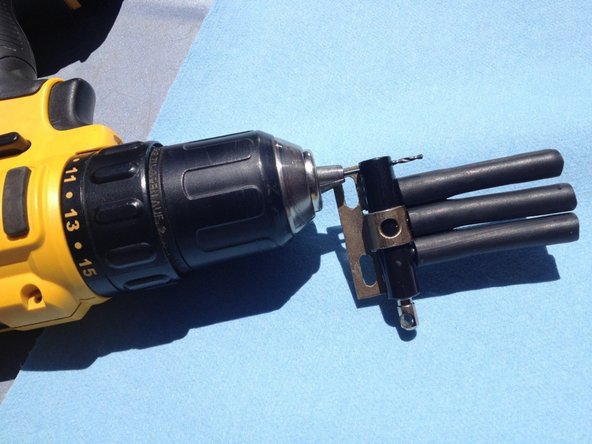
The metal shaft of the lock switch needs to be removed. To remove the shaft, drill in to the back of the switch body with a 5/16" drill bit.
-
Be sure to drill as centered on the body as possible and as straight as possible. Go slowly and be careful to stop drilling after you have gotten through the plastic body of the switch. To help avoid damaging the piston shaft pull it as far out as possible away from the area to be drilled.
-
-
-
-
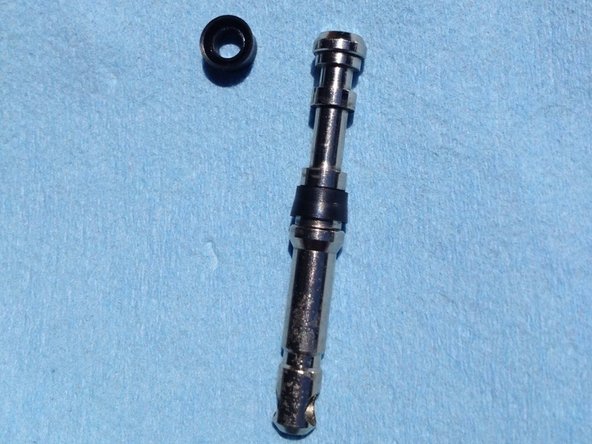
Once the back of the switch is drilled out the piston shaft can be removed.
-
The switch body is otherwise hollow.
-
The black rubber seals you can see on the switch are what seal that piston inside the switch body.
-
-
-
Inspect the shaft closely. As you can see here there is sufficient dirt and other contaminants to prevent a good seal, hence the leak.
-
Clean the piston shaft, then carefully remove the two rubber seals with a small flat blade screw driver or pick to clean underneath.
-
Re-install the seals on the shaft.
-
Lubricate the shaft with a silicone grease that is safe on rubber.
-
-
-
Re-insert the piston shaft in the body of the switch.
-
Use a drill with a 1/16" bit to drill a small hole from top through to the bottom of the switch body at the very back of the body, on the opposite side of the piston shaft.
-
-
-
Cut a small section of wire, smaller than 1/16" in diameter, and insert it in the hole you just drilled at the back of the switch body.
-
Bend the top and bottom of this wire so it stays in the opening.
-
This will keep the shaft inside the body. Keep in mind that it's OK to leave the back of the switch open; the two rubber seals on the shaft are what retain the vacuum inside the switch.
-
An alternative would be to find a cotter pin of suitable size to fit in this hole.
-


Team
