Free Shipping on Domestic Orders $75+

This translation may not reflect the most recent updates from the source guide. Help update the translation or view the source guide.

Repair straightener ghd - Replace thermal fuse ghd

What you need

Video Overview

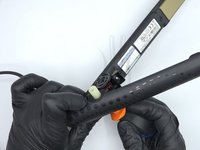
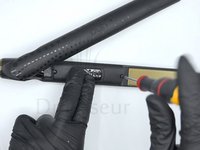
  1. Repair straightener ghd - Replace thermal fuse ghd, remove the round covers: step 1, image 1 of 2 Repair straightener ghd - Replace thermal fuse ghd, remove the round covers: step 1, image 2 of 2
    • Lightly lift the round covers using your finger to create a small opening.

    • Insert a thin flat screwdriver, or a lever if you have one in this opening.

    • Lift by trial and error to avoid breaking the teeth of these covers which are fragile. If they break, don't panic, you can glue them.

    Ask FixBot

    Add Comment

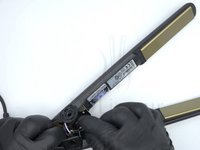
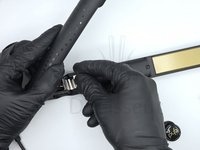
  2. Repair straightener ghd - Replace thermal fuse ghd, Remove the straightener axle screw: step 2, image 1 of 3 Repair straightener ghd - Replace thermal fuse ghd, Remove the straightener axle screw: step 2, image 2 of 3 Repair straightener ghd - Replace thermal fuse ghd, Remove the straightener axle screw: step 2, image 3 of 3
    • Sometimes these screws are mounted with screw glue. It is best to have two screwdrivers, including a small one for better control.

    • Start by unscrewing the screw by having the first screwdriver fixed on one side, and the other unscrewing on the other side.

    • screw it out, push the shaft and take it out.

    Ask FixBot

    Add Comment

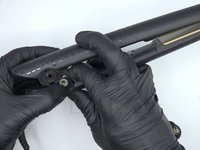
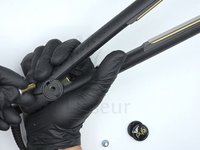
  3. Repair straightener ghd - Replace thermal fuse ghd, Remove the plastic pin and the spring.: step 3, image 1 of 2 Repair straightener ghd - Replace thermal fuse ghd, Remove the plastic pin and the spring.: step 3, image 2 of 2
    • Push the plastic axle with your screwdriver and take it out.

    • Remove the spring.

    Ask FixBot

    Add Comment

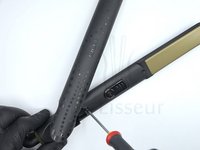
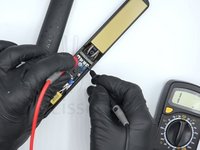
  4. Repair straightener ghd - Replace thermal fuse ghd, Unmount cache from branch and test: step 4, image 1 of 2 Repair straightener ghd - Replace thermal fuse ghd, Unmount cache from branch and test: step 4, image 2 of 2
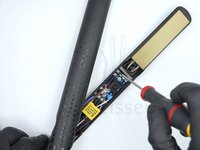
    • Remove the two screws from the button side cover.

    • Remove the cover equipped with the button.

    • The electronic card is now accessible. You can test the thermal fuse if you wish.

    Ask FixBot

    Add Comment

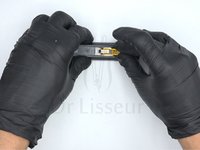
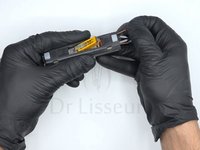
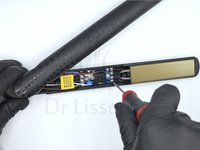
  5. Repair straightener ghd - Replace thermal fuse ghd, Removal of the HS fuse: step 5, image 1 of 3 Repair straightener ghd - Replace thermal fuse ghd, Removal of the HS fuse: step 5, image 2 of 3 Repair straightener ghd - Replace thermal fuse ghd, Removal of the HS fuse: step 5, image 3 of 3
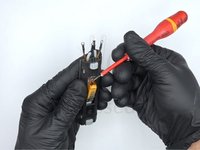
    • Unscrew the 4 screws that hold the plate to the electronic board.

    • The thermal fuse is now accessible.

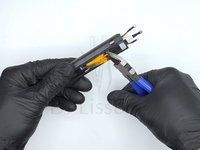
    • To remove the HS fuse, slightly pull out its cables as shown in the photo.

    • Using small pliers, scissors or nail clippers, cut the two cables.

    • You can now easily pull out the fuse head and cables on the other side.

    Ask FixBot

    Add Comment

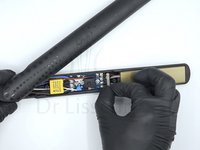
  6. Repair straightener ghd - Replace thermal fuse ghd, Reassembling the new thermal fuse: step 6, image 1 of 3 Repair straightener ghd - Replace thermal fuse ghd, Reassembling the new thermal fuse: step 6, image 2 of 3 Repair straightener ghd - Replace thermal fuse ghd, Reassembling the new thermal fuse: step 6, image 3 of 3
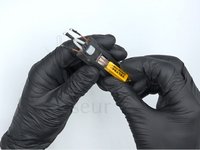
    • Insert the 2 cables of the new thermal fuse.

    • Lift the tab and insert the fuse head.

    • Pull the two cables and press on the head to firmly press the fuse against the ceramic plate.

    Ask FixBot

    Add Comment

  7. Repair straightener ghd - Replace thermal fuse ghd, Refit the plate and the cover.: step 7, image 1 of 3 Repair straightener ghd - Replace thermal fuse ghd, Refit the plate and the cover.: step 7, image 2 of 3 Repair straightener ghd - Replace thermal fuse ghd, Refit the plate and the cover.: step 7, image 3 of 3
    • Refit the plate on the electronic card using the 4 screws.

    • Do not forget to put the silicone part, which protects the electronic card against heat.

    • Refit the cover fitted with the button using the two screws.

    Ask FixBot

    Add Comment

  8. Repair straightener ghd - Replace thermal fuse ghd, Test run: step 8, image 1 of 1
    • Connect the straightener cable

    • You can now test the operation.

    • If you have a thermometer, the temperature should be between 180°C and 190°C. If you don't have one, turn on the straightener and let it heat up for 5 minutes to make sure everything is okay.

    Ask FixBot

    Add Comment

  9. Repair straightener ghd - Replace thermal fuse ghd, Final assembly: step 9, image 1 of 3 Repair straightener ghd - Replace thermal fuse ghd, Final assembly: step 9, image 2 of 3 Repair straightener ghd - Replace thermal fuse ghd, Final assembly: step 9, image 3 of 3
    • You can now reassemble everything:

    • First the spring, then the plastic axle, then the metal axle and finally the screws/washer and covers.

    Ask FixBot

    Add Comment

Conclusion

To reassemble your device, follow the steps in reverse order.

Cancel: I did not complete this guide.

6 other people completed this guide.

Special thanks to these translators:

fr en

59%

These translators are helping us fix the world! Want to contribute?
Start translating ›

Dr-lisseur.com

Member since: 07/14/22

201 Reputation

1 Guide authored

1 Guide Comment

Bonjour j'ai un lisseur GHD le model est 4.2B , je l'ai brancher j'ai entendu 2 bip et plus rien , pensez-vous que c'est le fuisible qui est HS ? Cordialement

Laurent - Reply Share

Add Comment

View Statistics:

Past 24 Hours: 5

Past 7 Days: 29

Past 30 Days: 214

All Time: 20,554