Free Shipping on Domestic Orders $75+

Remove Nintendo GameCube Optical Drive Assembly

Prerequisite Only
This is a prerequisite-only guide! This guide is part of another procedure and isn’t meant to be used alone.

What you need

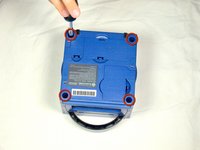
    1. Remove Nintendo GameCube Optical Drive Assembly, Top Case: step 1, image 1 of 3 Remove Nintendo GameCube Optical Drive Assembly, Top Case: step 1, image 2 of 3 Remove Nintendo GameCube Optical Drive Assembly, Top Case: step 1, image 3 of 3
      • Turn over the Gamecube so that the bottom side is facing up.

      • Use the 4.5 mm Gamebit screwdriver to remove all four screws.

      Ask FixBot

      Add Comment

    2. Remove Nintendo GameCube Optical Drive Assembly: step 2, image 1 of 3 Remove Nintendo GameCube Optical Drive Assembly: step 2, image 2 of 3 Remove Nintendo GameCube Optical Drive Assembly: step 2, image 3 of 3
      • With the bottom side of the GameCube facing upward and the screws removed, carefully pull the outer shell of the unit away from the top half.

      • Move the GameCube so that the inside is facing upwards.

      Ask FixBot

      Add Comment

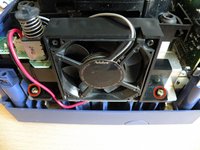
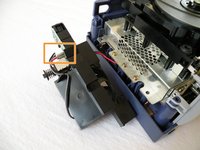
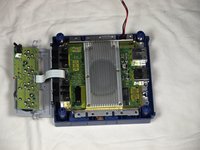
    1. Remove Nintendo GameCube Optical Drive Assembly, Remove Nintendo GameCube Optical Drive Assembly: step 3, image 1 of 2 Remove Nintendo GameCube Optical Drive Assembly, Remove Nintendo GameCube Optical Drive Assembly: step 3, image 2 of 2
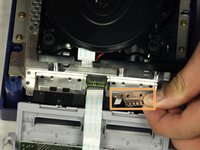
      • The left side of the unit contains the cooling fan and its housing.

      • Carefully remove the two screws attaching the cooling fan housing to the unit.

      • Do not detach the red and black cooling fan wire from the main unit. Boxed in orange.

      Ask FixBot

      Add Comment

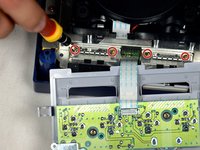
    2. Remove Nintendo GameCube Optical Drive Assembly: step 4, image 1 of 2 Remove Nintendo GameCube Optical Drive Assembly: step 4, image 2 of 2
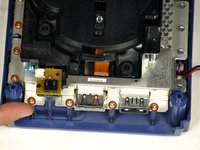
      • Remove the four Phillips #1 screws retaining the ground springs.

      • Carefully remove the ground springs from the main unit.

      Ask FixBot

      Add Comment

    3. Remove Nintendo GameCube Optical Drive Assembly: step 5, image 1 of 2 Remove Nintendo GameCube Optical Drive Assembly: step 5, image 2 of 2
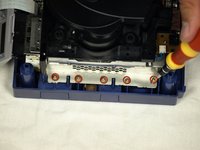
      • The optical drive is secured to a metal plate.

      • Using a Phillips #2 screwdriver, unscrew the twelve screws that are around the outer edge of the optical drive.

      Ask FixBot

      Add Comment

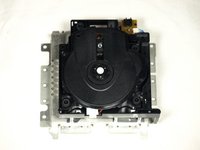
    4. Remove Nintendo GameCube Optical Drive Assembly, Remove the assembly: step 6, image 1 of 3 Remove Nintendo GameCube Optical Drive Assembly, Remove the assembly: step 6, image 2 of 3 Remove Nintendo GameCube Optical Drive Assembly, Remove the assembly: step 6, image 3 of 3
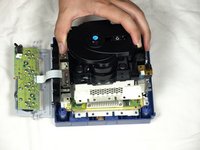
      • Carefully separate the optical drive assembly from the rest of the GameCube unit.

      • The optical drive assembly is secured to the motherboard underneath by a slot; some force may be required to carefully free the assembly.

      • The metal plate and the actual optical drive will remain attached.

      Ask FixBot

      Add Comment

Conclusion

To reassemble your device, follow these instructions in reverse order.

Cancel: I did not complete this guide.

dcarlin

Member since: 11/05/09

399 Reputation

4 Guides authored

Team

Cal Poly, Team 6-2, Maness Fall 2009 Member of Cal Poly, Team 6-2, Maness Fall 2009

CPSU-MANESS-F09S6G2

4 Members

96 Guides authored

0 Guide Comments

Add Comment

View Statistics:

Past 24 Hours: 1

Past 7 Days: 5

Past 30 Days: 28

All Time: 4,904