Introduction
This is a guide for accessing the internal workings of the camera. Before following these instructions make sure the proper replacement parts are available.
What you need
-
-
-
-
Remove this final screw from the memory card compartment.
-
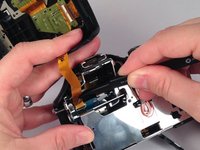
Remove the chassis by pulling the back cover away from the camera.
-
-
-
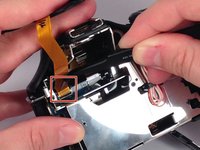
Gently but forcefully lift up on the parallel cable connecting the two halves of the camera.
-


Cancel: I did not complete this guide.
4 other people completed this guide.

Team

USF Tampa, Team 4-4, Meier Fall 2015 Member of USF Tampa, Team 4-4, Meier Fall 2015
USFT-MEIER-F15S4G4
4 Members
10 Guides authored