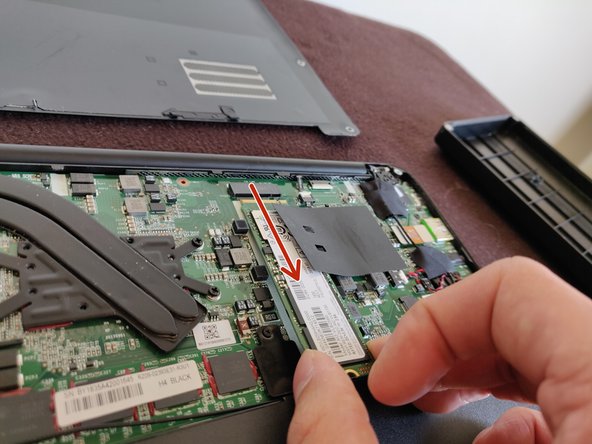
Razer Blade Stealth 2017 SSD Replacement

Archived Guide
This guide is retained solely for historical purposes. Use the updated version of the guide to perform your repair.

What you need

  1. Razer Blade Stealth 2017 SSD Replacement, SSD: step 1, image 1 of 1
    • Use a Torx T5 screwdriver to remove the eight, 3mm screws on the bottom cover of the laptop.

    • Whenever removing screws from the device, remember to save and label them.

    • Ensure the laptop is fully powered off before beginning!

  2. Razer Blade Stealth 2017 SSD Replacement: step 2, image 1 of 1
    • Remove the bottom cover of the laptop by sliding it away from the hinge.

    • Do not force the cover up!

  3. Razer Blade Stealth 2017 SSD Replacement: step 3, image 1 of 1
    • Use the Philips #00 screwdriver to remove the screw securing the SSD.

  4. Razer Blade Stealth 2017 SSD Replacement: step 4, image 1 of 1
    • Gently lift the side where you just removed the screw.

    • Do not lift the SSD too much or you might cause damage to your SSD, or your computer.

  5. Razer Blade Stealth 2017 SSD Replacement: step 5, image 1 of 1
    • Gently pull the SSD towards you to remove it

  6. Razer Blade Stealth 2017 SSD Replacement: step 6, image 1 of 2 Razer Blade Stealth 2017 SSD Replacement: step 6, image 2 of 2
    • Congratulations! You can now insert the desired SSD M.2 drive that you desire. Install it in the port you just freed.

Conclusion

To reassemble your device, do what you just did but in reverse order, and BAM, more storage.

One other person completed this guide.

Joaquin RP

Member since: 03/13/20

133 Reputation

1 Guide authored

0 Guide Comments

Add Comment

View Statistics:

Past 24 Hours: 0

Past 7 Days: 0

Past 30 Days: 0

All Time: 67