Introduction
Keys sticking on your Blackwidow Razer? There is probably food or soda underneath.
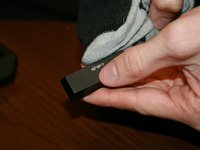
What you need
-
-
-
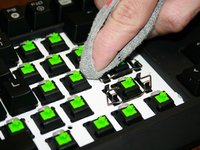
There could be food or other particulates underneath the key or on the keycap itself that may be making the key either stick or not move.
-
There could also be soda residue on the keyboard itself making the keys stick to it, make sure that it is wiped away.
-
Inspect the keyboard and the caps one last time to make sure there isn't anything left that could make the keys stick.
-
-
-
Gently pop the old or new key back into its place, ensuring that it is tight and secure.
-
Make sure that the bar that belongs to some of the keys has not popped out of place. If so pop back into place in the sockets it has underneath.
-
For the keys with a bar, slide one side into the bar and then use the metal spudger to pop the other side into place and test the keys to see if it still sticks.
-


Once the device is reassembled, test the keys to make sure they don't stick. Make sure to maintain your keys because they can start to stick again later on if not maintained.
Cancel: I did not complete this guide.
4 other people completed this guide.
Team

Western Carolina University, Team 1-5, Virtue Spring 2017 Member of Western Carolina University, Team 1-5, Virtue Spring 2017
WCU-VIRTUE-S17S1G5
4 Members
6 Guides authored