Introduction
Since its considered impossible to repair Rapoo Keyboards i tried and succeeded to at least get to the component which breaks first: The USB Connector Port
-
-
The main cause of defect with Rapoo Slimline Keyboards seems to be a faulty USB Connector Port.
-
As I couldn't find any conclusive repair instructions but several (violent) teardowns I at least had an idea of approaching a repair.
 Ask FixBot
-
-
-
Since the keayboard side is superglued (who needs sustainability when you can just buy a new one, duh) it is impossible to access the electronics from the topside.
-
The PCB and Battery compartment on the backside is screwed from the inside which makes it virtually impossible to teardown.
-
However, the screws are, well.. screwed into thin little poles which can easily be broken with enough (not too much) leverage.
-
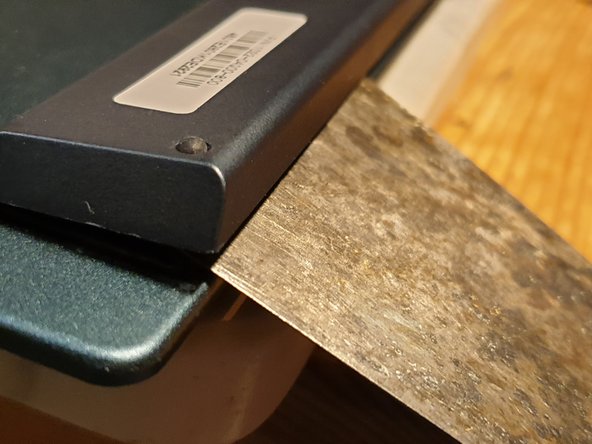
Begin with prying one corner with the thin prying tool.
-
Then slide a more sturdy wedge or in this case spatula underneath the first tool
-
-
-
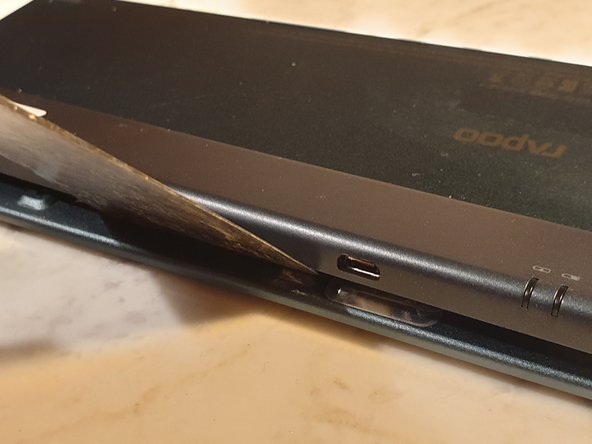
Now lay down the keyboard somewhere raised and press on the metal part so it wont bend.
-
Then youll need to wiggle in the spatula or tool of choice with an angle since the screwplate has a raised border.
-
Then slowly apply force to SLOWLY wedge the plastic plate upwards.
-
-
-
-
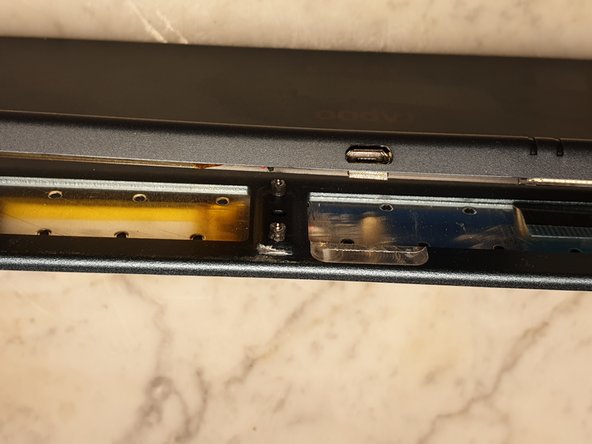
This particular Keyboard has four screws. One at each end and two in the middle.
-
Try to pop the screws at the ends first. Then the last two in the middle. Youll need to pry from each side.
-
-
-
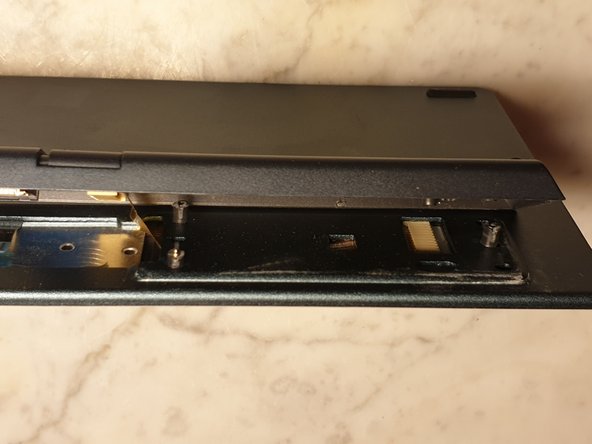
Be very careful not to yoink the cables as you pry the board.
-
Best to hold the plastic box in place when working on the last screw.
-
Open the flatcable connector by pushing its ends left and right with an flathead screwdriver or similar.
-
-
-
With this particular keyboard there is another flatcable lingering in the darkness.
-
You can try to pull it but youll need excessive force to do so plus it will be very difficult to get it back inside once youll reassemble.
-
-
-
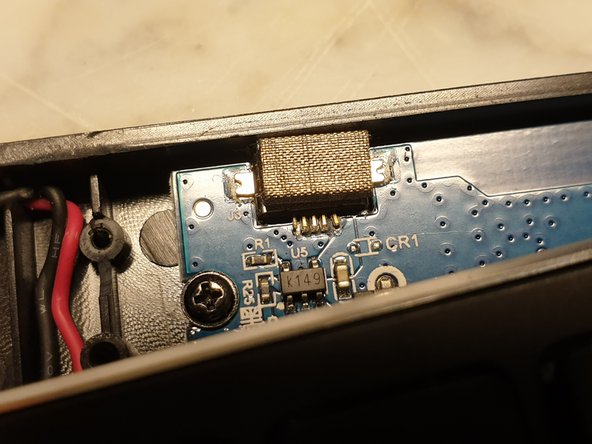
Carefully rotate the keyboard ever so slightly to get access to the faulty USB Port.
-
And there we have it, that pesky little bugger. Now resolder and reassemble and you're good to go.
-
This bigger keyboard has two hooks at the inside of the plastic compartment so you can just snap it back in place.
-
With keyboards that don't have such hooks you might need to tape or superglue the parts back together.
-
Congratulations, you have (hopefully) successfully repaired the USB Port.
-


![Rapoo E6700 Keyboard Connector Port Repair, [OPTIONAL] more cables!: step 6, image 1 of 1](https://guide-images.cdn.ifixit.com/igi/MUBM5k3ILlPOLEdV.medium)


Cancel: I did not complete this guide.
One other person completed this guide.

3 Guide Comments
Thanks, I have the same keyboard and the same micro-USB problem. I used a flat screwdriver to remove the PCB cover (breaking all the screws), removed both cables, soldered it, and with a lot of patience and with small pliers I was able to re-insert both cables. Now I’m just not sure how to glue the cover on again
Cheap SMIC is not made for repairing, throw it away and buy a new to make the Chinese company richer.