
RX 480 Disassembly, cleaning and thermal paste replacement

What you need

  1. RX 480 Disassembly, cleaning and thermal paste replacement, Large view of the RX480: step 1, image 1 of 1
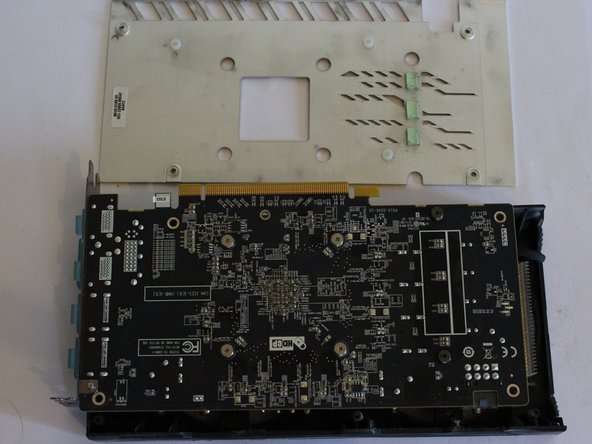
    • This graphic card is really dirty, so this tutorial will show you how you can clean it and change the thermal paste

    • WARM UP THE CARD BEFORE THE TEARDOWN. IF THE CARD IS COLD THE THERMAL PADS MAY BREAK AND YOU WILL HAVE TO REPLACE THEM

    • Simply launch a game for a while or run a graphics benchmark to heat up the card.

  2. RX 480 Disassembly, cleaning and thermal paste replacement, Remove the fans: step 2, image 1 of 3 RX 480 Disassembly, cleaning and thermal paste replacement, Remove the fans: step 2, image 2 of 3 RX 480 Disassembly, cleaning and thermal paste replacement, Remove the fans: step 2, image 3 of 3
    • Standard philips screw

    • Once the screws are removed, simply pull the fan up, they have no cables.

  3. RX 480 Disassembly, cleaning and thermal paste replacement, Remove the backplate / front plate screws: step 3, image 1 of 2 RX 480 Disassembly, cleaning and thermal paste replacement, Remove the backplate / front plate screws: step 3, image 2 of 2
    • Standard Philips screw, be careful as they are not the same length.

  4. RX 480 Disassembly, cleaning and thermal paste replacement, Remove the plastic panel: step 4, image 1 of 1
    • Be very gentle, you don't want to break the fan power system. You can use your nails if you're not getting it out with a tool, some twist left/right make the job DO NOT PULL FROM THE CABLE ITSELF!

  5. RX 480 Disassembly, cleaning and thermal paste replacement, Clean the radiator: step 5, image 1 of 3 RX 480 Disassembly, cleaning and thermal paste replacement, Clean the radiator: step 5, image 2 of 3 RX 480 Disassembly, cleaning and thermal paste replacement, Clean the radiator: step 5, image 3 of 3
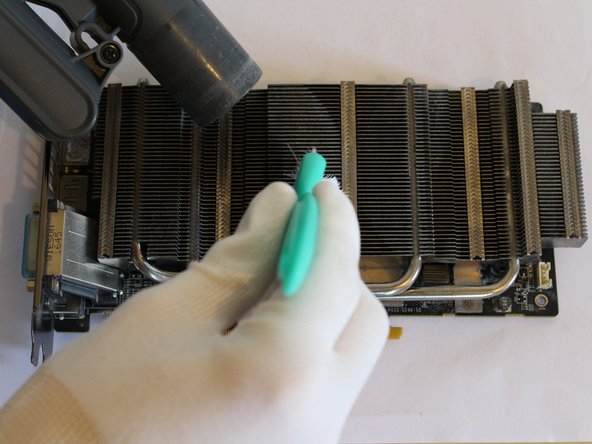
    • I personally clean the radiator using my vacuum cleaner, but you can just use a brush if you want.

  6. RX 480 Disassembly, cleaning and thermal paste replacement, Remove the radiator: step 6, image 1 of 2 RX 480 Disassembly, cleaning and thermal paste replacement, Remove the radiator: step 6, image 2 of 2
    • Standard philips screw.

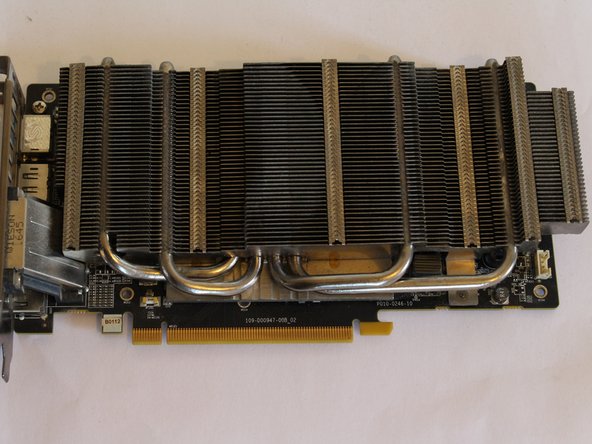
    • The radiator can feel "glued" to the card, don't hesitate to use a bit of muscle to separate them.

  7. RX 480 Disassembly, cleaning and thermal paste replacement, Clean the radiator: step 7, image 1 of 3 RX 480 Disassembly, cleaning and thermal paste replacement, Clean the radiator: step 7, image 2 of 3 RX 480 Disassembly, cleaning and thermal paste replacement, Clean the radiator: step 7, image 3 of 3
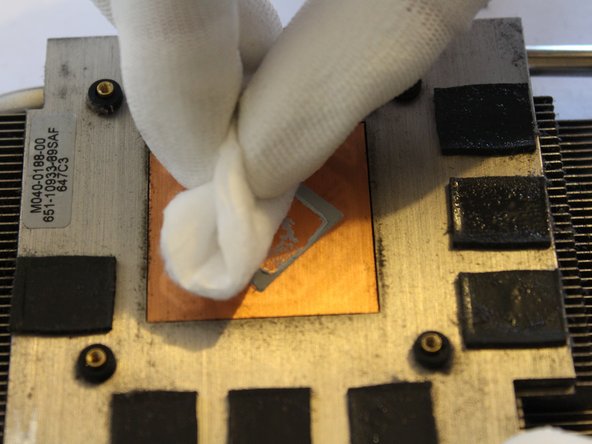
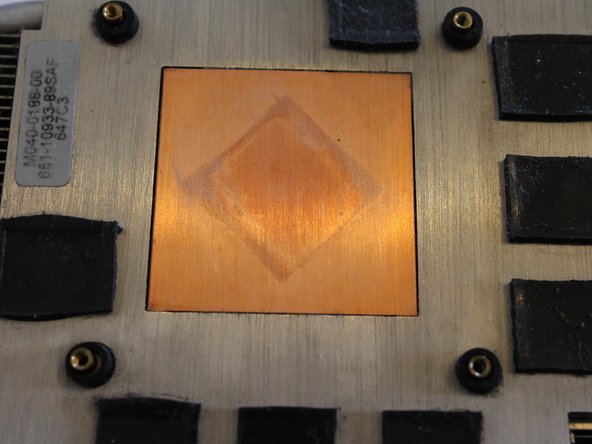
    • Put some 70-90% alcohol, wait a bit for the thermal paste to get wet, then clean with a piece of makeup cotton, repeat until you get a proper result like in the third pic.

  8. RX 480 Disassembly, cleaning and thermal paste replacement, Clean the GPU: step 8, image 1 of 1
    • Clean with a Q-tip filled with alcohol

    • Put some alcohol on the gray chip, wait for the paste to get wet and clean with cotton.

    • Don't worry, alcohol is non conductible and will not damage your card.

  9. RX 480 Disassembly, cleaning and thermal paste replacement, Apply fresh thermal paste: step 9, image 1 of 1
    • Do not hesitate to apply a bit more than me.

  10. RX 480 Disassembly, cleaning and thermal paste replacement, All the components before remounting: step 10, image 1 of 1
    • You're done! Time to reassemble.

Conclusion

To reassemble your device, follow these instructions in reverse order.

4 other people completed this guide.

Zeiko

Member since: 01/01/20

274 Reputation

1 Guide authored

One Comment

Would have loved to see a reassebmly after. But still exelent guide! 👏👏

koki michev - Reply

Add Comment

View Statistics:

Past 24 Hours: 7

Past 7 Days: 30

Past 30 Days: 115

All Time: 5,079