Introduction
Follow these steps to disassemble the plastic casing of the RIDGID R84015 X2 power drill.
What you need
-
-
-
Remove the backplate.
-
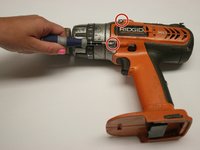
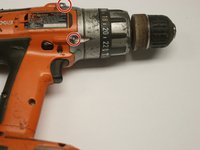
Using a Torx T20 screwdriver, remove the four screws attaching the back plate.
 Ask FixBot
-
-
-
Remove the drill handle.
-
Using the Phillips #2 screwdriver, remove the five screws attaching the drill handle to the body.
-
-
-
Remove the gear casing from the body.
-
Using the Philips #2 screwdriver, remove the four screws attaching the gear casing to the body.
-
-
-
-
-
-
With your drill taken apart, move your attention to the trigger and forward reverse switch.
-
-
-
Check to see that the forward reverse switch isn't broken.
-
NOTE: small tab on trigger fits into groove on forward reverse switch
-
-
-
With the battery attached, check that the wires work when the trigger is pulled.
-
Put multimeter wires here.
-
If wires work and drill doesn't, the problem is with the motor.
-
-




Cancel: I did not complete this guide.
2 other people completed this guide.

Team

Cal Poly, Team 15-48, Garner Spring 2010 Member of Cal Poly, Team 15-48, Garner Spring 2010
CPSU-GARNER-S10S15G48
6 Members
60 Guides authored
1 Guide Comment
I was able to diagnose and fix my problem with my black and decker following your instructions. TY
