Free Shipping on Domestic Orders $75+

Protocol Galileo Stealth Motor Replacement

What you need

    1. Protocol Galileo Stealth Motor Replacement, Propeller: step 1, image 1 of 1
      • Remove the chrome shaft cover by lightly pulling it away from the drone.

      Ask FixBot

      Add Comment

    2. Protocol Galileo Stealth Motor Replacement: step 2, image 1 of 1
      • Using a Phillips #000 screwdriver, remove the 7mm screw from the propeller stop.

      • Be sure to apply adequate pressure when removing the screw to prevent stripping it out.

      Ask FixBot

      Add Comment

    3. Protocol Galileo Stealth Motor Replacement: step 3, image 1 of 1
      • Remove the propeller stop from shaft by lightly pulling it away from the drone.

      Ask FixBot

      Add Comment

    4. Protocol Galileo Stealth Motor Replacement: step 4, image 1 of 1
      • Remove the propeller from shaft by lightly pulling it away from the drone.

      Ask FixBot

      Add Comment

    1. Protocol Galileo Stealth Motor Replacement, Housing: step 5, image 1 of 2 Protocol Galileo Stealth Motor Replacement, Housing: step 5, image 2 of 2
      • Remove the 8mm long Phillips #0 screws (24 total) from the lower housing unit.

      • Take care to place the screws in a safe place to prevent losing them.

      Ask FixBot

      Add Comment

    2. Protocol Galileo Stealth Motor Replacement: step 6, image 1 of 1
      • Separate the upper and lower housing units by lightly pulling the two housing units apart.

      Ask FixBot

      Add Comment

    1. Protocol Galileo Stealth Motor Replacement, Motor: step 7, image 1 of 2 Protocol Galileo Stealth Motor Replacement, Motor: step 7, image 2 of 2
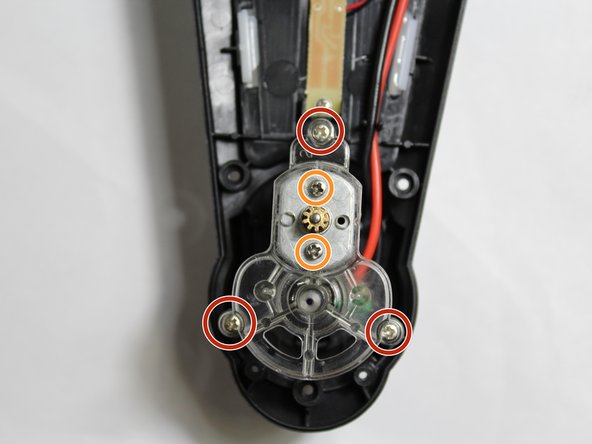
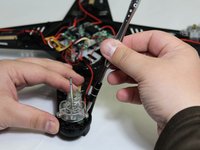
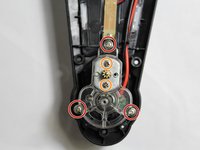
      • Remove the 3 outer 8mm long Phillips #0 screws from the lower drone housing.

      • Remove the 2 inner 3 mm long Phillips #0 screws from the drone motor.

      • Place screws in a safe place to prevent misplacing them.

      Ask FixBot

      Add Comment

    2. Protocol Galileo Stealth Motor Replacement: step 8, image 1 of 1
      • Remove the two 6mm long Phillips #0 screws from the lower motor cover located on the underside of the drone.

      • Place the screws in a safe place to prevent misplacing them.

      Ask FixBot

      Add Comment

    3. Protocol Galileo Stealth Motor Replacement: step 9, image 1 of 1
      • Remove the motor cover by lightly pulling it away from the drone.

      Ask FixBot

      Add Comment

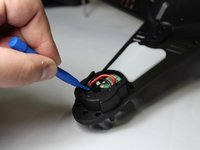
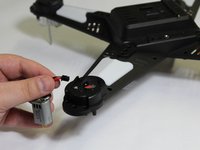
    4. Protocol Galileo Stealth Motor Replacement: step 10, image 1 of 2 Protocol Galileo Stealth Motor Replacement: step 10, image 2 of 2
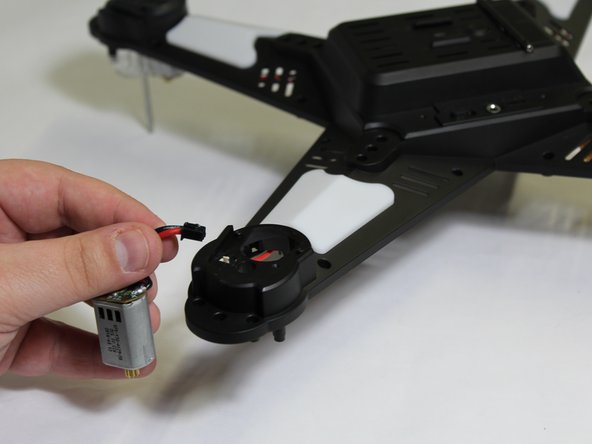
      • Unclip the wire plug by applying light pressure to the wire plug with the plastic opening tool, and remove the motor.

      • This plug can be a bit difficult to remove, but it does not require much force to remove.

      • Avoid damaging the plug and wires when unclipping wire plug.

      Ask FixBot

      Add Comment

Conclusion

To reassemble your device, follow these instructions in reverse order.

Cancel: I did not complete this guide.

2 other people completed this guide.

Matthew Selting

Member since: 02/15/18

453 Reputation

4 Guides authored

Team

UW Stout, Team S8-G4, Ogden Spring 2018 Member of UW Stout, Team S8-G4, Ogden Spring 2018

UWSTOUT-OGDEN-S18S8G4

4 Members

6 Guides authored

1 Guide Comment

Is there any way to get better fly time out of this bucket?

jeff - Reply Share

Add Comment

View Statistics:

Past 24 Hours: 0

Past 7 Days: 6

Past 30 Days: 37

All Time: 1,691