Introduction
This guide shows you how to access the USB ports on a Power Bank #2695. When plugging in a micro-USB cable to charge your power bank and lights illuminate or only a single light illuminates, or when plugging in a USB-A to charge another device and no charging takes place, the USB ports inside the power bank may have broken free. Follow this guide to see what’s wrong, make a repair, and start charging your power bank (as shown in above video).
What you need
Video Overview
-
-
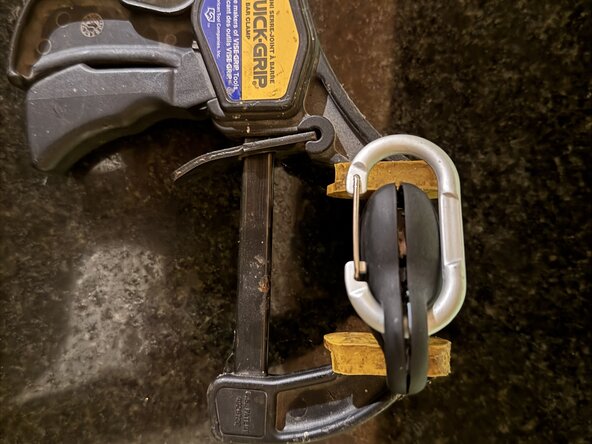
Gently squeeze the power bank with a quick grip/clamp as shown.
-
The power bank should separate under gentle force from the grip/clamp.
-
Continue to separate with your fingers or plastic pry tools.
 Ask FixBot
-
-
-
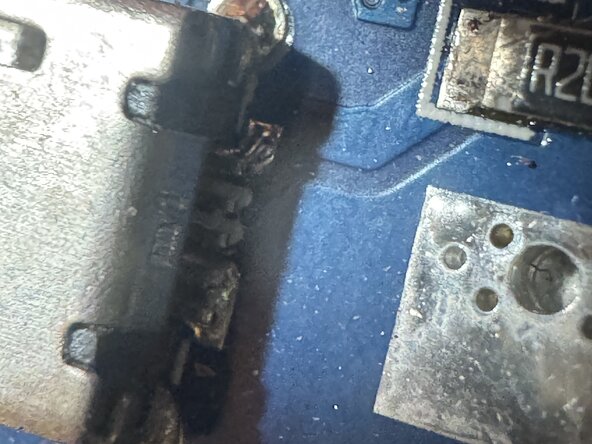
Use a 10x loupe to inspect the back side of each USB port.
-
If the pins are not in contact with the pads, they will need to be resoldered.
-
-
-
-
Apply heat to the top metal of the micro-USB port.
-
Squeeze USB port to PCB with a pair of pliers.
-
Apply fresh solder to USB pin and PCB pad.
-
Solder should wick in, allow to cool before reassembling.
-
Use a small amount of plastic compatible epoxy to seal both halves back together.
-
-
-
Use a 10x loupe to inspect the back side of each USB port.
-
If the pins are not in contact with the pads, they will need to be resoldered.
-


To reassemble your device, follow these instructions in reverse order.
