
Porter Cable 690LR Power Cord Replacement

What you need

  1. Porter Cable 690LR Power Cord Replacement, Power Switch: step 1, image 1 of 2 Porter Cable 690LR Power Cord Replacement, Power Switch: step 1, image 2 of 2
    • Use a Torx screwdriver to unscrew the 25.4 mm screws found at the top of the model.

  2. Porter Cable 690LR Power Cord Replacement: step 2, image 1 of 2 Porter Cable 690LR Power Cord Replacement: step 2, image 2 of 2
    • Remove the top by gently lifting the cover from router body.

    • Be careful when pulling the top from its place; wires connect the switch to the electrical cord and could be pulled loose or damaged.

  3. Porter Cable 690LR Power Cord Replacement: step 3, image 1 of 1
    • Use a spudger to pull off the plastic covering of the power switch.

    • Don’t be afraid to really pry underneath the plastic (no components of the router will be damaged if you do so).

  4. Porter Cable 690LR Power Cord Replacement: step 4, image 1 of 1
    • Push the power switch through the top of the router. The power switch should now be completely detached from the router (besides the wire connections).

  5. Porter Cable 690LR Power Cord Replacement: step 5, image 1 of 2 Porter Cable 690LR Power Cord Replacement: step 5, image 2 of 2
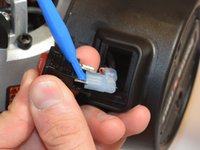
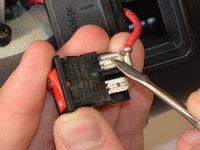
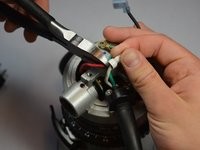
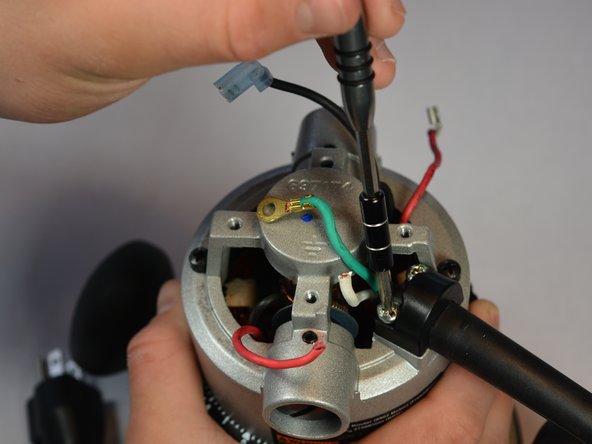
    • Find the wire plugs which are attached to the power switch. These connections are located at the back of the plastic box that houses the switch.

    • Use the spudger to carefully loosen the metal and rubber coverings, and detach the connections from the switch.

    • While some force is needed in order to successfully pull the connections free, have care in making sure that you don’t damage any of the metal components. If needed you may carefully use a metal spudger instead of a plastic opening tool.

  6. Porter Cable 690LR Power Cord Replacement, Power Cord: step 6, image 1 of 1
    • Use a pentalobe screwdriver to unscrew the 11 mm screw.

  7. Porter Cable 690LR Power Cord Replacement: step 7, image 1 of 3 Porter Cable 690LR Power Cord Replacement: step 7, image 2 of 3 Porter Cable 690LR Power Cord Replacement: step 7, image 3 of 3
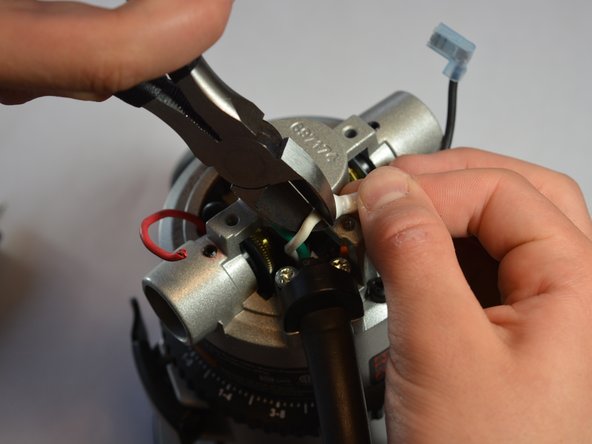
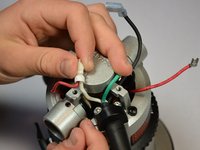
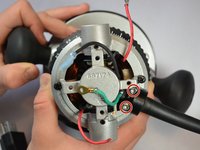
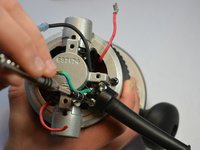
    • Use a pair of pliers to cut the white and red wires where they are crimped and the white wire connector.

    • Reminder: When following the guide in reverse order, you will need to remove a small section of the rubber insulation to reveal the wire. The wires will then have to be twisted together and covered with a new plastic housing. This process will shorten the wires every time the power cord is replaced.

  8. Porter Cable 690LR Power Cord Replacement: step 8, image 1 of 3 Porter Cable 690LR Power Cord Replacement: step 8, image 2 of 3 Porter Cable 690LR Power Cord Replacement: step 8, image 3 of 3
    • Locate the two 20 mm screws on the base of the power cord.

    • Use a pentalobe screwdriver to unscrew the screws.

Conclusion

To reassemble your device, follow these instructions in reverse order.

2 other people completed this guide.

Jaymes Ullrich

Member since: 10/05/16

343 Reputation

3 Guides authored

Team

Cal Poly, Team 20-7, Livingston Fall 2016 Member of Cal Poly, Team 20-7, Livingston Fall 2016

CPSU-LIVINGSTON-F16S20G7

4 Members

6 Guides authored

0 Comments

Add Comment

View Statistics:

Past 24 Hours: 0

Past 7 Days: 3

Past 30 Days: 6

All Time: 1,032