
PlayStation Move Case Replacement

Prerequisite Only
This guide is only intended to be used as a prerequisite for other guides. It's incomplete by itself.

What you need

  1. PlayStation Move Case Replacement, Case: step 1, image 1 of 2 PlayStation Move Case Replacement, Case: step 1, image 2 of 2
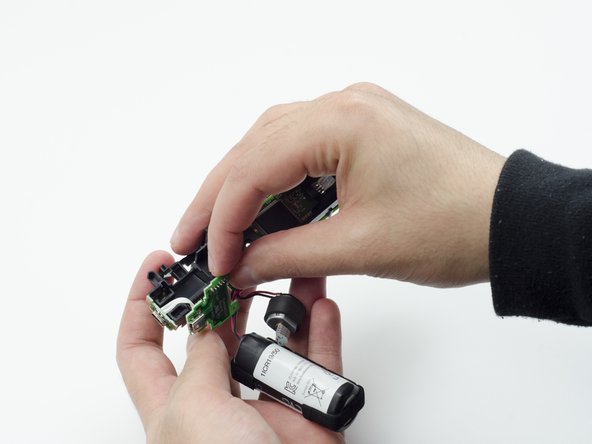
    • Turn the controller over and unscrew the four 10mm screws with a PH #00 screwdriver.

  2. PlayStation Move Case Replacement: step 2, image 1 of 3 PlayStation Move Case Replacement: step 2, image 2 of 3 PlayStation Move Case Replacement: step 2, image 3 of 3
    • Pinch the sides of the back panel to remove it and set it aside.

  3. PlayStation Move Case Replacement: step 3, image 1 of 2 PlayStation Move Case Replacement: step 3, image 2 of 2
    • Hold the base of the controller with one hand and with the other carefully pull up on the white spherical piece to remove it.

  4. PlayStation Move Case Replacement: step 4, image 1 of 2 PlayStation Move Case Replacement: step 4, image 2 of 2
    • Push the Lithium Ion battery from its slot to remove it.

    • Be mindful not to damage the wires or wired components, as the battery will still be attached via its connector.

  5. PlayStation Move Case Replacement: step 5, image 1 of 1
    • Unscrew the 9mm screw in the battery slot with a PH #00 screwdriver.

  6. PlayStation Move Case Replacement: step 6, image 1 of 2 PlayStation Move Case Replacement: step 6, image 2 of 2
    • Using a plastic opening tool, carefully pry the rumble motor free.

  7. PlayStation Move Case Replacement: step 7, image 1 of 1
    • Unscrew the 9mm screw behind the rumble motor slot with a PH #00 screwdriver.

  8. PlayStation Move Case Replacement: step 8, image 1 of 3 PlayStation Move Case Replacement: step 8, image 2 of 3 PlayStation Move Case Replacement: step 8, image 3 of 3
    • Carefully pinch the plastic sides of the battery slot and lift it (along with the circuit board) from the plastic shell of the move controller.

  9. PlayStation Move Case Replacement: step 9, image 1 of 2 PlayStation Move Case Replacement: step 9, image 2 of 2
    • Using your fingers, carefully pry the square green piece beneath the battery slot free.

    • It is attached via white ribbons which need to be kept intact.

  10. PlayStation Move Case Replacement: step 10, image 1 of 3 PlayStation Move Case Replacement: step 10, image 2 of 3 PlayStation Move Case Replacement: step 10, image 3 of 3
    • Follow the white ribbon attached to the part you just removed to a smaller, more rectangular piece.

    • Lift the rectangular piece from its slot to free it.

  11. PlayStation Move Case Replacement: step 11, image 1 of 3 PlayStation Move Case Replacement: step 11, image 2 of 3 PlayStation Move Case Replacement: step 11, image 3 of 3
    • Carefully lift the entire circuit board from the black plastic encasing it.

    • Take extra care not to damage any of the wired components.

Conclusion

To reassemble your device, follow these instructions in reverse order.

Sarah Shand

Member since: 02/20/17

1,885 Reputation

7 Guides authored

Team

USF Tampa, Team S3-G1, Sullivan Spring 2017 Member of USF Tampa, Team S3-G1, Sullivan Spring 2017

USFT-SULLIVAN-S17S3G1

3 Members

13 Guides authored

0 Comments

Add Comment

View Statistics:

Past 24 Hours: 0

Past 7 Days: 0

Past 30 Days: 0

All Time: 80