
Pillowcase Zipper Replacement

Alayna Oldag and one other contributor
Last updated on Aug 13, 2026
Views: 414
View statistics:
- Past 24 Hours:
- 2
- Past 7 Days:
- 62
- Past 30 Days:
- 200
- All Time:
- 414
Comments: 0
No one has left comments on this guide. Will you be first?
Go to guide commentsCompleted: 0 1
No one has marked this guide "completed." Will you be the first?
1 person has marked this guide "completed." It's you — great job!
Favorites: 0 1
No one has favorited (and subscribed to) this guide. Will you be the first?
1 person has favorited (and subscribed to) this guide — and that's you!
Introduction
Go to step 1 ↓If you want to salvage a pillowcase that has a broken zipper, use this guide to remove the old zipper and sew in a new one.
This guide is designed for anyone, including people with minimal sewing experience. It does not require a sewing machine. For the thread and zipper, I would recommend using a thread and zipper color that matches the pillowcase. I used an orange zipper and blue thread so that it is easier to see. In addition, this project does not have to be completed in one sitting.
This guide can also be used to replace zippers on other materials. However, the pillowcase is unique because it is made of a very thin material and is difficult to unzip when turned inside out.
What you need
Tools


-
-
-
Unzip the zipper as much as possible.
-
Flip the pillowcase inside out and lay it flat.
-
Locate the seam that connects the zipper to the pillowcase.
 Ask FixBot
-
-
-
Slide the seam ripper under the first stitch. Move your hand forward in order to tear the thread.
-
Repeat this process every 4-5 stitches down the seam. After ripping a few stitches, start separating the zipper from the fabric. If it is difficult to pull it apart, use the seam ripper to remove a few more stitches.
-
Once there is a gap between the zipper and the pillowcase, use the seam ripper to tear the threads that are still holding them together. Alternate pulling the zipper away and ripping the seam until you have removed most of the zipper.
-
-
-
Locate the knots at the end of the zipper that are holding it to the pillowcase. Wedge the seam ripper underneath these knots until the zipper fully comes off.
-
Remove any threads that are still attached to the pillowcase.
-
-
-
Line up a new zipper with the pillowcase. The zipper can be slightly longer than the length of the pillowcase opening.
-
Clip the zipper to the folded edge of the pillowcase opening. Make sure the zipper is upside down and the pillowcase is inside out.
-
Keep the edge of the zipper even with the edge of the pillowcase as you continue adding clips.
-
-
-
Cut a thread that is about three times the length of the pillowcase opening.
-
Tie a triple knot at one end of the thread.
-
At the other end, thread the eye of a needle and hold both ends in the same direction.
-
-
-
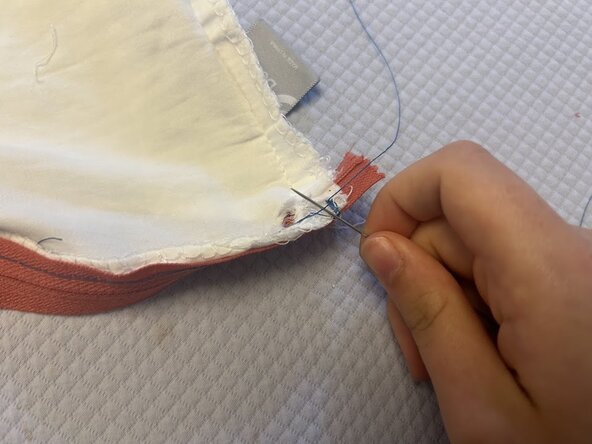
Insert the needle from the back of the pillowcase, halfway between the zipper teeth and the edge of the zipper fabric. Pull the thread all the way through until the knot catches the fabric.
-
Move a half inch to the right and insert the needle from front to back. This is how you start the backstitch.
-
Move another half inch to the right, and insert the needle from the back to the front and pull all the way through.
-
Poke the needle back through the same hole that was created when you first pulled the needle from front to back. Make sure that the needle is going through the same hole in both layers of fabric.
-
From the back, move the needle one inch to the right, and pull the thread all the way through. Repeat this process of moving one half inch to the left, pulling front to back, moving one inch to the right, then pulling back to front.
-
-
-
Remove the clips as you go. Once you reach the end of your stitch, loop the thread through one hole around the edge a few times, securing both fabrics.
-
Slide the needle under the stitch. Pull it almost all the way through, leaving a small opening for the needle. Poke the needle through the opening and tighten the knot. Repeat this a couple times for a secure knot.
-
-
-
Cut the excess thread with a pair of scissors.
-
Unzip the zipper completely.
-
Flip the pillowcase over.
-
-
-
-
Flip the opposite side of the zipper so that both outward facing sides are facing each other.
-
Clip the unzipped end of the zipper so that it is even with the opposite side.
-
Continue clipping all the way down the opening, using the same allowance as the sewed side.
-
-
-
Repeat steps 6-8 for the other side of the zipper. Secure the backstitch with knots on either end, and clip the excess thread.
-
-
-
Turn the pillowcase inside out, making sure to tuck the ends of the zipper in before closing the pillowcase.
-
Zip the pillowcase shut, and congratulate yourself on a job well done!
-
-





Team

Austin Community College, Team 57-11, Kapoor Summer 2026 Member of Austin Community College, Team 57-11, Kapoor Summer 2026
AUSTINCC-KAPOOR-SU26S57G11
1 Member
12 Guides authored
