Free Shipping on Domestic Orders $75+

This translation was generated by a machine and has not been reviewed by a person yet. Speak this language? Review it.

Philips Roller Controller Repair

What you need

    1. Philips Roller Controller Repair, Philips Roller Controller Repair: step 1, image 1 of 1
      • Remove the 5 screws on the bottom edge.

      Ask FixBot

      Add Comment

    2. Philips Roller Controller Repair: step 2, image 1 of 1
      • Detach the top cover.

      • Watch out for the connector for the buttons on the right side. Disconnect it.

      Ask FixBot

      Add Comment

    3. Philips Roller Controller Repair: step 3, image 1 of 1
      • Disconnect the two connectors. Note their position for reassembly.

      Ask FixBot

      Add Comment

    4. Philips Roller Controller Repair: step 4, image 1 of 3 Philips Roller Controller Repair: step 4, image 2 of 3 Philips Roller Controller Repair: step 4, image 3 of 3
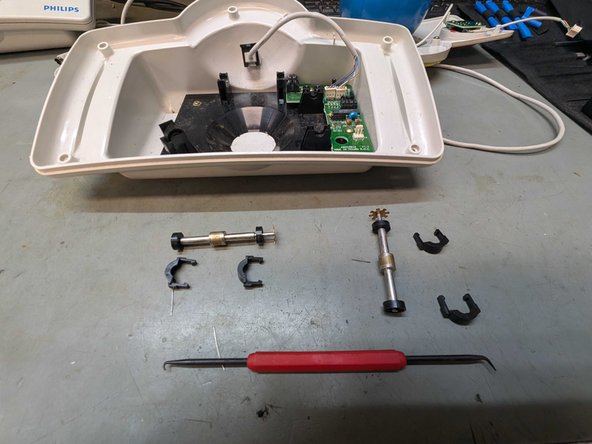
      • You can pull the tabs on both sides slightly outward and then carefully pull the clip upward.

      • Use a pick to carefully release the bearing retainer.

      Ask FixBot

      Add Comment

    5. Philips Roller Controller Repair: step 5, image 1 of 1
      • Remove the two screws and you can take out the PCB.

      Ask FixBot

      Add Comment

    6. Philips Roller Controller Repair: step 6, image 1 of 1
      • Replacement parts you need:

      • 4x LTR-301 Infrared Receiver

      • 4x LTE-302 Infrared Emitter

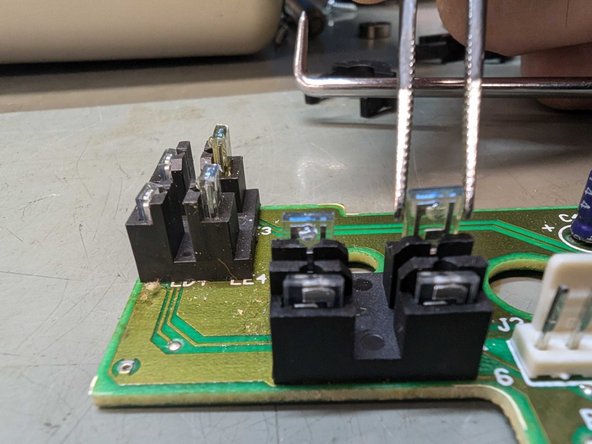
      • The emitters, LTE-302, are mounted on the inside and replace the BLUE-tinted emitters.

      • The receivers are positioned against the outer edge of the board. These are the LTR-301 types.

      • Often only the emitters are faulty, but we prefer to replace both the emitters and the receivers.

      Ask FixBot

      Add Comment

    7. Philips Roller Controller Repair: step 7, image 1 of 2 Philips Roller Controller Repair: step 7, image 2 of 2
      • Desolder the emitters.

      • Place the replacement parts and solder them back into place with a little flux.

      • Ensure that you place the parts neatly into the holder and that both the receiver and the transmitter are at the same height.

      Ask FixBot

      Add Comment

      • You can reassemble the controller in reverse order.

      Ask FixBot

      Add Comment

Conclusion

To reassemble your device, follow these instructions in reverse order.

Cancel: I did not complete this guide.

One other person completed this guide.

willy

Member since: 03/16/24

277 Reputation

2 Guides authored

Team

HomeComputerMuseum Member of HomeComputerMuseum

Community

3 Members

24 Guides authored

0 Guide Comments

Add Comment

View Statistics:

Past 24 Hours: 4

Past 7 Days: 21

Past 30 Days: 71

All Time: 347