Introduction
Follow this guide for instructions on how to remove and replace the air fryer's transformer. Removal of the transformer may be required if the device is being taken to another country where power outlets are different from the United States.
What you need
-
-
-
Insert a nylon spudger underneath the top of the device.
-
Leverage the tool and pop off each of the eight tabs holding the plastic cover in place.
 Ask FixBot
-
-
-
Remove the four 12.4 mm screws in each of the corners using a JIS #1 screwdriver.
-
-
-
-
-
-
Remove the two 39.5 mm screws attached to the black piece of the transformer using a JIS #1 screwdriver.
-
-
-
Remove the top piece, using a Phillips #2 screwdriver, to get the whole transformer.
-
-
-
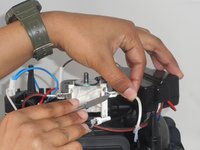
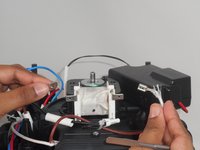
Remove the brown and white wire attached to the transformer using a spudger.
-
Disconnect both the brown and white cables.
-
-



To reassemble your device, follow these instructions in reverse order.
Cancel: I did not complete this guide.
One other person completed this guide.

Team

University of Memphis, Team 3-1, Sneed Spring 2024 Member of University of Memphis, Team 3-1, Sneed Spring 2024
UM-SNEED-S24S3G1
4 Members
60 Guides authored
1 Guide Comment
This is not the transformer, it is the coil of the shaded-pole motor.
