
Philips DPM8000 Housing & Display Replacement

Prerequisite Only
This guide is only intended to be used as a prerequisite for other guides. It's incomplete by itself.

What you need

  1. Philips DPM8000 Housing & Display Replacement, Anti-Static Wrist Strap: step 1, image 1 of 1
    Tool used on this step:
    Anti-Static Wrist Strap
    $7.95
    Buy
    • Before you start disassembling your device make sure that it is turned off.

    • Put on the Anti-Static Wrist Strap and clamp the end of the band to an unpainted spot of a radiator.

  2. Philips DPM8000 Housing & Display Replacement, Battery Lid: step 2, image 1 of 2 Philips DPM8000 Housing & Display Replacement, Battery Lid: step 2, image 2 of 2
    • Remove the battery lid

  3. Philips DPM8000 Housing & Display Replacement, Battery: step 3, image 1 of 2 Philips DPM8000 Housing & Display Replacement, Battery: step 3, image 2 of 2
    • Remove the battery.

    • The battery lid is designed to function as an instrument for this task.

  4. Philips DPM8000 Housing & Display Replacement, Upper Ornamental Part: step 4, image 1 of 3 Philips DPM8000 Housing & Display Replacement, Upper Ornamental Part: step 4, image 2 of 3 Philips DPM8000 Housing & Display Replacement, Upper Ornamental Part: step 4, image 3 of 3
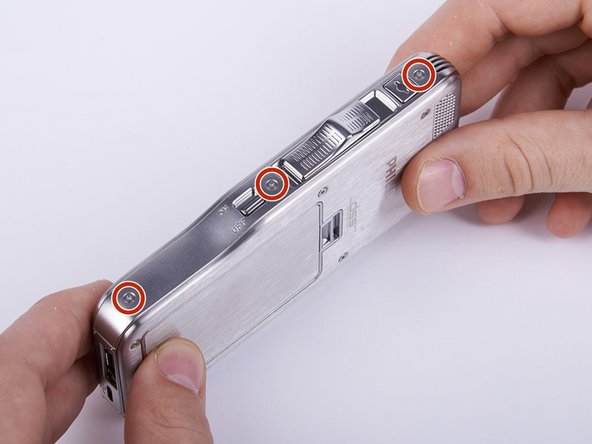
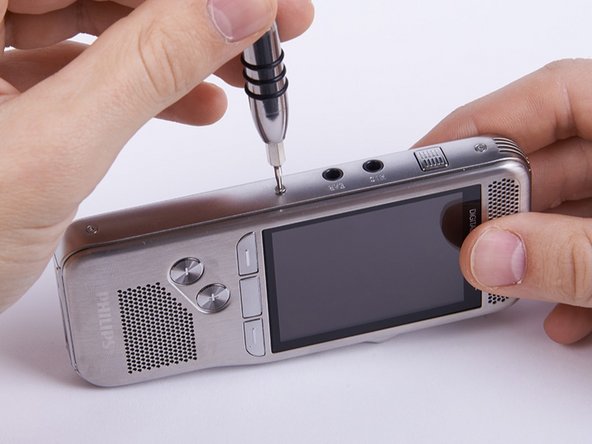
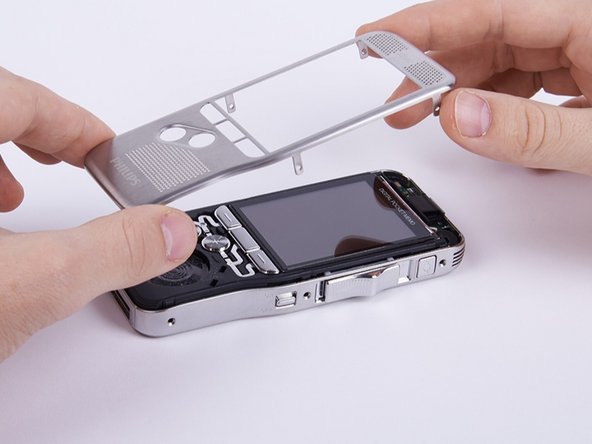
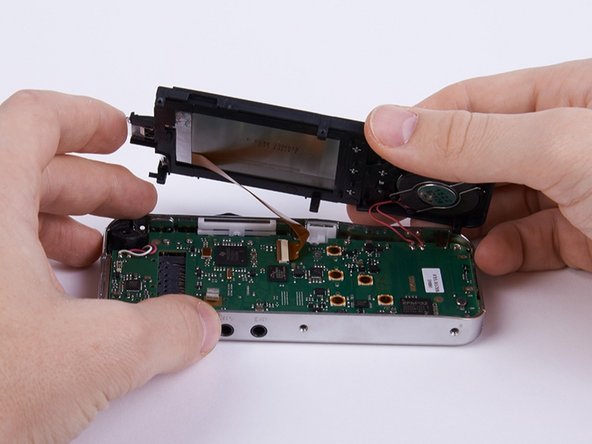
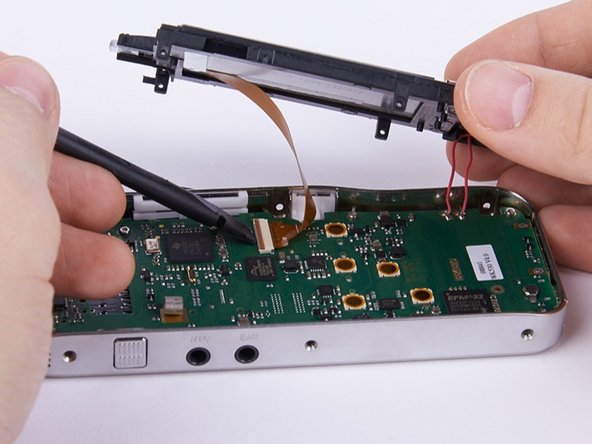
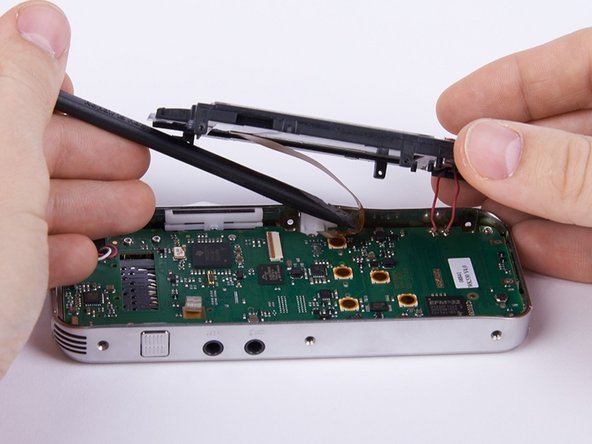
    • Unscrew the six Torx #4 (5,3 mm) screws from both sides of the device

    • Collect the removed screws in a bowl or something comparable, otherwise they might get lost.

  5. Philips DPM8000 Housing & Display Replacement: step 5, image 1 of 3 Philips DPM8000 Housing & Display Replacement: step 5, image 2 of 3 Philips DPM8000 Housing & Display Replacement: step 5, image 3 of 3
    • Remove the upper ornamental part from the housing.

    • If your fingernails are not long enough you can use a plastic opening tool.

    • When reassembling the device be aware that the six shackles on the sides of the upper ornamental part need to be placed inside the frame.

  6. Philips DPM8000 Housing & Display Replacement, Housing/Display: step 6, image 1 of 2 Philips DPM8000 Housing & Display Replacement, Housing/Display: step 6, image 2 of 2
    • Lift up the housing.

    • The display as well as the speaker are connected to the motherboard. Therefore you need to be careful not to harm those connections.

  7. Philips DPM8000 Housing & Display Replacement: step 7, image 1 of 2 Philips DPM8000 Housing & Display Replacement: step 7, image 2 of 2
    • Unlock the connection between display and motherboard by pushing open the brown cleat.

    • It is recommended to use a spudger or a comparable tool for this step.

    • If the connection is not completely open, one of the involved components could easily be harmed.

  8. Philips DPM8000 Housing & Display Replacement: step 8, image 1 of 2 Philips DPM8000 Housing & Display Replacement: step 8, image 2 of 2
    • Separate the connection by pulling out the display cable.

    • If the cable does not come out easily, the connection is probably still locked.

    • When reconnecting the display to the motherboard don't forget to lock the connection, otherwise it will eventually come loose and you will have to redo the first eight steps of this guide.

Conclusion

Arbeite die Schritte in umgekehrter Reihenfolge ab, um dein Gerät wieder zusammenzubauen.

Andreas Holl

Member since: 11/05/15

731 Reputation

6 Guides authored

Team

Technische Universität Wien Member of Technische Universität Wien

Community

2 Members

6 Guides authored

0 Comments

Add Comment

View Statistics:

Past 24 Hours: 0

Past 7 Days: 0

Past 30 Days: 0

All Time: 88