Introduction
Before you begin disassembly, be sure to have the necessary tool. You will need a Torx size T6 screwdriver. You will be removing the stylus in order to take off the back panel.
What you need
-
-
-
Remove the 4 screws from the corners of the back panel of the device using a size T6 Torx screwdriver.
-
-
-
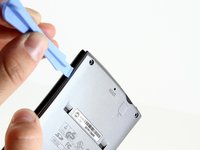
Insert the edge of the plastic opening tool between the back panel and the black stylus holder.
-
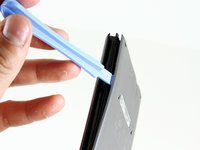
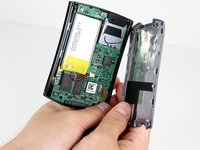
Carefully and forcefully pry the panels apart.
-


To reassemble your device, follow these instructions in reverse order.
Cancel: I did not complete this guide.
One other person completed this guide.
Team

Cal Poly, Team 14-9, Forte Winter 2011 Member of Cal Poly, Team 14-9, Forte Winter 2011
CPSU-FORTE-W11S14G9
6 Members
6 Guides authored