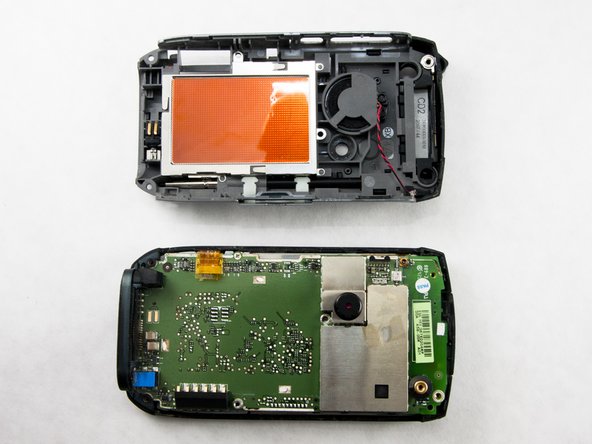
Installing Palm Treo 755p Back Cover

What you need

  1. Installing Palm Treo 755p Back Cover, Battery: step 1, image 1 of 3 Installing Palm Treo 755p Back Cover, Battery: step 1, image 2 of 3 Installing Palm Treo 755p Back Cover, Battery: step 1, image 3 of 3
    • Press the button on the back cover to release the battery cover.

    • Slide off the battery cover.

  2. Installing Palm Treo 755p Back Cover: step 2, image 1 of 2 Installing Palm Treo 755p Back Cover: step 2, image 2 of 2
    • Remove the battery by lifting up on one side.

  3. Installing Palm Treo 755p Back Cover, Back Cover: step 3, image 1 of 2 Installing Palm Treo 755p Back Cover, Back Cover: step 3, image 2 of 2
    • Remove the stylus by pulling up on the large top to reveal the top left case screw.

    • Pull away the black flap to reveal the top right case screw.

  4. Installing Palm Treo 755p Back Cover: step 4, image 1 of 1
    • WARNING: The top right red screw marked by the red circle has a warranty seal. Removing this seal will void your warranty.

    • Use the T5 screwdriver attachment to remove the 5 black back case screws marked by the red and yellow circles. These screws are 0.274 inches long.

    • Use the same T5 screwdriver attachment to remove the middle screw marked by the blue circle. It is shorter than the other screws at 0.121 inches in length.

  5. Installing Palm Treo 755p Back Cover: step 5, image 1 of 2 Installing Palm Treo 755p Back Cover: step 5, image 2 of 2
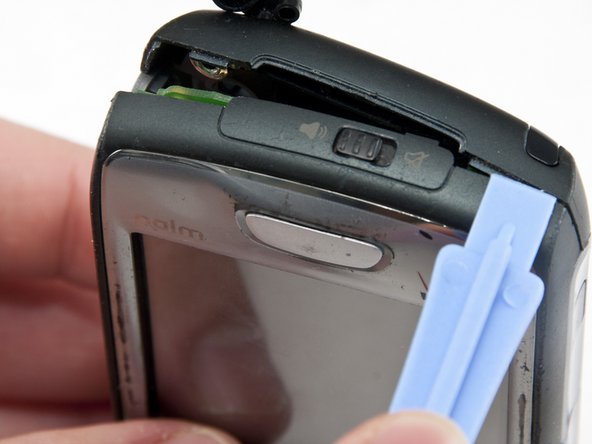
    • Use the plastic opening tool to pry open the device. Start on the volume control side (left side of the screen) and work your way up along the edge and across the top.

    • ATTENTION: Side volume control buttons may fall out after opening the device.

  6. Installing Palm Treo 755p Back Cover: step 6, image 1 of 2 Installing Palm Treo 755p Back Cover: step 6, image 2 of 2
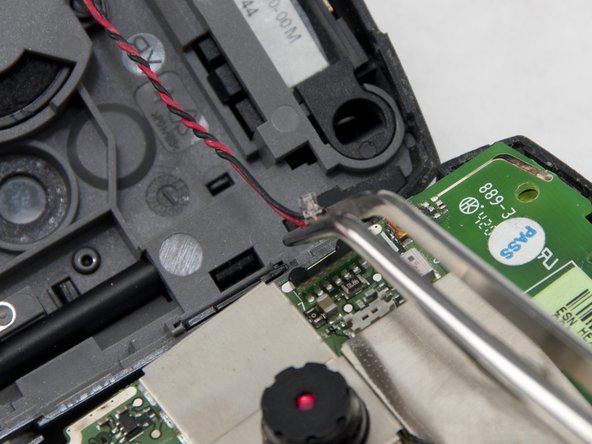
    • Slowly unfold the back casing away from the front casing revealing the red and black wound wire speaker cable, marked by the yellow box.

    • WARNING: Be gentle while separating the halves to prevent breaking the red and black wound wire speaker cable that bridges both halves.

  7. Installing Palm Treo 755p Back Cover: step 7, image 1 of 3 Installing Palm Treo 755p Back Cover: step 7, image 2 of 3 Installing Palm Treo 755p Back Cover: step 7, image 3 of 3
    • Using tweezers, squeeze the plastic head of the black and red wound wire cable. This will detach the cable from the circuit board and fully separate the two halves.

Mike Shaw

Member since: 01/03/11

601 Reputation

6 Guides authored

Team

Cal Poly, Team 14-6, Forte Winter 2011 Member of Cal Poly, Team 14-6, Forte Winter 2011

CPSU-FORTE-W11S14G6

6 Members

12 Guides authored

View Statistics:

Past 24 Hours: 0

Past 7 Days: 0

Past 30 Days: 1

All Time: 1,550