
PSP 300x Front Casing Replacement

kbrunner and
Last updated on Nov 6, 2026
Views: 25K
View statistics:
- Past 24 Hours:
- 2
- Past 7 Days:
- 55
- Past 30 Days:
- 310
- All Time:
- 25,351
Comments: 8
7 comments on steps, 1 guide comment.
Go to guide commentsCompleted: 34 35
34 people have marked this guide "completed." Will you be next?
35 people have marked this guide "completed." Including you — great job!
Favorites: 9 10
9 people have favorited (and subscribed to) this guide. Will you be next?
10 people have favorited (and subscribed to) this guide — including you!
Inconsistent Images
Updating the images on this guide to be more consistent with the prerequisites would increase its awesomeness.
Student In Progress
This guide is being worked on by hardworking students.
Introduction
Go to step 1 ↓Steps for replacing the outer casing of a Sony PSP-3000.
What you need


-
-
-
Place the PSP face down and locate the battery cover on the left side of the device.
-
Lift and remove the battery cover to reveal the battery.
-
Remove the battery.
 Ask FixBot
-
-
-
-
-
Peel back the warranty sticker that is behind the battery with a spudger or your fingernail.
-
-
-
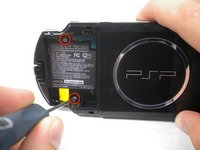
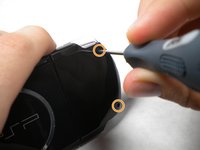
Unscrew all four screws from the back of the PSP with the Phillips #00 Screwdriver.
-
Two are located behind the battery's warranty sticker.
-
Two are located on the right side of the PSP.
-
-
-
Then, remove the single screw from the bottom edge of the PSP (which is positioned next to the barcode).
-
-
-
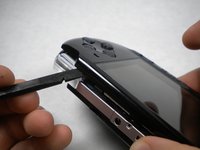
Slide the spudger in between the outer casing of the PSP, beginning at the "R" shoulder button, and gently pry off the casing.
-
Remove the front casing completely.
-
-





To reassemble your device, follow these instructions in reverse order.
Cancel: I did not complete this guide.
34 other people completed this guide.

Team

Cal Poly, Team 19-2, Maness Fall 2009 Member of Cal Poly, Team 19-2, Maness Fall 2009
CPSU-MANESS-F09S19G2
3 Members
24 Guides authored
