Free Shipping on Domestic Orders $75+

PSP 2000 Speaker Replacement

Views: 16K

View statistics:

Past 24 Hours:
6
Past 7 Days:
41
Past 30 Days:
203
All Time:
15,666
Comments: 5

4 comments on steps, 1 guide comment.

Go to guide comments
Completed: 2

2 people have marked this guide "completed." Will you be next?

Favorites: 10

10 people have favorited (and subscribed to) this guide. Will you be next?

Time Required: 5 - 20 minutes
Difficulty: Moderate
Featured Student Guide

This guide has been the hard work of our awesome students and is found to be exceptionally cool by the iFixit staff.

PSP 2000 Speaker Replacement

Introduction

Go to step 1 ↓

Going deaf? Perhaps it's just the speaker...replace it! Use this guide to replace the speaker on Sony's PSP 2000.

What you need

Parts

Tools

    1. PSP 2000 Speaker Replacement, Battery: step 1, image 1 of 3 PSP 2000 Speaker Replacement, Battery: step 1, image 2 of 3 PSP 2000 Speaker Replacement, Battery: step 1, image 3 of 3
      • Place PSP face down, so that the UMD Drive is facing upwards.

      • Locate the battery door and open.

      • Remove the battery from inside.

      Ask FixBot

      Add Comment

    1. PSP 2000 Speaker Replacement, Front Casing: step 2, image 1 of 1
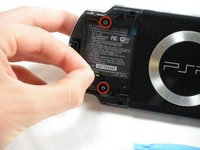
      • This step requires the removal of the warranty sticker. Removing the sticker will void the warranty. According to the FTC removing this will not void your warranty.

      • Locate the sticker in the battery compartment labeled: "En: Warranty Void if Seal Damaged."

      • Remove the sticker using the PSP Opening Tools.

      • Under the sticker is a 5mm Phillips screw needed in the next step.

      Ask FixBot

      Add Comment

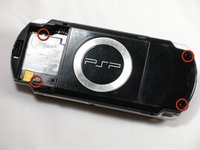
    2. PSP 2000 Speaker Replacement: step 3, image 1 of 2 PSP 2000 Speaker Replacement: step 3, image 2 of 2
      • Remove four 5 mm Phillips from the case.

      • If the screws stick in the case, you can use a magnetized screwdriver to draw them out.

      Ask FixBot

      Add Comment

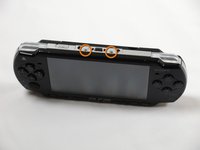
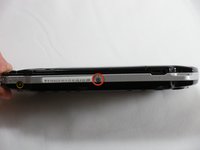
    3. PSP 2000 Speaker Replacement: step 4, image 1 of 2 PSP 2000 Speaker Replacement: step 4, image 2 of 2
      • Remove the following screws from around the bezel:

      • Two 4 mm Phillips

      • One 5 mm Phillips

      • The two shorter 4 mm screws are on the top of the PSP; the longer 5 mm screw is on the bottom.

      Ask FixBot

      Add Comment

    4. PSP 2000 Speaker Replacement: step 5, image 1 of 2 PSP 2000 Speaker Replacement: step 5, image 2 of 2
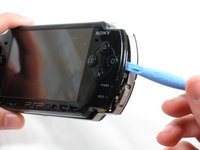
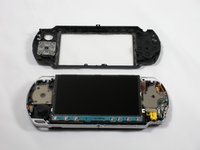
      • Gently pry the front bezel away from the casing using a PSP opening tool.

      • Start on the right hand side of the PSP bezel, and carefully work the tool around the side.

      • If you want to clean the control buttons or D-pad, you can easily pop them out once the faceplate is off and wipe them clean.

      Ask FixBot

      Add Comment

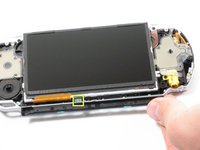
    1. PSP 2000 Speaker Replacement, Display: step 6, image 1 of 3 PSP 2000 Speaker Replacement, Display: step 6, image 2 of 3 PSP 2000 Speaker Replacement, Display: step 6, image 3 of 3
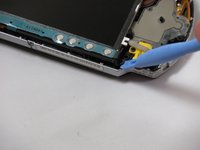
      • Remove the home bar by gently prying on the left and right sides of it with the opening tools. Lift the bar out of the device.

      • A ribbon cable connects the home bar to the logic board. Be careful not to damage the cable when removing the bar.

      Ask FixBot

      Add Comment

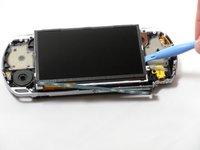
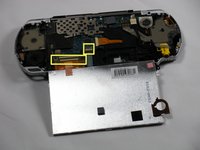
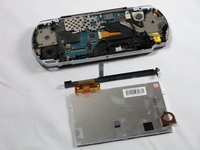
    2. PSP 2000 Speaker Replacement: step 7, image 1 of 3 PSP 2000 Speaker Replacement: step 7, image 2 of 3 PSP 2000 Speaker Replacement: step 7, image 3 of 3
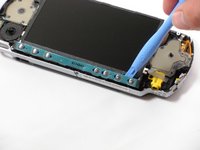
      • With the home bar out of the way, gently pry up the display using the opening tools.

      • There is another ribbon cable attached to the bottom of the LCD. Be careful not to damage either of the connectors when removing.

      • Lift the black tabs of the ribbon cable connectors using a opening tool. Pull the ribbons out towards the bottom of the PSP to disconnect.

      • Gently lift out the display.

      Ask FixBot

      Add Comment

    1. PSP 2000 Speaker Replacement, Speaker: step 8, image 1 of 2 PSP 2000 Speaker Replacement, Speaker: step 8, image 2 of 2
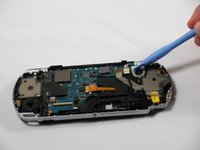
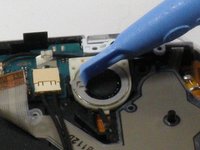
      • Use the opening tools to press the tab on the left-hand side of the speaker to release it.

      • Be careful not to puncture the speaker in the process.

      • Remove the speaker by twisting it counter-clockwise (to the left, like a screw).

      Ask FixBot

      Add Comment

Conclusion

To reassemble your device, follow these instructions in reverse order.

Cancel: I did not complete this guide.

2 other people completed this guide.

espinks

Member since: 10/18/09

3,926 Reputation

5 Guides authored

Team

Cal Poly, Team 6-3, Maness Fall 2009 Member of Cal Poly, Team 6-3, Maness Fall 2009

CPSU-MANESS-F09S6G3

5 Members

108 Guides authored

1 Guide Comment

What about the other speaker? How to replace?

felipeavatar - Reply Share

Add Comment

View Statistics:

Past 24 Hours: 6

Past 7 Days: 41

Past 30 Days: 203

All Time: 15,666