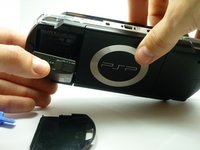
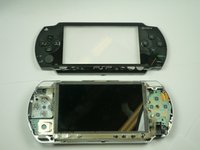
PSP 1000 UMD Door Replacement

What you need

  1. PSP 1000 UMD Door Replacement, Battery: step 1, image 1 of 1
    • Turn the PSP over so its back is facing you.

  2. PSP 1000 UMD Door Replacement: step 2, image 1 of 2 PSP 1000 UMD Door Replacement: step 2, image 2 of 2
    • Locate the battery casing button on the rear-left side of the PSP.

    • Press down the button and remove the battery cover.

  3. PSP 1000 UMD Door Replacement: step 3, image 1 of 2 PSP 1000 UMD Door Replacement: step 3, image 2 of 2
    • Using your finger, remove the battery upwards from the system as shown.

  4. PSP 1000 UMD Door Replacement, Front Casing: step 4, image 1 of 2 PSP 1000 UMD Door Replacement, Front Casing: step 4, image 2 of 2
    • Remove the four screws shown with a Phillips #00 screwdriver.

    • You will have to peel back the guarantee sticker to access the screw on the lower left.

  5. PSP 1000 UMD Door Replacement: step 5, image 1 of 1
    • Remove the screw from the bottom side of the PSP. Keep it separated from the rest of the screws.

    • Remove screws from back righthand side within the holes.

  6. PSP 1000 UMD Door Replacement: step 6, image 1 of 2 PSP 1000 UMD Door Replacement: step 6, image 2 of 2
    • Gently separate the outer plastic casing from the rest of the system as shown.

  7. PSP 1000 UMD Door Replacement, LCD Screen: step 7, image 1 of 1
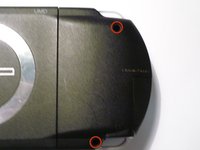
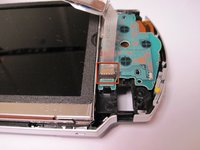
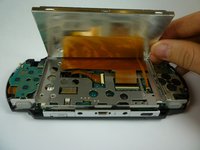
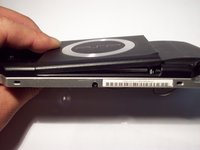
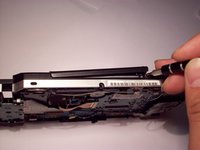
    • The Button Board, at the base of the LCD Screen, is held by two clips.

    • Pry these clips over the nubs using a PSP opening tool. This will release the clips.

    • The Button Board is still attatched to the PSP by a ribbon cable!

  8. PSP 1000 UMD Door Replacement: step 8, image 1 of 3 PSP 1000 UMD Door Replacement: step 8, image 2 of 3 PSP 1000 UMD Door Replacement: step 8, image 3 of 3
    • The Button Board Ribbon Cable is held down with a latch. Lift the latch open, away from the ribbon cable.

    • Pull the cable away from the latch.

  9. PSP 1000 UMD Door Replacement: step 9, image 1 of 2 PSP 1000 UMD Door Replacement: step 9, image 2 of 2
    • The LCD Screen is held by the LCD Frame with similar clips. Slide a thin tool between the clip and the screen and gently pry them apart while beginning to lift the screen.

  10. PSP 1000 UMD Door Replacement: step 10, image 1 of 1
    • The LCD screen is still attached with ribbon cables. Gently lift up the LCD screen so you do not break them.

  11. PSP 1000 UMD Door Replacement: step 11, image 1 of 3 PSP 1000 UMD Door Replacement: step 11, image 2 of 3 PSP 1000 UMD Door Replacement: step 11, image 3 of 3
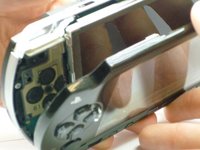
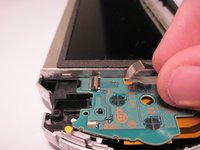
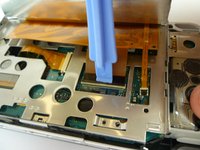
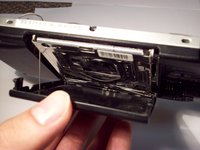
    • The thin Ribbon Cable opens from the opposite side in which the Ribbon Cable enters. Open up the latch towards the Ribbon Cable. The latch will pull up and release the ribbon cable. Put your tool behind the black part, then pry up the black piece of plastic.

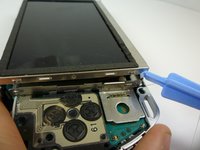
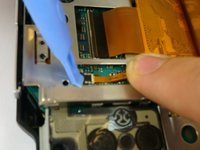
    • The wide Ribbon Cable opens from the same side in which the Ribbon Cable attatches, and opens away from the cable.

    • Both of these latches are the black pieces.

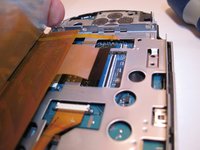
    • Gently pull the ribbon cables away from the latches. The LCD screen can now be removed.

    • When reassembling - be careful which way you push the latches. The small one is very easy to break.

  12. PSP 1000 UMD Door Replacement, UMD Door: step 12, image 1 of 1
    • Now that the LCD is removed, unscrew the two screws in red.

  13. PSP 1000 UMD Door Replacement: step 13, image 1 of 1
    • First Start by turning the PSP over, UMD Drive up.

    • Then using a small flat-head, Pry the lower left corner up.

    • The right side will come out after the left latch is free. Some jiggle work might be needed, no excessive force.

    • FIRST, with the psp facing up, unscrew the black screw on the bottom right hand of the umd door adjacent to the right side speaker for easier prying of the umd door in the next step.

  14. PSP 1000 UMD Door Replacement: step 15, image 1 of 2 PSP 1000 UMD Door Replacement: step 15, image 2 of 2
    • Hold the tray on the left side and slide it to the right.

    • Remove the tray.

  15. PSP 1000 UMD Door Replacement: step 16, image 1 of 3 PSP 1000 UMD Door Replacement: step 16, image 2 of 3 PSP 1000 UMD Door Replacement: step 16, image 3 of 3
    • Because the problem was that the door was loose, clean all parts of dirt or debris.

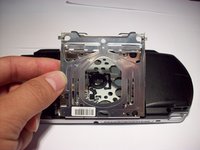
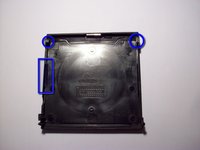
    • Align the tray to the 2 hinges at the bottom and slide the tray to the left, back into place. The latch should still be above the UMD frame.

    • Apply light pressure to the left side while lowering the tray to its original position.

  16. PSP 1000 UMD Door Replacement: step 17, image 1 of 2 PSP 1000 UMD Door Replacement: step 17, image 2 of 2
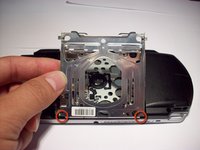
    • This next part is a bit tricky. Notice the slot for the spring arm and the slot for the UMD tray in the the corners.

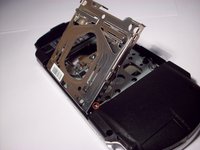
    • Turn the PSP upside-down, so that the bottom is now facing up.

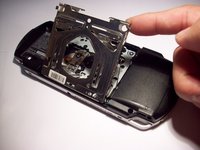
    • First slide the UMD tray into the slots on the UMD cover. Once these are in, align the spring into its slot.

  17. PSP 1000 UMD Door Replacement: step 18, image 1 of 2 PSP 1000 UMD Door Replacement: step 18, image 2 of 2
    • Carefully close the PSP door, keeping the UMD tray and spring in their slots.

    • Insert the left side of the door first, then the right hinge.

    • This can be done using either your hands or a flat-head.

Conclusion

To reassemble your device, follow these instructions in reverse order.

36 other people completed this guide.

Henry Lee

Member since: 01/14/10

794 Reputation

4 Guides authored

Team

Cal Poly, Team 5-6, Forte Winter 2010 Member of Cal Poly, Team 5-6, Forte Winter 2010

CPSU-FORTE-W10S5G6

5 Members

22 Guides authored

4 Comments

thank u for the tutorial. great step by step because it was so easy to get my psp fixed on my own...no need to send in repairs and get charged for a $10 or less umd cover...more satisfaction when done on out own. thank u again

Sara CE - Reply

Thanks! I just wanted to make a note that you don't actually have to take the screen off and mess with the ribbon cables. I just lifted it up, unscrewed those two screws, and snapped it back on. Just don't forget to put the screws back in before you put the cover on like I did.

Jeffery - Reply

Hi, my UMD door opens too easily, just as i touch it sometimes, and i have to press it hard to close it. What should i do to make it stay close? i don’t understand why it has become so loose

Andrea Rusconi - Reply

You can actually use a file and an exacto knife and some sandpaper on an aftermarket door. They tried to make an L-shaped reinforcement on the right side (if looking at the PSP from the back) that's why it's quite hard to get it in past those screws, just shave and file and sliver little by little, until it fits in without even having to take off the front case. You may also have to do some trimming and gluing of the latch catch on most of these aftermarket UMD doors.

whoohaaXL - Reply

Add Comment

View Statistics:

Past 24 Hours: 18

Past 7 Days: 111

Past 30 Days: 561

All Time: 75,086