Free Shipping on Domestic Orders $75+

PS4 Case Opening Procedure for Cleaning

Prerequisite Only
This is a prerequisite-only guide! This guide is part of another procedure and isn’t meant to be used alone.

What you need

    1. PS4 Case Opening Procedure for Cleaning, Flip over the PS4: step 1, image 1 of 1
      • Flip your PS4 upside-down with the back side facing towards you.

      Ask FixBot

      Add Comment

    2. PS4 Case Opening Procedure for Cleaning, Remove the rear stickers: step 2, image 1 of 3 PS4 Case Opening Procedure for Cleaning, Remove the rear stickers: step 2, image 2 of 3 PS4 Case Opening Procedure for Cleaning, Remove the rear stickers: step 2, image 3 of 3
      • Stickers cover the screws securing the PS4's outer case.

      • Use a pair of tweezers to remove the sticker in the center of the back of the PS4, exposing the first screw.

      • Remove the two stickers at the outer edges, exposing two more screws.

      Ask FixBot

      Add Comment

    3. PS4 Case Opening Procedure for Cleaning, Remove the rear case screws: step 3, image 1 of 1
      • Remove the three 7.2 mm-long TR8 Torx security screws on the back of the PS4.

      Ask FixBot

      Add Comment

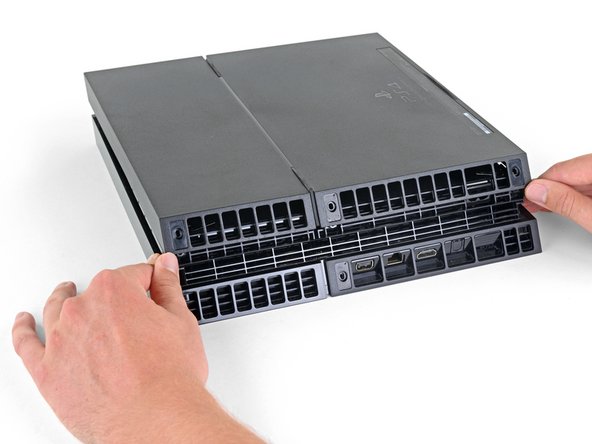
    4. PS4 Case Opening Procedure for Cleaning, Remove the lower case: step 4, image 1 of 2 PS4 Case Opening Procedure for Cleaning, Remove the lower case: step 4, image 2 of 2
      • Use your thumbs to lift the lower case up and off the PS4.

      • In addition to the three rear screws, the lower case is held in place by plastic clips. You may need to use significant force to release the lower case.

      Ask FixBot

      Add Comment

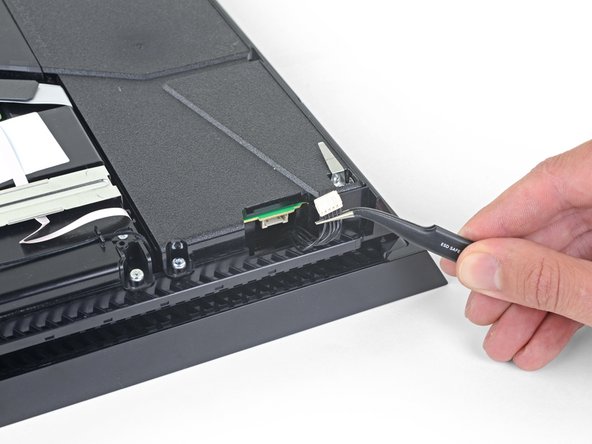
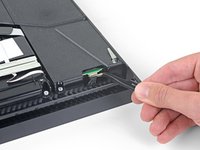
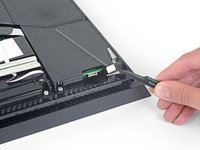
    5. PS4 Case Opening Procedure for Cleaning, Disconnect the power supply: step 5, image 1 of 2 PS4 Case Opening Procedure for Cleaning, Disconnect the power supply: step 5, image 2 of 2
      Tool used on this step:
      Small Needle Nose Pliers
      $6.99
      Buy
      • Use a pair of tweezers to pull the power supply cable straight out to disconnect the power supply unit from the motherboard.

      • Depending on the age of your console, this cable might be very firmly connected. If it feels stuck, don't pull on the cables themselves with much force.

      • Use your fingers to grab the white connector head, and wiggle or "walk" the connector out of its socket to disconnect it.

      • In extreme cases, you might need to use needle nose pliers to get a good grip on the connector.

      • Go slow: pulling on the cables themselves might rip them out of the connector.

      Ask FixBot

      Add Comment

Conclusion

To reassemble your device, follow these instructions in reverse order.

Cancel: I did not complete this guide.

One other person completed this guide.

Carsten Frauenheim

Member since: 03/10/20

171,443 Reputation

442 Guides authored

Team

iFixit Member of iFixit

Staff

122 Members

72,401 Guides authored

0 Guide Comments

Add Comment

View Statistics:

Past 24 Hours: 0

Past 7 Days: 2

Past 30 Days: 18

All Time: 216