
Oregon Scientific RM318PA Focus Knob Replacement

What you need

  1. Oregon Scientific RM318PA Focus Knob Replacement, A/C Adapter: step 1, image 1 of 3 Oregon Scientific RM318PA Focus Knob Replacement, A/C Adapter: step 1, image 2 of 3 Oregon Scientific RM318PA Focus Knob Replacement, A/C Adapter: step 1, image 3 of 3
    • Hold Clock so the screen is facing away from you.

    • Using your thumbs, push up on battery cover to remove.

    • With your other hand, pull down on the A/C Adapter jack to remove.

  2. Oregon Scientific RM318PA Focus Knob Replacement, Batteries: step 2, image 1 of 1
    • Remove batteries by pushing a battery toward the spring.

    • Lift battery out at an angle. Repeat with second battery.

  3. Oregon Scientific RM318PA Focus Knob Replacement, Projection Arm: step 3, image 1 of 3 Oregon Scientific RM318PA Focus Knob Replacement, Projection Arm: step 3, image 2 of 3 Oregon Scientific RM318PA Focus Knob Replacement, Projection Arm: step 3, image 3 of 3
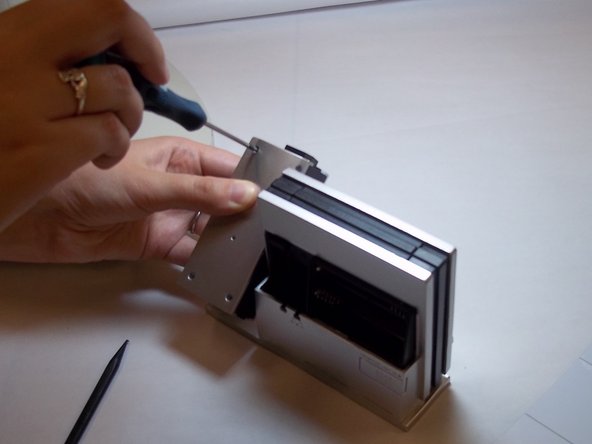
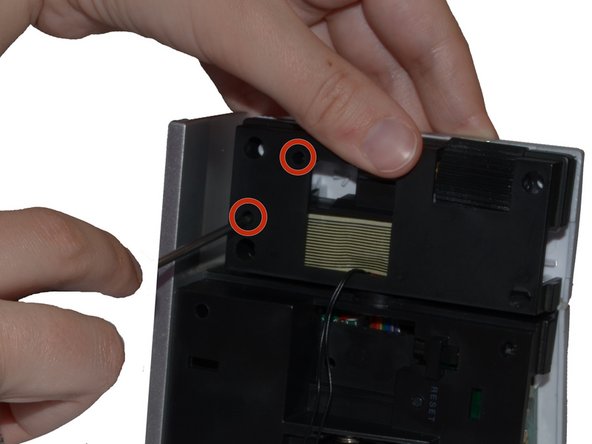
    • Use a Phillips #00 Screwdriver to remove the four (4) screws from the back of the projection arm.

    • Once screws are removed, lift the back up and off of the projection arm.

  4. Oregon Scientific RM318PA Focus Knob Replacement: step 4, image 1 of 2 Oregon Scientific RM318PA Focus Knob Replacement: step 4, image 2 of 2
    • Use a Phillips #00 Screwdriver to remove two (2) screws from back of projection arm.

  5. Oregon Scientific RM318PA Focus Knob Replacement: step 5, image 1 of 2 Oregon Scientific RM318PA Focus Knob Replacement: step 5, image 2 of 2
    • Use a plastic opening tool to pry apart the front of the projection arm casing. Start at the top of the projection arm.

    • Once top is partially open, use a spudger to pry at the side of the projection arm.

  6. Oregon Scientific RM318PA Focus Knob Replacement, Focus Knob: step 6, image 1 of 3 Oregon Scientific RM318PA Focus Knob Replacement, Focus Knob: step 6, image 2 of 3 Oregon Scientific RM318PA Focus Knob Replacement, Focus Knob: step 6, image 3 of 3
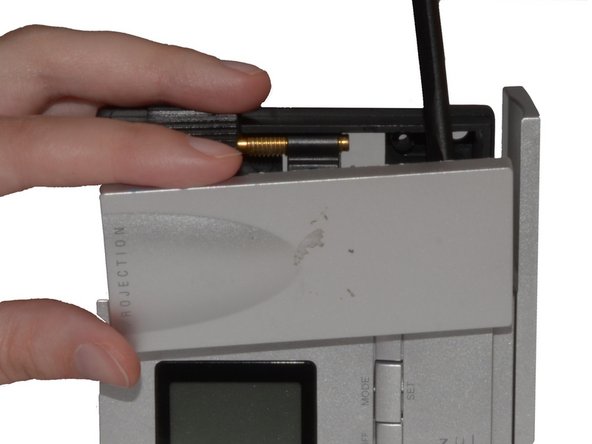
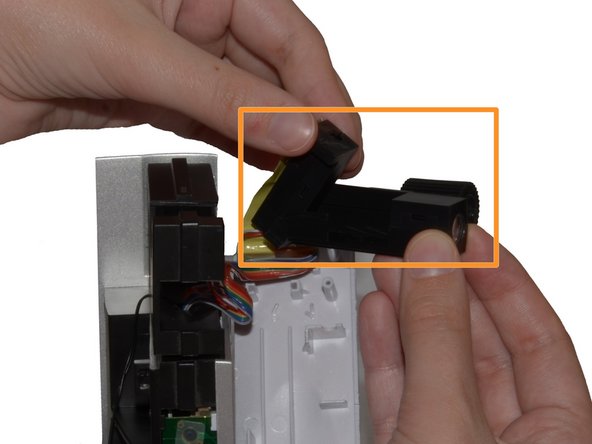
    • Turn the clock on its side. Slide the Focus Knob forward with your thumb.

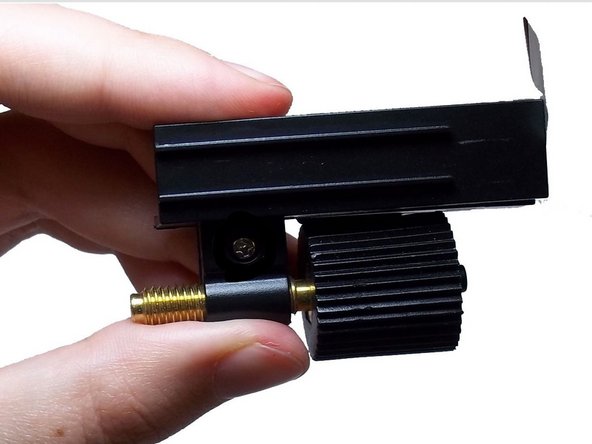
    • The Focus Knob Component should now be free of Projection Arm.

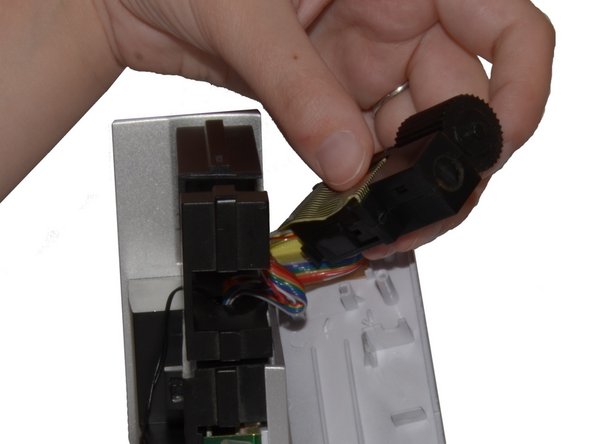
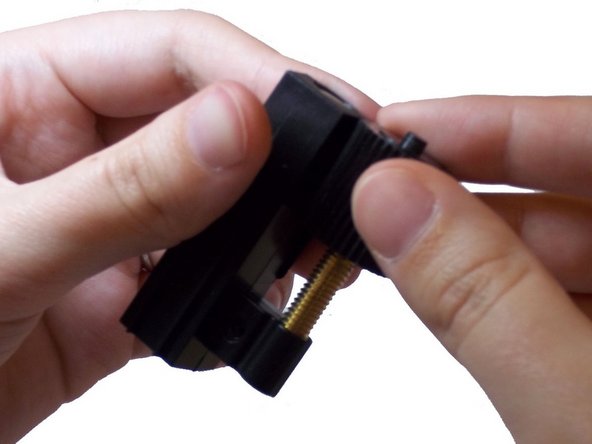
    • Hold the Component in one hand and lift the Projection Beam up and away from the Focus Knob.

  7. Oregon Scientific RM318PA Focus Knob Replacement: step 7, image 1 of 3 Oregon Scientific RM318PA Focus Knob Replacement: step 7, image 2 of 3 Oregon Scientific RM318PA Focus Knob Replacement: step 7, image 3 of 3
    • Loosen Focus Knob by turning the Focus Knob counterclockwise with your fingers.

    • If needed, add a SMALL amount of WD-40 to the base of the knob and continue turning Focus Knob.

    • Place replacement Focus Knob in socket and turn clockwise to secure.

Conclusion

To reassemble your device, follow these instructions in reverse order.

0 Comments

Add Comment

View Statistics:

Past 24 Hours: 0

Past 7 Days: 3

Past 30 Days: 15

All Time: 843