
Orbo Jr. Battery Replacement

What you need

  1. Orbo Jr. Battery Replacement, Battery: step 1, image 1 of 1
    • Use your thumbs to gently pry the silicon case away from the tablet starting at one of the corners. Once the first corner is separated the other three corners should slip off easily.

  2. Orbo Jr. Battery Replacement: step 2, image 1 of 3 Orbo Jr. Battery Replacement: step 2, image 2 of 3 Orbo Jr. Battery Replacement: step 2, image 3 of 3
    • Use the plastic opening tool to pry the back off the tablet. Work your way around the edges. Once you have one side open you can slowly unsnap the rest of the case and use the tool as needed.

    • Go slowly when you pry the back off to ensure you do not crack the case or damage the screen.

  3. Orbo Jr. Battery Replacement: step 3, image 1 of 1
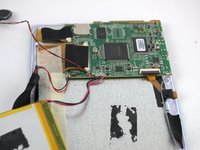
    • Gently pull the cables attached to the speaker to remove it from the back cover.

    • The speaker is taped in the back cover and caution should be used when pulling on the wires.

  4. Orbo Jr. Battery Replacement: step 4, image 1 of 1
    • Pull back the tape to expose the wires that are attached to the battery.

  5. Orbo Jr. Battery Replacement: step 5, image 1 of 2 Orbo Jr. Battery Replacement: step 5, image 2 of 2
    • Do not attempt to fully remove the battery. It is still connected to the motherboard by two wires.

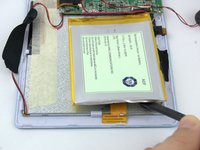
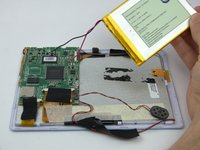
    • Use a nylon spudger to lift the battery from the right side of the device. Slowly remove the adhesive below the battery.

    • To avoid damage to device and battery, do not attempt to remove the battery until adhesive is completely detached.

  6. Orbo Jr. Battery Replacement: step 6, image 1 of 3 Orbo Jr. Battery Replacement: step 6, image 2 of 3 Orbo Jr. Battery Replacement: step 6, image 3 of 3
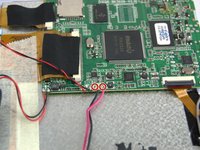
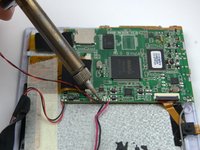
    • Desolder the battery wires from the positive and negative connection to the motherboard. Check out iFixit's How to Solder and Desolder Connections guide for soldering help.

    • Positive and Negative battery terminals.

    • Be careful to not make contact to other components on the motherboard while using the soldering iron.

Conclusion

To reassemble your device, follow these instructions in reverse order.

Ryan Christman

Member since: 02/10/16

684 Reputation

5 Guides authored

Team

USF Tampa, Team 3-1, Sullivan Spring 2016 Member of USF Tampa, Team 3-1, Sullivan Spring 2016

USFT-SULLIVAN-S16S3G1

4 Members

10 Guides authored

0 Comments

Add Comment

View Statistics:

Past 24 Hours: 0

Past 7 Days: 1

Past 30 Days: 3

All Time: 377