Introduction
I couldn't find a good guide on how to disassembly the H180X after I got the "fan fail" error, except for a few photos online. When I therefor took it apart myself, I created this small guide for others to use. Hope it helps!
A note on "fan fail":
When you get this error, the projector will turn off automatically just after showing a brief message about this.
The indicator lamp on the projector (beside the power button) will now start to blink 0,5 seconds OFF and 2 seconds RED, indicating "fan fail".
A repair usually costs a lot of money, but "fan fail" usually means that the second small fan is to dirty to do its job properly. In this guide you will see how to clean this fan.
However, "fan fail" CAN also mean that the fan needs to be replaced. If so, you can find similar fans on eBay pretty cheap. Continuing from this guide with removing the top circuit board will expose that fan, and makes it possible to replace it.
What you need
-
-
Begin with unscrewing the two screws that hold the lamp cover.
-
NOTE: One of these are hidden below a "read the manual"-label. You might want to do this!
-
NOTE: If you still have guarantee on your projector - DO NOT follow this guide! Contact the company where your purchased the projector instead!
 Ask FixBot
-
-
-
After removing the cover, unscrew the two black screws (circled).
-
Pull the metal tab (1 in the picture) and pull the lamp UP.
-
NOTE: The plastic lid at 2 in the picture might get stuck. BE CAREFUL! You can help with a screwdriver here, very carefully.
-
-
-
-
Turn the projector over. Then unscrew the two screws on each side of the back of the projector (circled).
-
-
-
Now comes the hard part!
-
CAREFULLY pry open the lid and remove it from the projector. At each of the YELLOW arrows is a small plastic clip. You will need to "pull" the plastic cover "outwards" and UP at each of these yellow arrows/the tabs, to be able to remove the cover.
-
Start with the BACKSIDE first, and then each side. Be very careful or you might damage the projector. Doing it with a screwdriver will most certainly chip the plastic a little. If you're fine with that, then pry on! :)
-
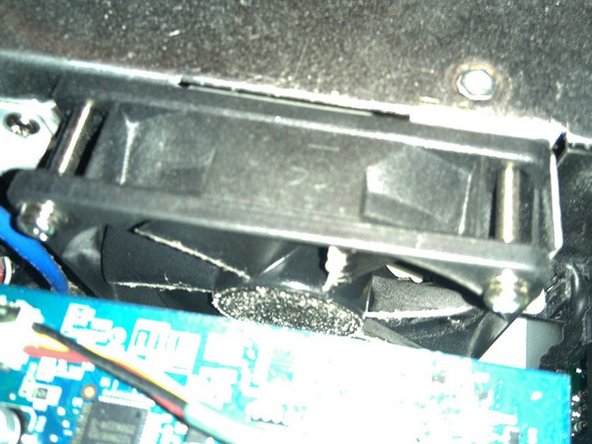
You can now also see the fans. 1 is the large fan beside the lamp (see below) and 2 is the small fan that usually is the reason for the "fan fail" error.
-
-
-
This is what the plastic clips look like, close up. This is the BACKSIDE clip. The backside clip is the only one that is a "single" clip. All the others are "double" (see next picture).
-
-
-
This is what the clips look like on the left side (but also on the right side and front side).
-
You can see the obvious "chippings" after my screwdriver. :)
-
-
-
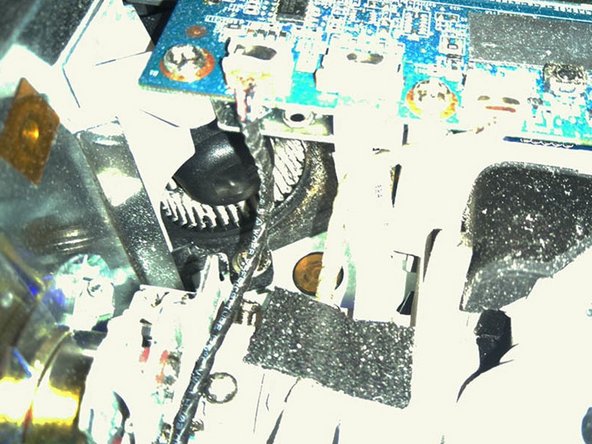
If you have the "fan fail" problem, then this fan (which can be seen from above/front) is the one that you will need to clean.
-
I cleaned this with compressed air (using a small compressor unit). This might NOT be the optimal way to clean it, but it did work. :)
-
You might be able to clean it manually by removing the top circuit board - however, cleaning it with compressed air means that you do not need to remove any further parts.
-
-
-
This is the second fan that might need to be cleaned as well. You can clean this fan by just removing the lamp - and not having to remove the top plastic from the projector.
-


To reassemble your device, follow these instructions in reverse order.
Cancel: I did not complete this guide.
7 other people completed this guide.
2 Guide Comments
I have a different projector model, but the steps were comparable and helped greatly. Unfortunately I do not know the model name, but is has a more curved front and is a Full HD DLP projector if that helps anyonnle else in future.
Thank you. Do you know what model number/type of fan we can replace that one with, if we need to? Did you get any pictures of the fan info? Thanks again for the tutorial.
(I usually unplug the power to mine, push the power button to discharge any residual power, plug back in, and turn on. It works... but I'd like a more permanent fix.)