Free Shipping on Domestic Orders $75+

Opening the Olympus E-PL1 Case

Prerequisite Only
This is a prerequisite-only guide! This guide is part of another procedure and isn’t meant to be used alone.

What you need

    1. Opening the Olympus E-PL1 Case, Opening The Case: step 1, image 1 of 1
      • Push the gray tab down, using a spudger if necessary, and the battery will come out.

      • Failure to remove the battery prior to disassembly can result in harm.

      Ask FixBot

      Add Comment

    2. Opening the Olympus E-PL1 Case: step 2, image 1 of 3 Opening the Olympus E-PL1 Case: step 2, image 2 of 3 Opening the Olympus E-PL1 Case: step 2, image 3 of 3
      • There are a total of six screws that must be removed using the the #000 Philips screwdriver.

      • As per picture one: there is one 4.9 mm Philips head screw on the left side of the camera.

      • As per picture two: on the bottom of the camera, there are three 3.4 mm Philips head screws; these are located on the darker area of the case.

      • As per picture three: there are two 5.3 mm Philips head screws on the right side, one is beneath the USB cover.

      Ask FixBot

      Add Comment

    3. Opening the Olympus E-PL1 Case: step 3, image 1 of 1
      • Open the case by peeling off the back panel.

      • Pull the case apart gently so that the ribbon connector will not tear.

      Ask FixBot

      Add Comment

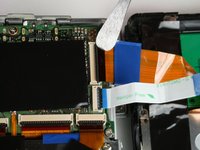
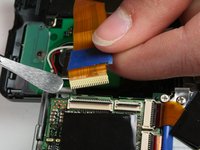
    4. Opening the Olympus E-PL1 Case: step 4, image 1 of 2 Opening the Olympus E-PL1 Case: step 4, image 2 of 2
      • Disconnect the two ribbon cables as shown in picture one.

      • Avoid using metal pry tools, as shown in the photo, on internal electronic components, as it can cause a short and damage the device. Use an ESD-safe tool such as a standard nylon spudger.

      • To disconnect a ribbon cable, use a spudger to lift the black tab then pull the ribbon out. This works the same for all ribbon cables.

      Ask FixBot

      Add Comment

    5. Opening the Olympus E-PL1 Case: step 5, image 1 of 1
      • The back panel has now been removed.

      Ask FixBot

      Add Comment

Conclusion

To reassemble your device, follow these instructions in reverse order.

Cancel: I did not complete this guide.

Jeffery Smith

Member since: 03/11/15

831 Reputation

6 Guides authored

Team

0 Guide Comments

Add Comment

View Statistics:

Past 24 Hours: 0

Past 7 Days: 2

Past 30 Days: 9

All Time: 296