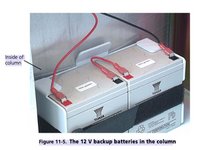
Opening the Column in the Hamilton Galileo

What you need

  1. Opening the Column in the Hamilton Galileo, Opening the Column in the Hamilton Galileo: step 1, image 1 of 1
    • Use a grounding cable and wrist band connected to the GALILEO or other work surface when you are working on the GALILEO.

    • Remove from GALILEO: External mains power supply, Air and oxygen supplies, Patient breathing circuit (for convenience only), Flow Sensor tubes (for convenience only).

  2. Opening the Column in the Hamilton Galileo: step 3, image 1 of 1
    • Loosen the rear panel of the column by removing the six hexagonal-drive (Allen) screws that hold it in place.

  3. Opening the Column in the Hamilton Galileo: step 4, image 1 of 2 Opening the Column in the Hamilton Galileo: step 4, image 2 of 2
    • Without removing any electrical connections, open the left side of the column as wide as practical.

    • This exposes: GALILEO’s internal power supply, The battery fuse, The diagnostic LEDs on the power supply’s main circuit board, and the back up batteries.

    • Make sure no electrical connections are touching the column.

    • Make sure all green/brown grounding (earthing) cables are securely in place.

Conclusion

To reassemble your device, follow these instructions in reverse order.

Ian Van Sciver

Member since: 04/09/20

332 Reputation

2 Guides authored

Team

Cal Poly, Team S7-G26, Paton Spring 2020 Member of Cal Poly, Team S7-G26, Paton Spring 2020

CPSU-PATON-S20S7G26

3 Members

4 Guides authored

0 Comments

Add Comment

View Statistics:

Past 24 Hours: 0

Past 7 Days: 0

Past 30 Days: 1

All Time: 114