Introduction
If your OnePlus 6 isn't charging when plugged into a charging cable, the charging port may be broken and will need to be replaced. The charger port transmits power to the battery and without a reliable charger port, the phone will not have any power to run.
Always test the phone using cables that you know work to ensure that the charging cable itself isn’t the issue. Also, consider that the battery may be faulty. Poor charging can be caused by many things so be sure to check out the OnePlus 6 Troubleshooting page before completing this replacement guide.
The first step in this guide requires the removal of the back panel of the phone, which is usually made of glass so be careful not to shatter it.
Before completing this guide make sure that the phone is powered off and that there are no power sources connected to it.
What you need
-
-
Turn on the heat gun to a low heat and and gently heat the curved edges on the back of the phone.
-
Wedge the opening picks between the front and back panel and slide them around the perimeter to break the adhesive securing the back cover.
-
Repeat until the back panel is fully released.
 Ask FixBot
-
-
-
Gently lift up the back panel, with care not to damage the fingerprint sensor ribbon cable.
-
-
Tool used on this step:Tweezers$4.99
-
Use a pair of tweezers to gently pull up on the red tab and disconnect the cable from the device.
-
Completely remove the back panel from the device.
-
-
-
-
Grip the green tab connected to the battery and pull the battery directly up and out.
-
-
-
Using the Phillips #00 screwdriver, remove the eight 3 mm screws from the lower frame.
-
Gently lift the lower panel up and out of the device.
-
-
-
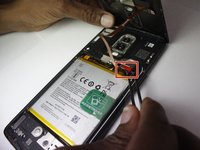
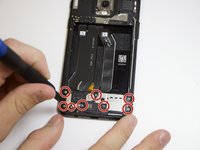
Using a Phillips #00 screwdriver, remove the two 2.3 mm screws with the screwdriver located on the two ends of the charging port.
-
-
Tool used on this step:Tweezers$4.99
-
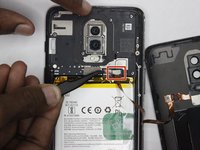
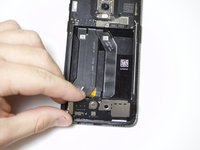
Gently disconnect the four connectors surrounding the charging port using a pair of tweezers.
-
-
-
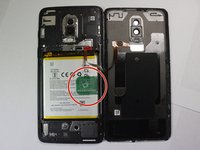
Pull the rubber strip up with your finger located just inside of the battery housing.
-
-
-
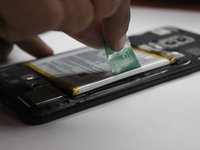
Using the tweezers, grab the charging port ribbon cable and pull it towards the top of the phone.
-
Gently remove the charging port and its cable from the device.
-


To reassemble your device, follow these instructions in reverse order.
Cancel: I did not complete this guide.
6 other people completed this guide.
Team

Clemson, Team 4-3, Hunter Fall 2021 Member of Clemson, Team 4-3, Hunter Fall 2021
CLEM-HUNTER-F21S4G3
5 Members
14 Guides authored
1 Guide Comment
Helpful guide! However, there are some steps missing. Between step 7 and 9, the daughter board needs to be lifted up to make room to remove the charging port. It doesn't have to be fully removed, and it is held in place with some adhesive. Also, the charging port connects to the main-board, and that is held down by a plastic shield. Some screws will need to be removed. Once the plastic shield is removed, the charging port can be unplugged from the main-board and fully removed.